Sales and Marketing
Tools useful for marketing and sales
-
NextAgency enables you to reach your clients with email campaigns. This article explains how to use our email campaigns with your agency’s CRM data to target your clients, improve customer retention, drive sales, and achieve effective marketing results.
Introduction to Setting Up Email Campaigns with NextMail Integration
- In the navigation pane, click Fast Access >Email Campaigns.
- At the top of the Email Campaigns page, you can view some Quick Statistics about your previous email campaigns, such as the number of sent emails, spam emails, and bounces both for all the time and today.
Linking Your Email to Email Campaigns
- To link an email account, below the Quick Statistics section on the right, click Manage Emails.
- The Campaign Emails page opens. In the upper-right corner of the page, click New.
- In the Add Email popup that opens, enter your email account, and then click Add.
- You will receive a verification email to the address that you have just entered. Go to that email’s inbox, open the verification email, and then verify your address. Note: If you do not see the verification email, please check your Spam or Trash folders.
Creating Your Email Campaign
- Having set up and verified your email, you can add a new email campaign. Below the Quick Statistics section on the right, click Add Email Campaign.
- It is now a three-step process to edit, manage, and schedule your campaign. First, choose a name for your email campaign, describe it, and then click Continue.
Customizing and Editing Your Email’s Details
- Second, set up your email message. Specify the sender and the recipient in the From and To fields, accordingly. Note: For email recipients, you can choose either a Primary Contact, Administrator Contact, or Lead.
Personalizing Your Email
- Now enter the email subject. In the body of the email, we have integrated some simple Receiver Fields so that you can make your emails seem more personalized and unique. For example, you can add such personalized fields as First Name, Last Name, Broker of Record, and more. Having entered the email’s text body and edited it to best reflect your agency, click Continue.
Sending Your Email with Time-Driven Precision
- The last step of setting up your campaign is scheduling. On this page, you will be able to schedule your email to be sent at a specific time.
Customizing Your Email Campaign for Optimal Results
- Finally, filter your campaign so that it will reach only the specific cases or clients. We have built robust filtering tools so you can make decisions and send emails to your clients at a granular level. You can filter by client name, date of birth, renewal date, specific product type, and more.
Reviewing Your Campaign
- Having set up all of your filters, in the upper-right corner of the Filters pane, click Calculate Case Count to see how many cases will be affected/emails will be sent out.
Finalizing Your Campaign
- Now, scroll to the very bottom of the screen and click either Publish Live or Save as Draft. If you decide to save your campaign as a draft, you can easily come back to the Email Campaigns page, click the Actions button next to the draft campaign, and then select Set to Active.
Viewing Your Campaign’s Performance
At the top of the Email Campaigns page, you can view some quick statistics about your previous campaigns, such as the number of sent emails, spam emails, and bounces both for all the time and today.
-
On the Sales tab within a Case, you can view and edit related quotes, proposals, and enrollment kits. To quickly access the Sales page, find the Case record in the table and click Actions > Sales.
The Sales tab has three sub-tabs.
- Quotes
- Proposals
- Enrollment Kits
Quotes
The Quotes sub-tab contains all client-related quotes that you create for a carrier or general agency. The quotes are divided into Active, Drafts, and Archived.
Uploading Quotes
To upload a quote, сlick the Upload Quote button and fill in the following data in the window that appears:
- Select All: Select this checkbox to automatically fill in the Requested From field with all contacts from the carrier or general agency who are labeled as Quoting. Leave the checkbox blank to add the contacts manually.
- Desired Effective Date: Select the date on which the quote should become effective.
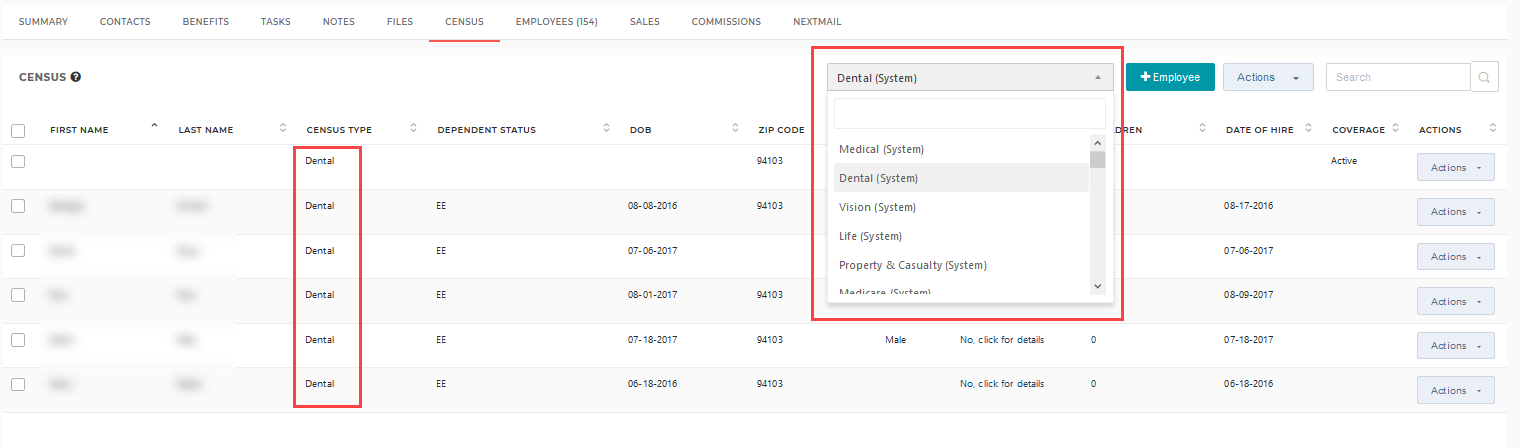
- Census Type: Choose one or several census types that are relevant to the quote.
- Sent On: Select the date on which the quote is going to be sent.
- Sent By: Select the employee who is going to send the quote.
- Status: Choose one of the available statuses for your quote:
- Draft: Place the quote record on the Drafts tab and send it later.
- Sent: Send the quote.
- Uploaded: Place the quote record on the Drafts tab and send it later.
- Proposed: Place the quote record on the Active tab with the Proposed status but not send it.
- Manage files: Click this link to attach files to your quote. NextAgency will take you to the Attach Files subtab of the Upload Quote window, where you can select the files to be attached.
When ready, return to the Quote Content sub-tab and click Upload.
Requesting Quotes
There are two ways to request a quote in NextAgency:
- Click the Request Quote button and fill in the form that appears.
- Request a quote from a draft by clicking Actions > Edit Draft and add the missing data in the form that appears.
The Request Quote form is similar to the Upload Quote form; however, now you cannot set up the sent date and change the status. Besides, you have to accompany the quote with a message.
When ready, click either Save Draft or Send. As a result, the status of the quote on the Active subtab will change to Sent.
Other Quote-Related Actions
It is also possible to do the following actions with the quotes:
- Add attachments: Add further attachments to the quote, quote draft, or archived quote.
- Add notes: Add an HTML formatted note to the quote, quote draft, or archived quote. After you add a note, you can edit it from the same Actions column.
- Archive: Archive the quotes and quote drafts and move them to the Archived tab.
- Convert to proposal: Convert the quotes and quote drafts to proposals and move them to the Drafts tab of the Proposals page.
- Unarchive: Remove the quote from the Archived tab back to the Drafts tab.
Proposals
The Proposals subpage contains all client-related proposals that you create for a carrier or general agency. The proposals are divided into Sent, Drafts, and Archived.
Adding Proposals
To add a proposal, сlick the Add Proposal button and fill in the following data in the window that appears:
- Sent To: Select the contacts to whom the proposal will be sent.
- Sent On: Select the date on which the proposal is going to be sent.
- Effective Date: Select the date on which the proposal should become effective.
- Sent By: Select the employee who is going to send the proposal.
- Quote Type: Select the type of the quote relevant to the proposal – Health, Dental, Vision, Life, or Other. It is also possible to select several quote types.
- Add files: Click this link to attach files to your proposal. NextAgency will take you to the Attach Files subtab of the Upload Quote window, where you can select the files to be attached. If the files have not been uploaded yet, NextAgency will suggest that you upload them.
When ready, return to the Proposal Content subtab and click Add.
Sending Proposals
There are two ways to send a proposal in NextAgency:
- Click the Send Proposal button and fill in the form that appears.
- Send a proposal from a draft by clicking Actions > Resume and add the missing data in the form that appears.
The Send Proposal form is similar to the Add Proposal form; however, now you cannot set up the sent date and change the status. Besides, you have to accompany the proposal with a message.
When ready, click either Save as Draft or Send. As a result, the proposal will be moved to the Sent subtab.
Other Proposal-Related Actions
It is also possible to do the following actions with the proposals:
- Add attachments: Add further attachments to the proposal.
- Add notes: Add an HTML formatted note to the proposal. After you add a note, you can edit it from the same Actions column.
- Archive: Archive the proposals and proposal drafts and move them to the Archived tab.
- Unarchive: Remove the proposal from the Archived tab back to the Drafts tab.
Enrollment Kits
On the Enrollment Kits subpage, you can create enrollment kits for employers and carriers. Click Create Enrollment Kit and fill in the following data:
- Select Plan/Carrier tab: Select a plan/carrier to add to the kit by clicking Add Plan/Carrier. This will open the Custom Carriers and Plans page where you can make a selection. When ready, click Select Carrier.
- For Employer tab: Fill in the form to send the enrollment kit to the employer. Specify the recipient, desired effective date, status, and edit the note, if necessary. Click Add files to attach the files to the kit, if necessary. When ready, click either Save Draft or Send Kit To Employer.
- For Carrier tab: Fill in the form to send the enrollment kit to the carrier. Specify the recipient, desired effective date, status, and edit the note, if necessary. Click Add files to attach the files to the kit, if necessary. When ready, click either Save Draft or Send Kit To Carrier.
You can also convert the enrollment kit to carrier by clicking Actions > Convert to Carrier. As a result, the kit will be moved to the Carrier tab.
It is also possible to archive the kit by clicking Actions > Archive. As a result, the kit will be moved to the Archived tab, from where you can also unarchive it.
-
This page contains demographic information about the client’s employees, such as age or marital status. This data is needed to estimate the health care costs and is used for quoting purposes only, without being linked to the client's actual HR system. You can view the records by selecting the census type from the drop-down list.
You can also add new employees to the census by clicking the Employee button next to the drop-down list.
The following actions are available for the census:
- Set Coverage: Set the coverage status for the census.
- Set Dependent Status: If a person in the list is a dependent, i.e. a spouse of a child of an employee, you can specify the exact status.
- Delete Selected: Remove the selected employee record together with dependents.
- Import: If you need to add a large amount of employee records, it would be more convenient to run a bulk import from an Excel file. You need to download the import template, fill it in, and then upload it to NextAgency.
- Export: Generate an Excel file with employee data from the census.
- Quote: Send a quote request for the case to a carrier or general agency.
Employees
This page contains a list of the client’s employee records. Here you can do the following:
- Add new employees or existing contacts
- Filter the employees by type, state, zip code, and date of hire
- Copy all or several employees to the census
- Run a bulk import of the employees
-
NextAgency enables you to quickly and easily create Mail Merge documents using Word. These can then be converted to other formats like PDFs.
To begin creating Mail Merge documents, please follow the below steps:
1. How to set up the Word document for Mail Merge:
Windows Users:
i) Open Microsoft Word on your computer.
ii) Click on "File" and select "New Document" to create a new Word document.
iii) Customize the document formatting according to your requirements.
For example, let's explore a sample format that includes a table. In this document, the first column contains basic information about a case record, while the second column represents dynamic data that will be generated using Mail Merge.
iv) Place your cursor in the field where you want the text to be generated.
v) In Word, click on "Insert" and choose "Quick Parts," then select "Field."
vi) A pop-up window will appear. Please select "MergeField" under Field Names and set the Format to "None."
vii) Enter the desired "Field Name." For instance, if you want to use the field "Primary Contact Email," input "Primary Contact Email" as the Field Name.viii) Click 'OK' to proceed. The field will be formatted as «Primary Contact Email» in the Word document.
ix) Repeat the same steps for all the fields you wish to fill.
x) Note that special formatting is required for custom fields in NextAgency. Add "Case-Custom" before the custom field name. For example, if you have a case custom field named "Referring Partner," write it as "Case-Custom Referring Partner" in Word.
Mac Users:i) Launch Microsoft Word on your computer.
ii) Navigate to the "File" from the menu bar and click "New Document" to initiate a fresh Word document.
iii) Customize the document formatting according to your requirements.
iv) To add the field's name, place your cursor in the field where you want the text to be generated. Click on the "Insert" tab and click on "Field". See attached screenshot.v) Locate "Mail Merge" in the 'Categories' column, and in the adjacent column named 'Field names', select "MergeField".
vi) In the "MergeField" box, enter the field name you desire, enclosing it in quotation marks and using the correct syntax for your specific field. Example: MERGEFIELD "Primary Contact Email". Finally, click "Ok" or press "Enter" and save your document.
vii) Note that special formatting is required for custom fields in NextAgency. Add "Case-Custom" before the custom field name. For example, if you have a case custom field named "Referring Partner," write it as "Case-Custom Referring Partner" in Word.After defining all the fields in your document, log in to NextAgency to seamlessly finalize the Mail Merge process.
2. To upload the created Word document into NextAgency, please follow these steps:
i) Log in to NextAgency, and go to Settings.
ii) Navigate to Sales Settings and select "Merge Template".
iii) Click on "Add Merge Template" and upload the Word file you created in the steps, above.iv) On the same page, you will find the 'Merge Template Field Guide' document that comprehensively lists all the supported fields within NextAgency.
3. How to create a Mail Merge document for a case record:
i) Once you have successfully uploaded the Word document, you are ready to generate Mail Merge documents. To initiate the process, please proceed to the Cases/Policies page. Select the desired case records you wish to use for the Mail Merge document (the filter can help you quickly identify the right records). Once you select the records, click on 'Bulk Actions' and choose 'Generate Mail Merge'.ii) NextAgency will notify you when your merged documents are ready. Click on the notification icon (the globe in the header on every NextAgency page).
iii) Depending on how many Word documents you are creating, this may take a few minutes. Click on the specific notification that your documents are successfully created. NextAgency will download your documents in a zip file. Extract the documents as you normally would.
Should you have any questions or require any assistance, our support team is readily available to help you. Feel free to contact them for any queries you may have by clicking on the green question mark in the header or by email us at Support@NextAgency.com.