NextAgency Agency Management System Logo
  • Products
    • NextAgency Product Overivew
    • NextCommission Product Overivew
    • Security
  • Components
    • Agency Management
    • CRM
    • Marketing & Communication
    • Commission Tracking
    • NextMarket
  • Onboarding
  • Compare
  • Pricing
    • NextAgency Pricing
    • NextCommission Solo – Pricing
  • FAQ
  • Login
Start Free Trial
Get Demo
  1. Take 44 / NextAgency
  2. Using NextAgency Articles
  3. Managing Cases

Managing Cases

Follow New articles New articles and comments
  • How to Merge Case Records
  • Cases and Associations
  • Using Filters
  • Managing Calls in NextAgency
  • How to convert an Employee and Dependent to an Individual case record.
  • NextAgency: Managing Product Types
  • NextAgency: Cases & Policies
  • NextAgency: Adding, Editing, and Deleting Cases
  • NextAgency: Customizing Stages/Pipelines
  • NextAgency: Benefits
  • NextAgency: How to Assign Benefits to Employees Within Your Group Cases

Managing Cases

Follow New articles New articles and comments

Prospect and client records, carrier information and more

  • Merging case records in NextAgency is straightforward, but it’s crucial to understand the process. Instead of replacing the original records, the system generates a new case and archives the two you merged, ensuring you have a copy of both.

    Follow these steps to merge cases:

    1. Open the first case record, then click on the three dots near the top of the page > Merge.

    2.  Select the second case record.

    3.  Enter a name for the new case record.

    4.  Choose the case tabs you’d like to merge (i.e. Contacts, Benefits, files, etc.) and click Save.


    Your new merged case will now be available with all the selected information included, while the original cases are securely archived.

    You can also initiate this via the Merge option in the action menu on the cases/policies page.


    Important: You can only merge two individual cases or two groups (small or large). Merging an individual case with a group is not supported. If you have any questions, please contact our support team.


  • Associations Section on the Summary Page

    The Summary page for all case records (Individuals, Dependents, and Employees) features an "Associations" section, which displays a comprehensive table of all related records. This provides a centralized and clear view of all connected case records.

    If a case has dependents already associated, they will appear in this table by default. You can identify such records by the ‘As Dependent’ column, which displays “Yes” for dependent relationships.


    Adding Associations

    An ‘Associate’ button is available within the Associations section, allowing you to manually add related case records, such as a partner, colleague, etc.

    Associating a case:

    • Click Associate to open the modal. Search for the case record and click 'Save'.


    • Use the Relationship field to specify how the associated record is related. Click the ‘-’ icon to add a custom relationship, enter the name, and confirm by clicking the checkmark.


    Association Behavior

    • Records added via the Associate modal are displayed in the Associations table, but not in the Dependents tab.
    • All associations are reciprocal, when two records are linked, both will show the association in their respective Associations sections, enabling seamless navigation between them.


      If you have any questions, please contact our support team.

       
  • The filters on the Cases/Policies page provide greater flexibility to refine your search. 


    You can filter by multiple categories like General, Details, Benefits, Leads, and custom fields for both Cases and Benefits.


    How it works

    • Include – It shows only items that match the selected criteria.

    • Exclude – It removes any items that match the selected criteria.

    Include:

    If you want to see all case records of a certain stage:

    1. Open the filter panel.

    2. Go to the Include tab.

    3. Choose the stage you want to Include (e.g., 'Active').

    4. You’ll now see all the cases that match the filters.

    Exclude:

    If you want to see all case records except those in a certain Stage:

    1. Open the filter panel.

    2. Go to the Exclude tab.

    3. Choose the stage you want to exclude (e.g., 'Processing').

    4. You’ll now see all other stages except the one selected.


    You can also combine both tabs. For example:

    • Include: Broker of Record: John Smith

    • Exclude: Stage: Closed – Lost

    This will show all cases where John Smith is the broker of record, but exclude those that are in the "Closed – Lost" stage.

    Saving filters

    When you save a filter, both Include and Exclude settings will be saved and applied when you use that saved filter.

    Please contact the support team if you have any questions.


  • In NextAgency, you have a dedicated Calls tab where you can log all your call recordings with clients. To add a new call recording, open any case record and navigate to the Calls tab. Click on 'New' to start logging the call details.

    You will be prompted to enter important information such as:

    • Talked With
    • Date/Time
    • Recording Link
    • Source
    • Topics
    • Phone Number
    • Email
    • Notes

    Once you’ve filled in all the required fields, click 'Save' to store the call log.


    Associate Benefits
    You can link calls to specific benefits within a case record if the call is related to a particular benefit. To associate, simply click on the Benefits tab then the 'Associate Benefits' option.


    Associate Notes/Tasks
    You can also associate the call log with Notes or Tasks. This is helpful when the call is related to completing a specific task or when you need to document a special note. To do so, click on the Notes/Tasks tab then on the 'Associate Notes/Tasks' button.


    Attach Files
    You can upload files related to the call in the designated "Files" tab. Simply click on "Attach Files" then 'Add Files' to upload any necessary documents.


    Please contact our support team if you have any questions.

  • In some situations, you may need to track an employee's or dependent's policies separately after they've been removed from a group case or individual case. This could happen for various reasons, such as employee termination or a dependent aging out of coverage. NextAgency simplifies removing employees and dependents from their primary case and converting them into individual case records.

    Removing an Employee from their group case record:

    To remove an employee from a group case record and create their individual case record, follow these steps:

    1. Navigate to the group case record and click on the 'Employees' tab.
    2. Locate the employee you want to remove, click the Actions button next to their name, and click on 'Remove Association' > 'Confirm'.


    If the employee has at least one associated group benefit, you must confirm whether to retain the benefits or not.


    That's it! The employee will now have their own individual case record.


    Removing a Dependent from their Primary Case Record:

    You can also remove dependents from their primary case record in just a few simple steps:

    1. Navigate to the primary case record (Employee or Individual cases) and click on the 'Dependents' tab.
    2. Locate the dependent you want to remove, click the Actions button next to their name, and click on 'Remove Association' > 'Confirm'.

    Once completed, the dependent will be converted into a separate individual case record.


    Adding an Individual Case Record as an Employee or Dependent:

    If needed, you can always add any individual case records as dependents or employees to any case. To do this:

    1. Click on New in the navigation menu.
    2. Select Add Individual Case.
    3. Search for the case record and click 'Save'.


    Please get in touch with our support team if you have any questions.


  • NextAgency gives you access to a product type library where you can associate product types with carriers as well as create and edit your own product types. To manage product types, follow these steps:

    1. In the upper-right corner of any NextAgency page, click your profile icon and choose Settings.
    2. On the Settings page that opens, go to the Carrier Settings tab.
    3. Go to the Product Types subtab.


    Here you can see a list of system product types and custom product types. You can edit only the custom product types, i.e. those that you created yourself. To create a new product type, click Add Product Type in the upper-right corner of the page. In the dialog that pops up, enter the name of the product type and click Save.


    To assign product types to carriers, follow these steps:

    1. In the menu bar, click Partners > Carriers.

    2. Within the Carrier's library, select Actions > Edit on the specific carrier record you intend to associate the product types with.


    3. Click on 'Manage Product Type'.


    1. In the dialog that pops up, select the relevant product type, e.g. Medical, and click Add.


    1. At the bottom of the carrier record page, click Publish Live to save the changes and make them visible to authorized brokers.


    After adding the Product Type to the Carrier, you'll find the newly added Product Type displayed on the left side. From this page, you can proceed to add Plans. Simply click on 'Add (Product Type name) Plan'.


    In the pop-up window, you can fill in all the necessary details beforehand and then finalize by selecting 'Save'.


  • To open a case record, click the name of the case in the table. Let’s take the client card as an example and explore all the available tabs.

    NextBroker_ClientProspectCard_01.png

    Summary

    This page contains an overview of the client’s contact details, custom fields that are relevant to the client's case, company snapshot, etc. Here you can also find important dates, such as the employer’s last login or next renewal date.


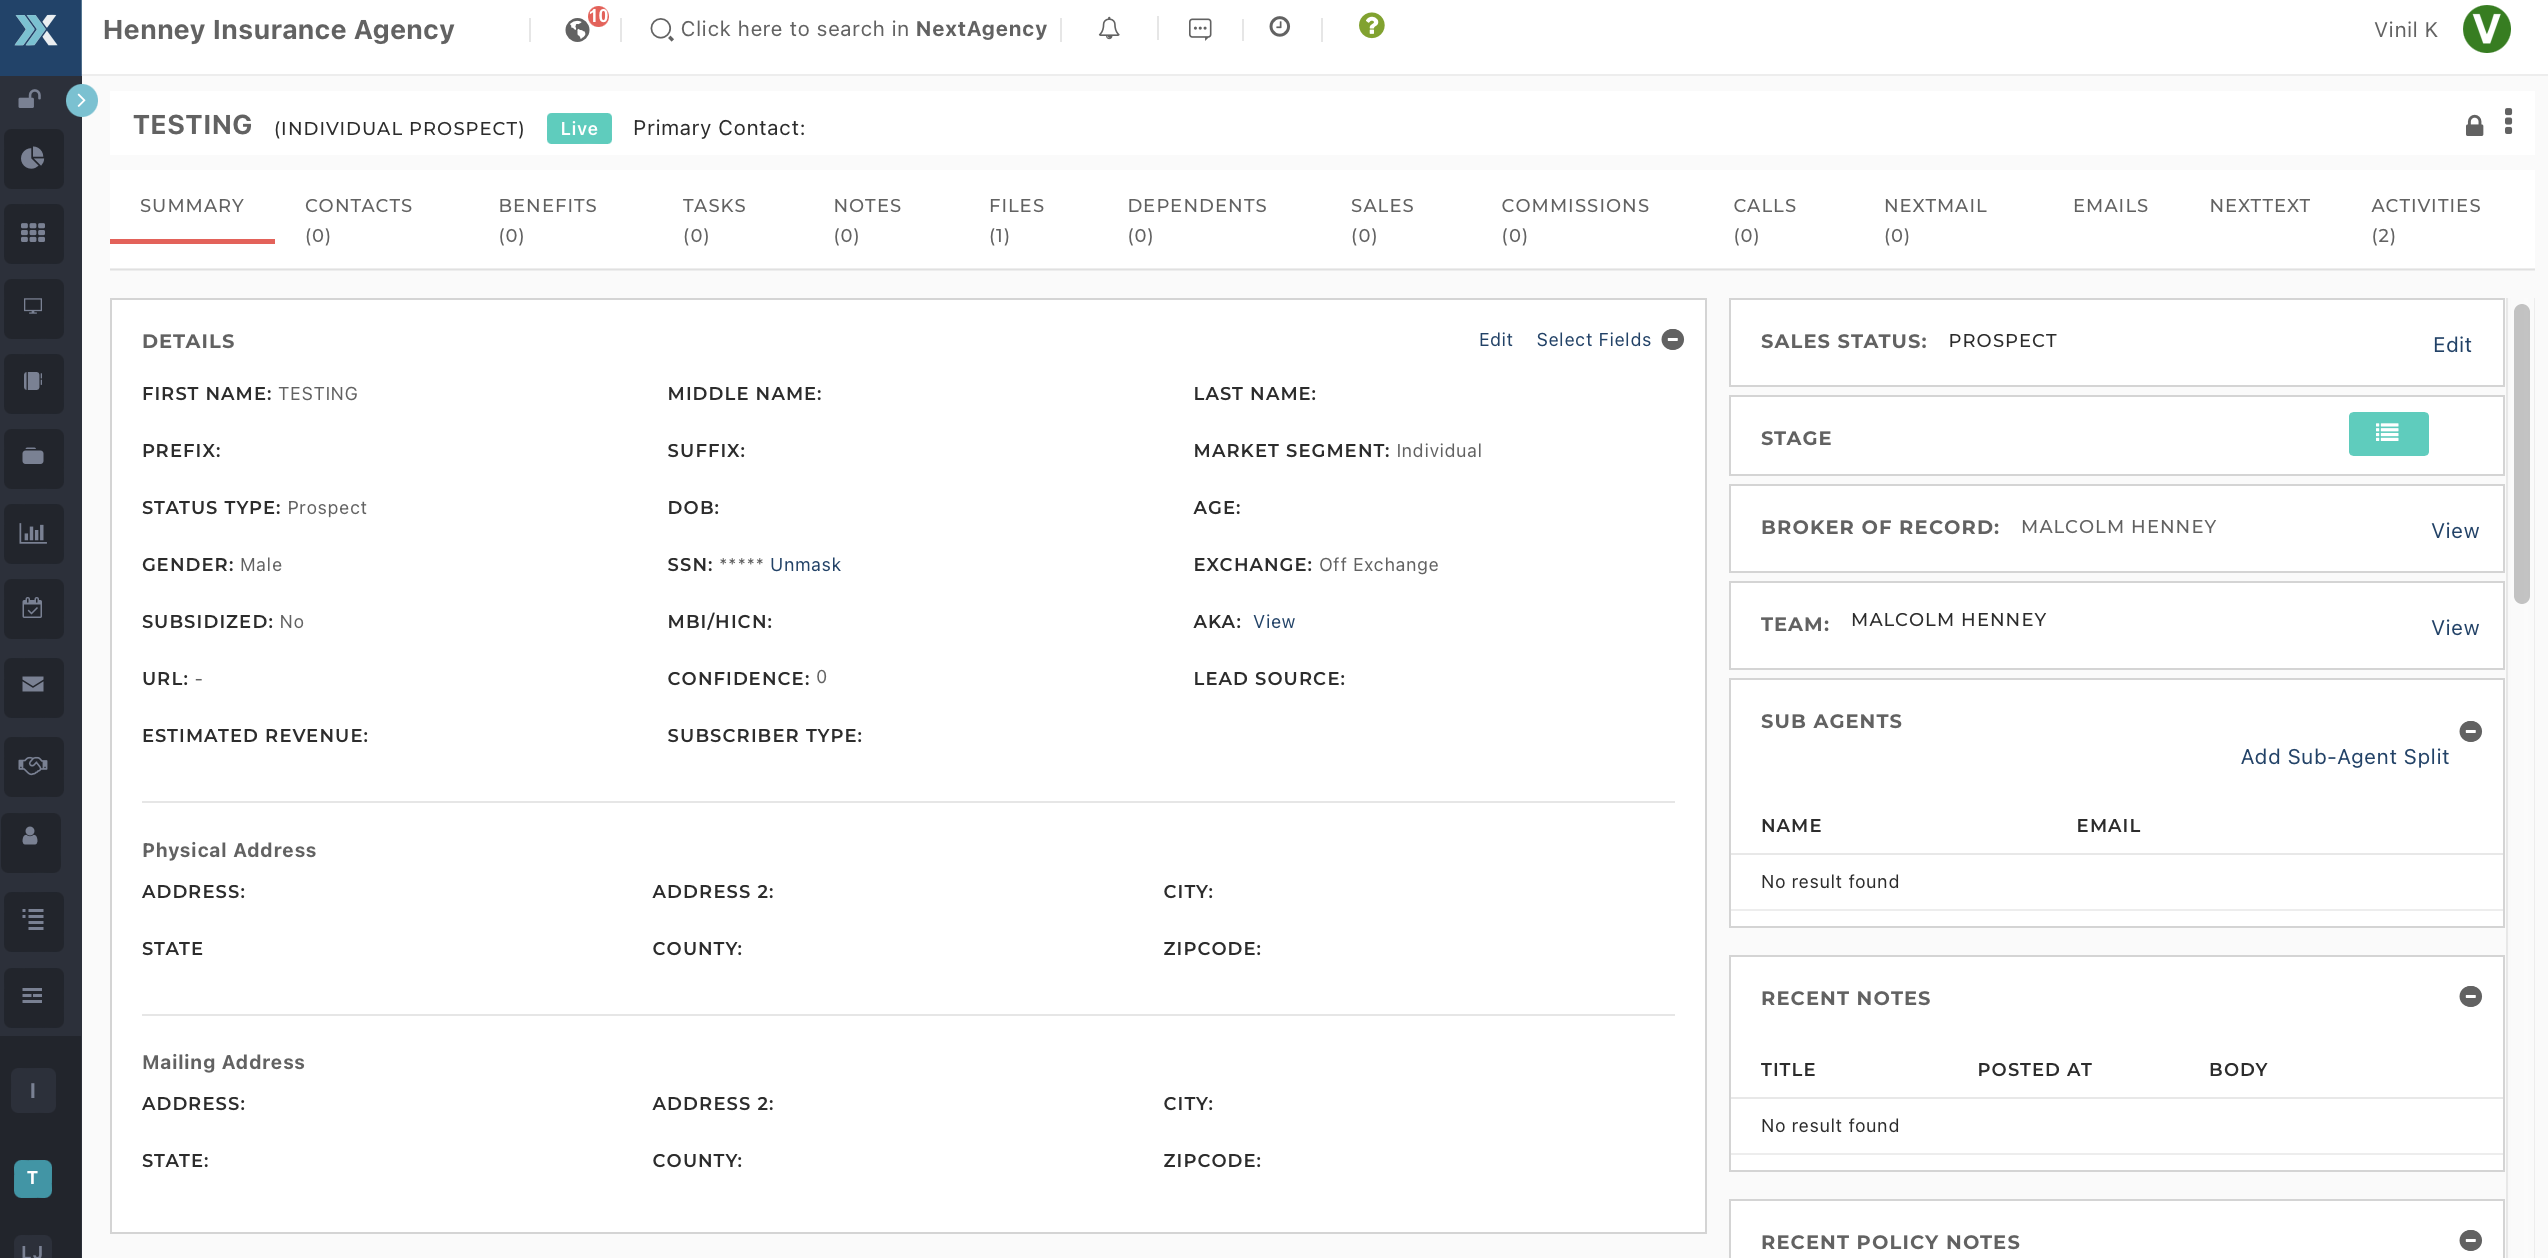
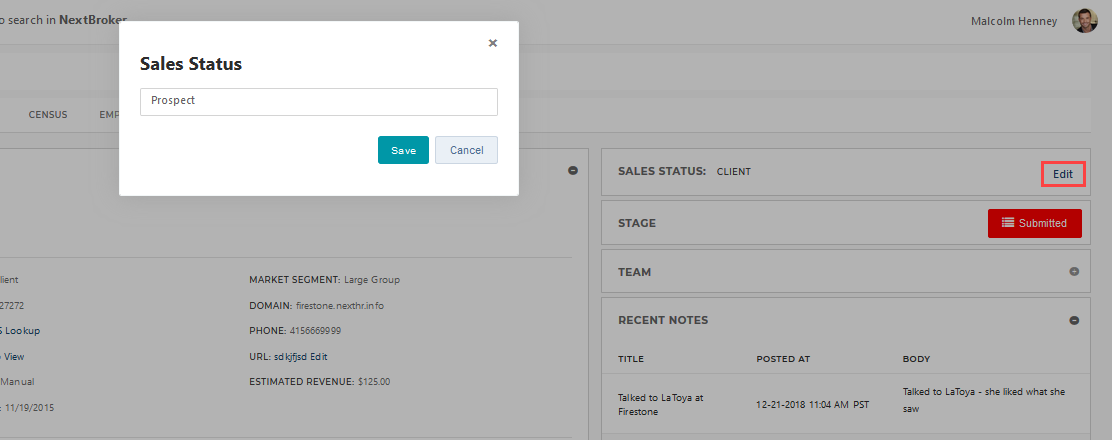
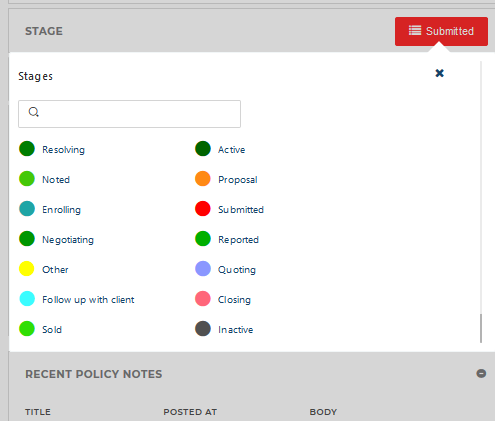
    In addition, on the Summary page, you can also convert the client to a prospect, change its status, and add team members.

    NextBroker_ClientProspectCard_03.png

    NextBroker_ClientProspectCard_04.png

    NextBroker_ClientProspectCard_05.png


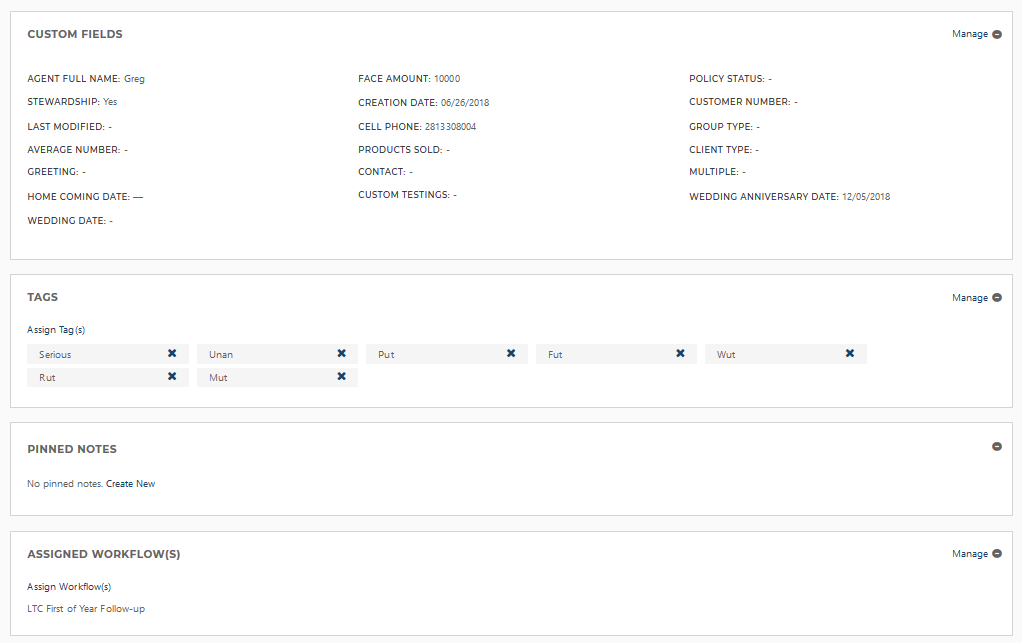
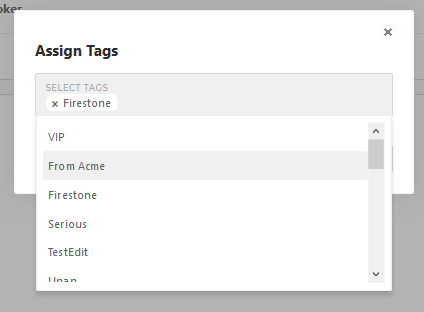
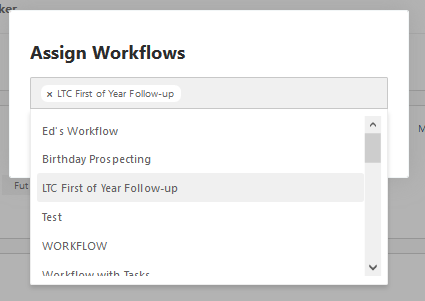
    Finally, you can view custom fields that are related to the case, assign tags and workflows to the case, view the company snapshot, view important case-related dates, and read recent case-related notes.
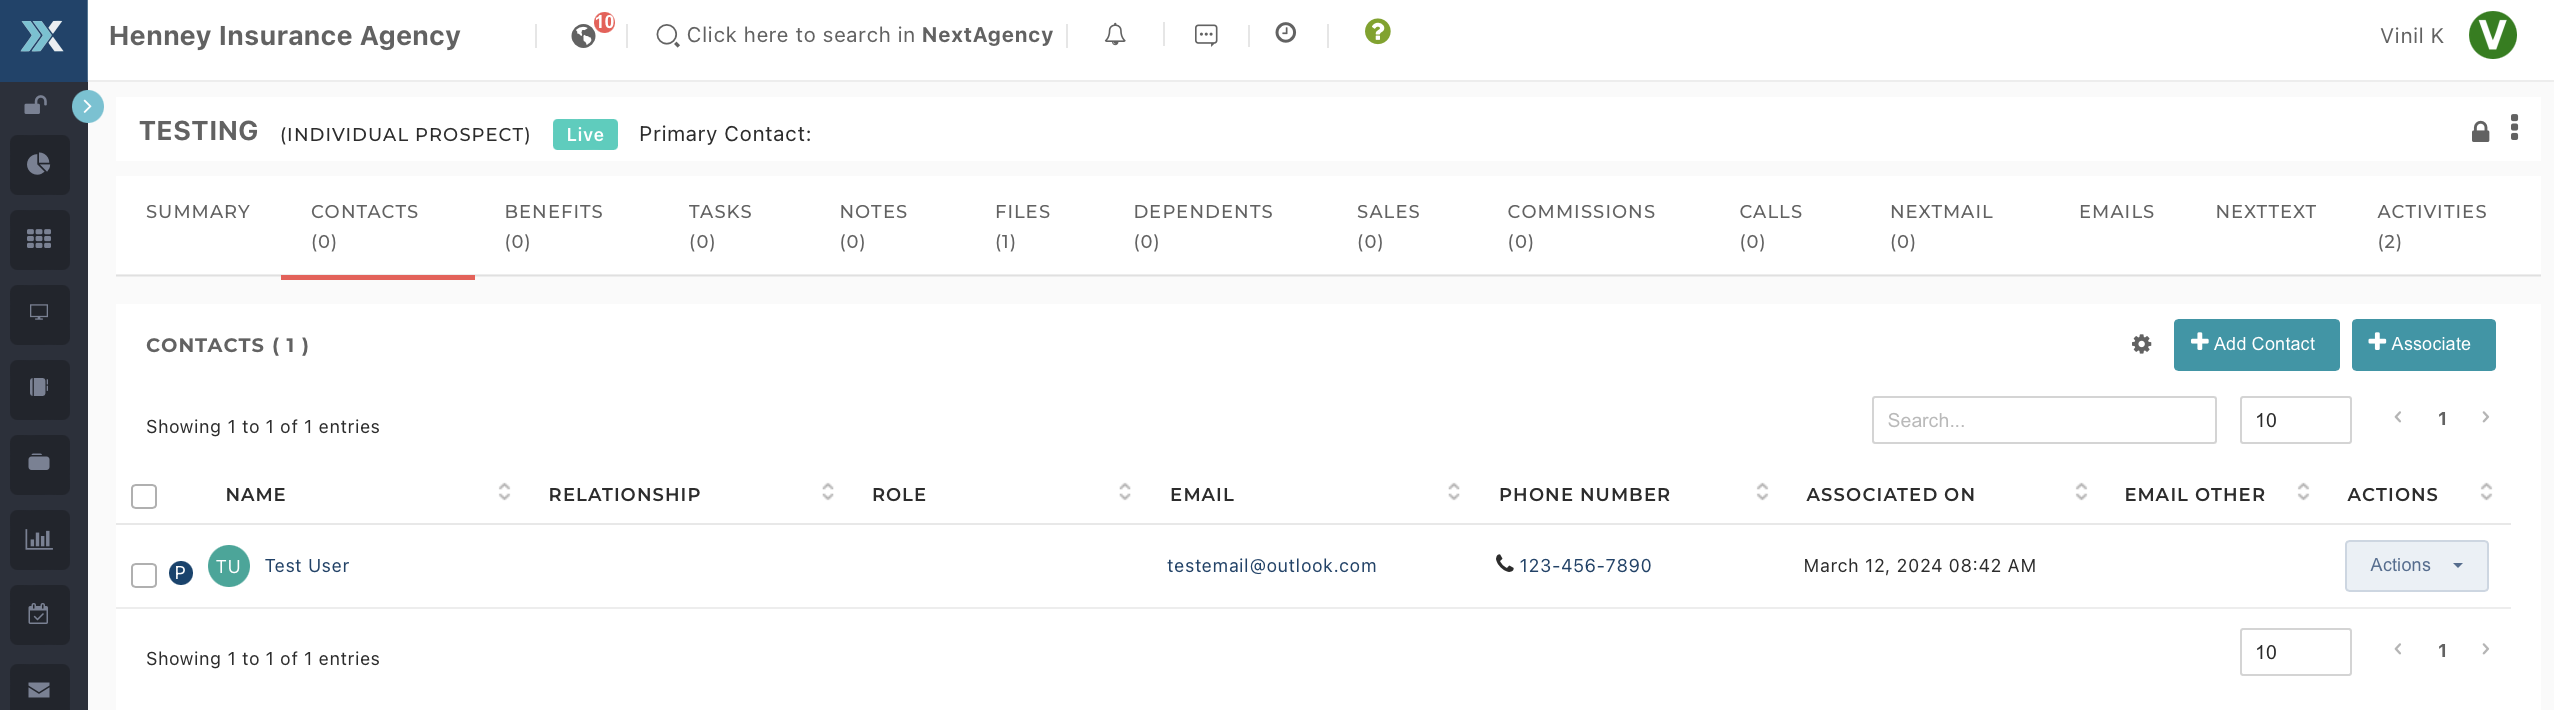
    NextBroker_ClientProspectCard_06.png

    NextBroker_ClientProspectCard_07.png

    NextBroker_ClientProspectCard_08.png


    Contacts

    This tab houses contact information about the owner/administrator of the client's business or Individual contact persons. You can choose to either add a new contact or link existing ones.


    Benefits

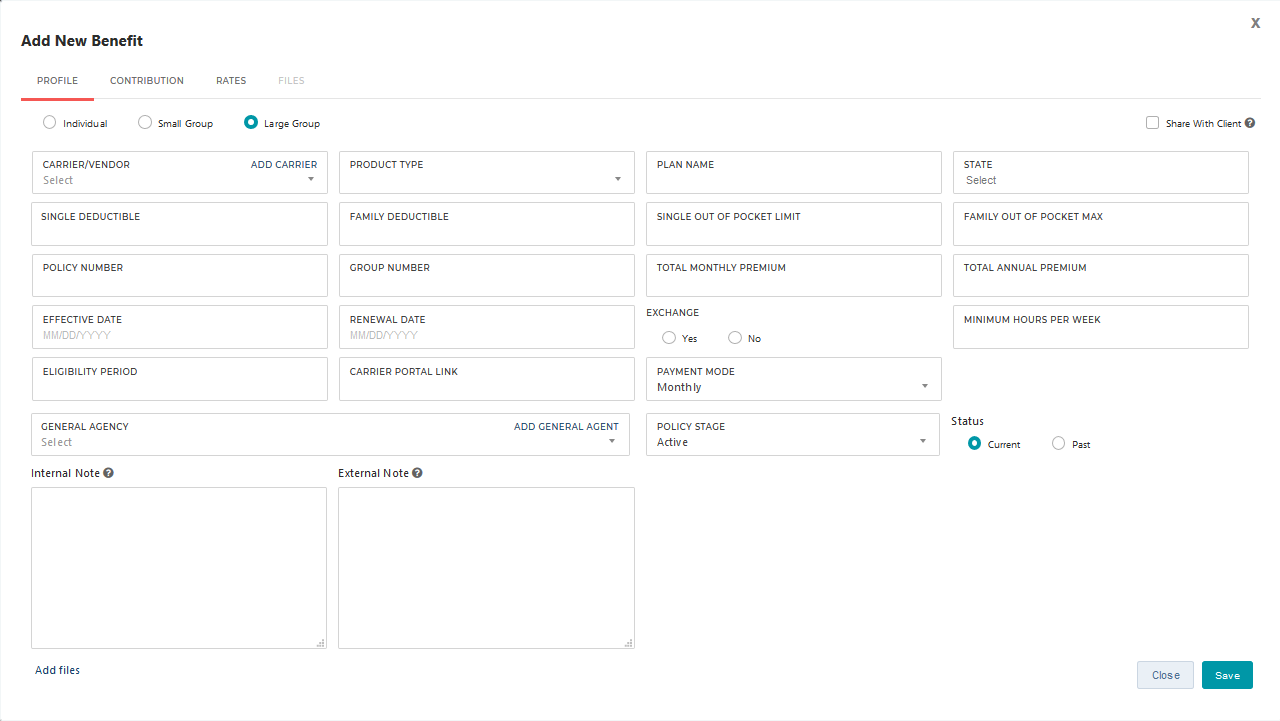
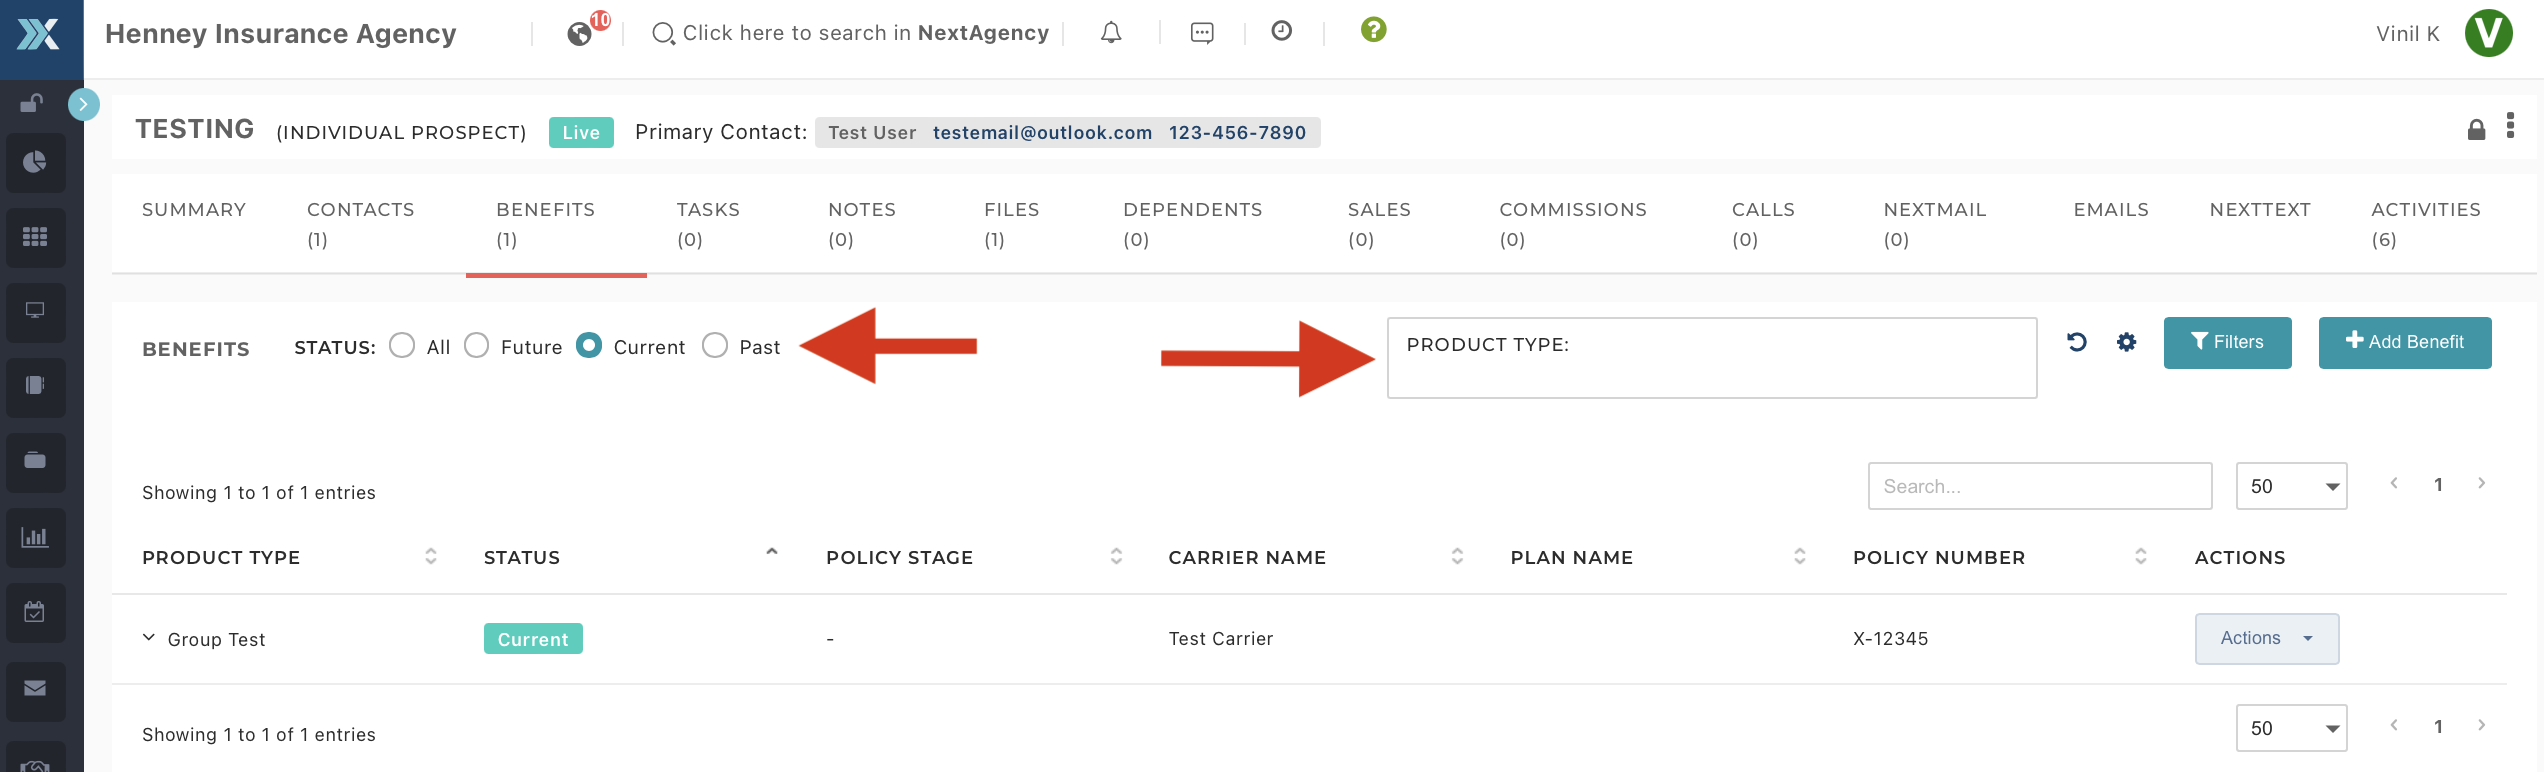
    On the Benefits tab, you can view and add insurance benefits relevant to the case record.


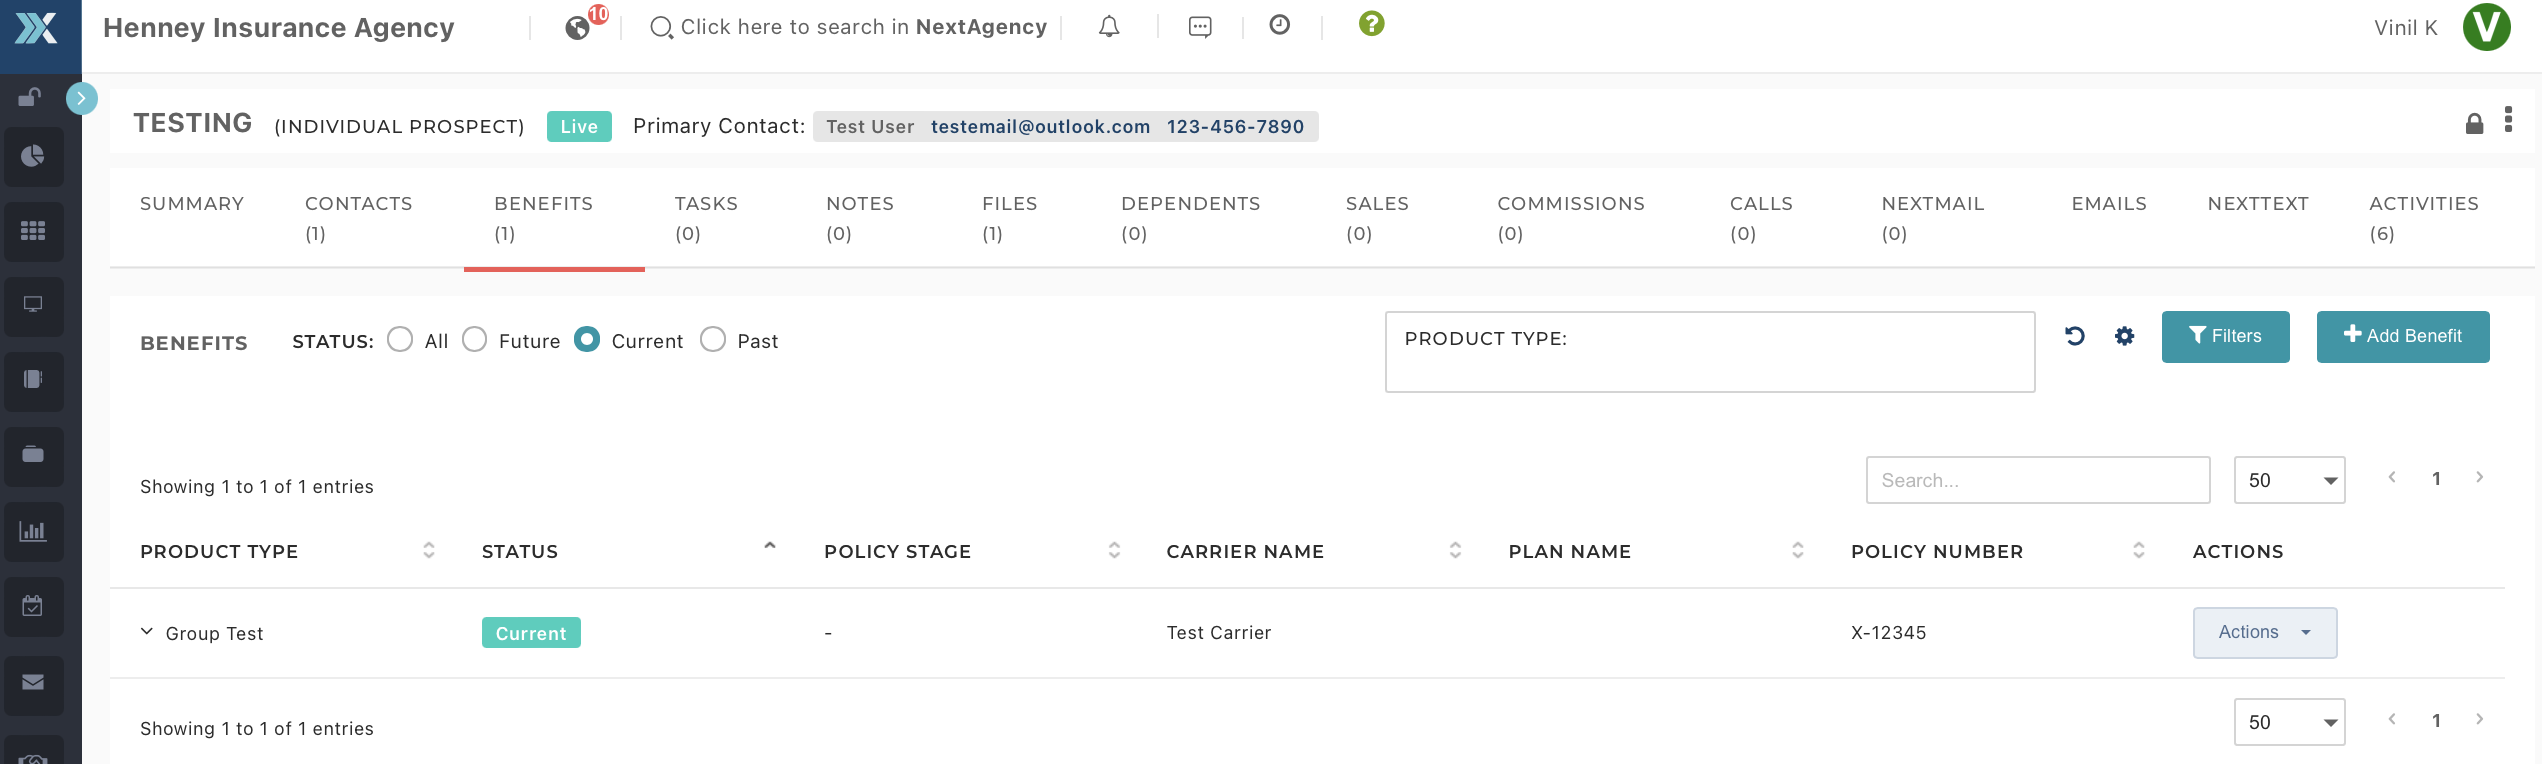
    To add a new Benefit, simply click on 'Add Benefit' and fill out all the details.

    NextBroker_ClientProspectCard_12.png


    You can also filter the benefits by product type as well as by the Current and Past parameters.


    Tasks

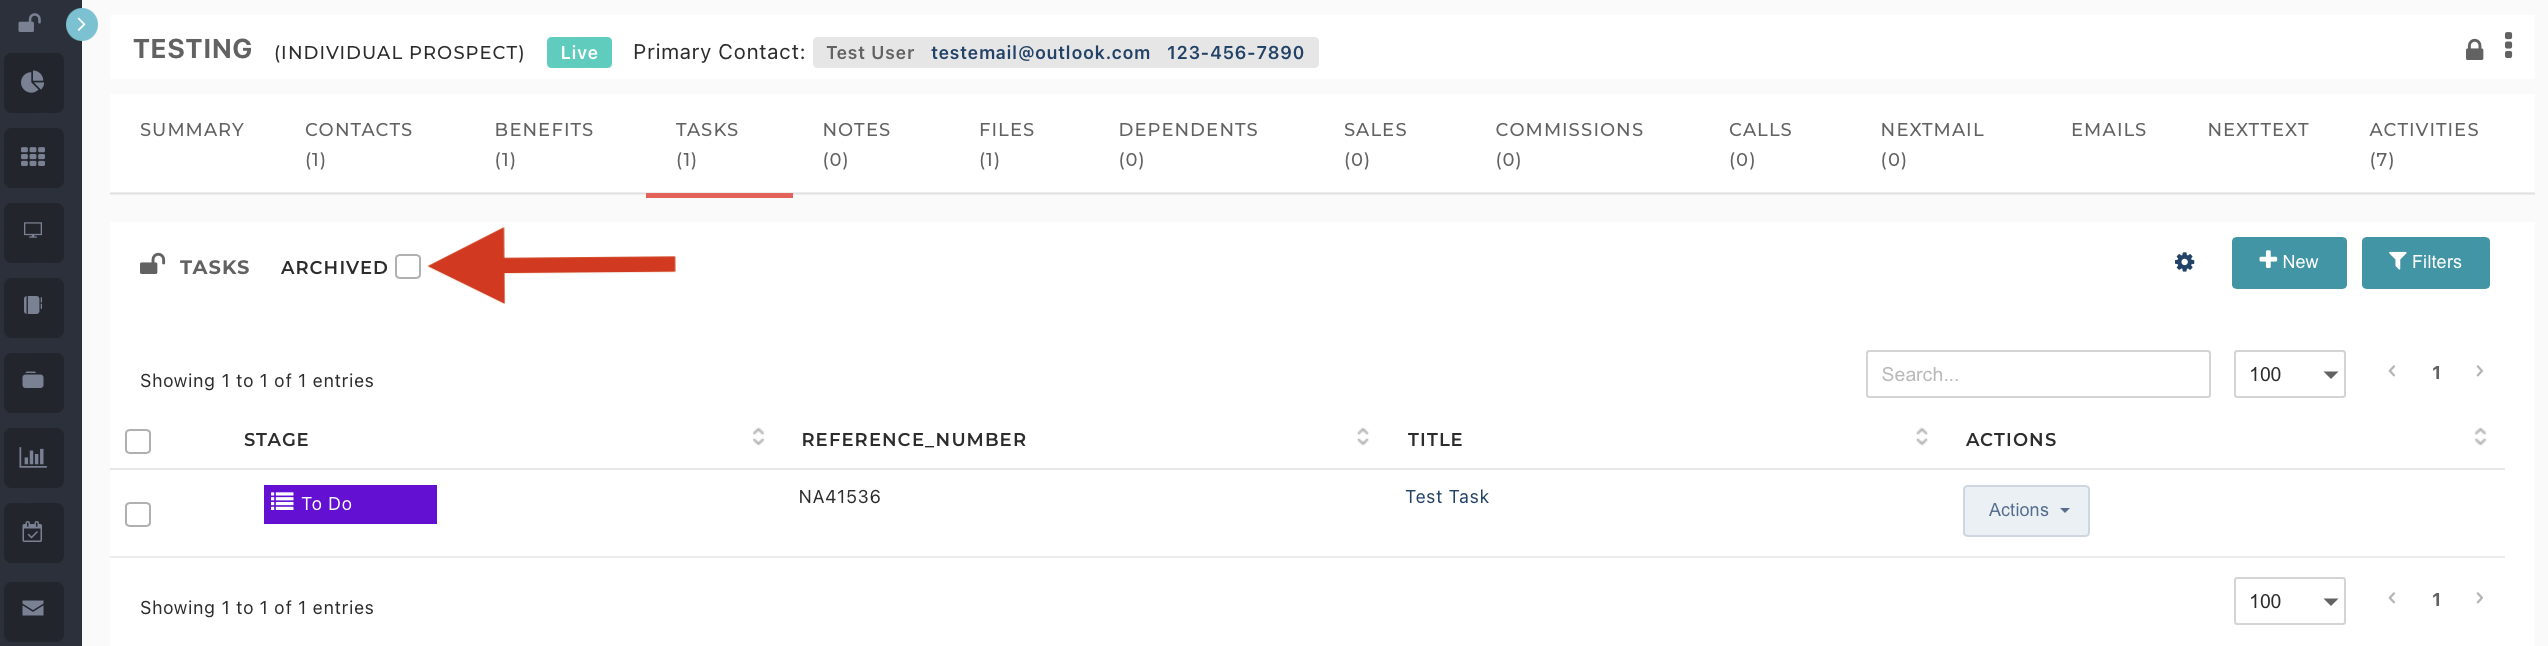
    This page contains tasks relevant to the case record. You can add new tasks as well as edit the existing tasks.


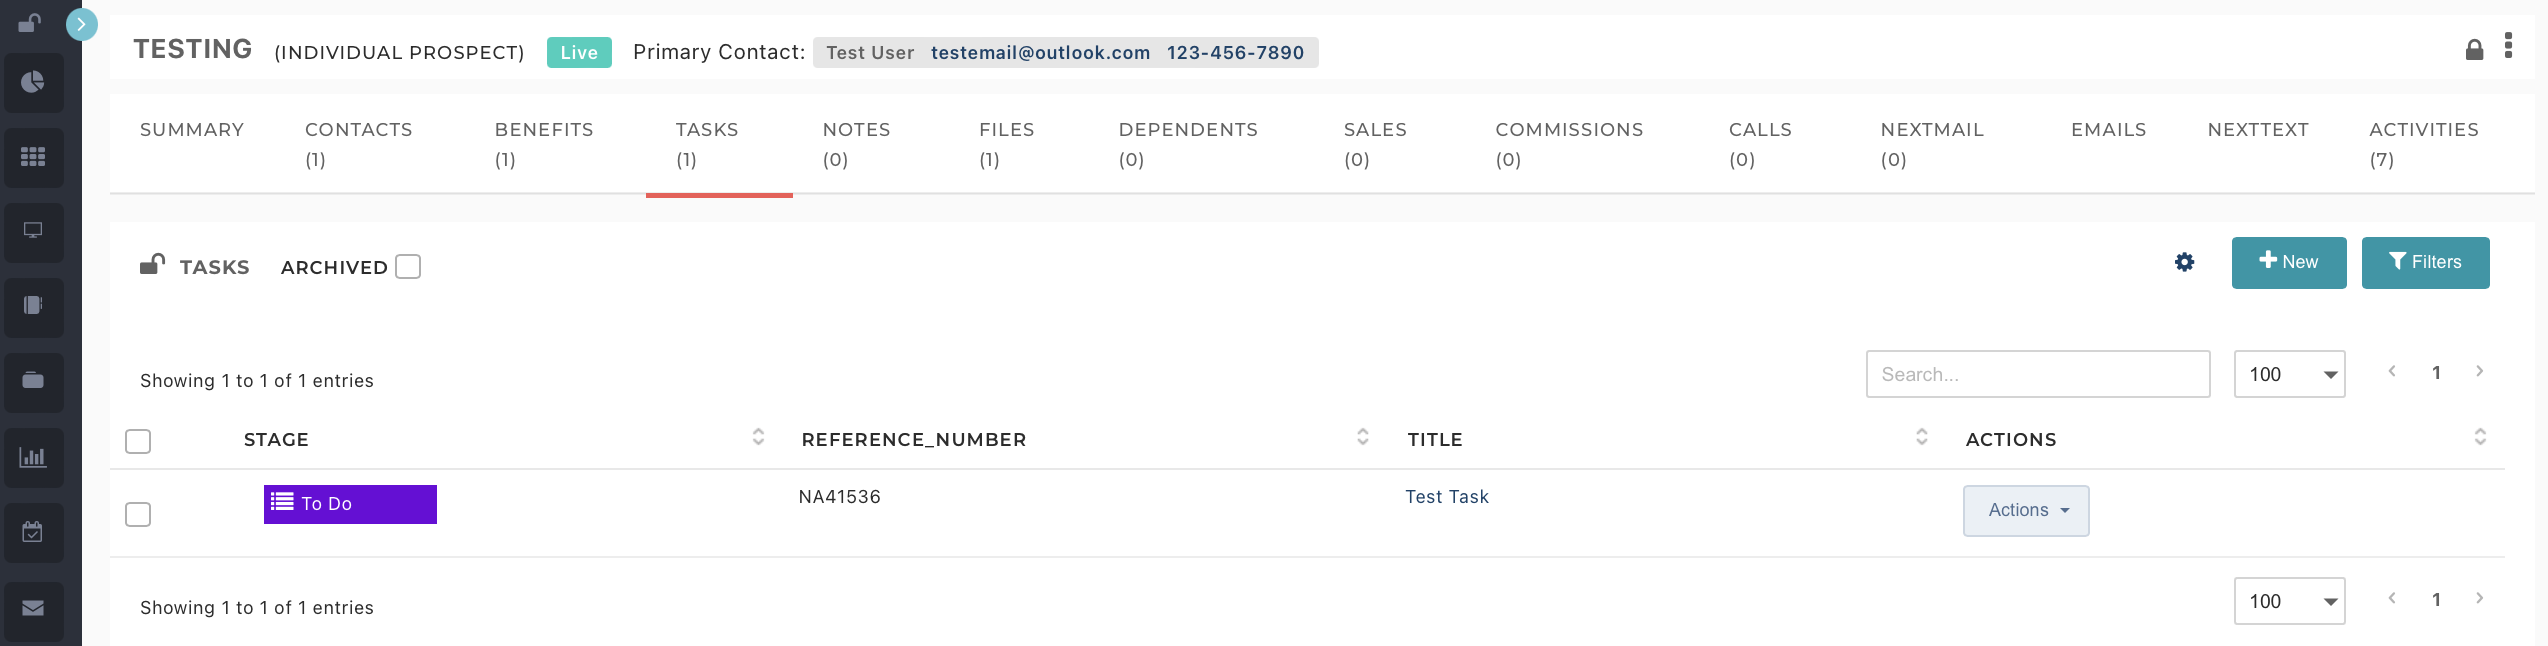
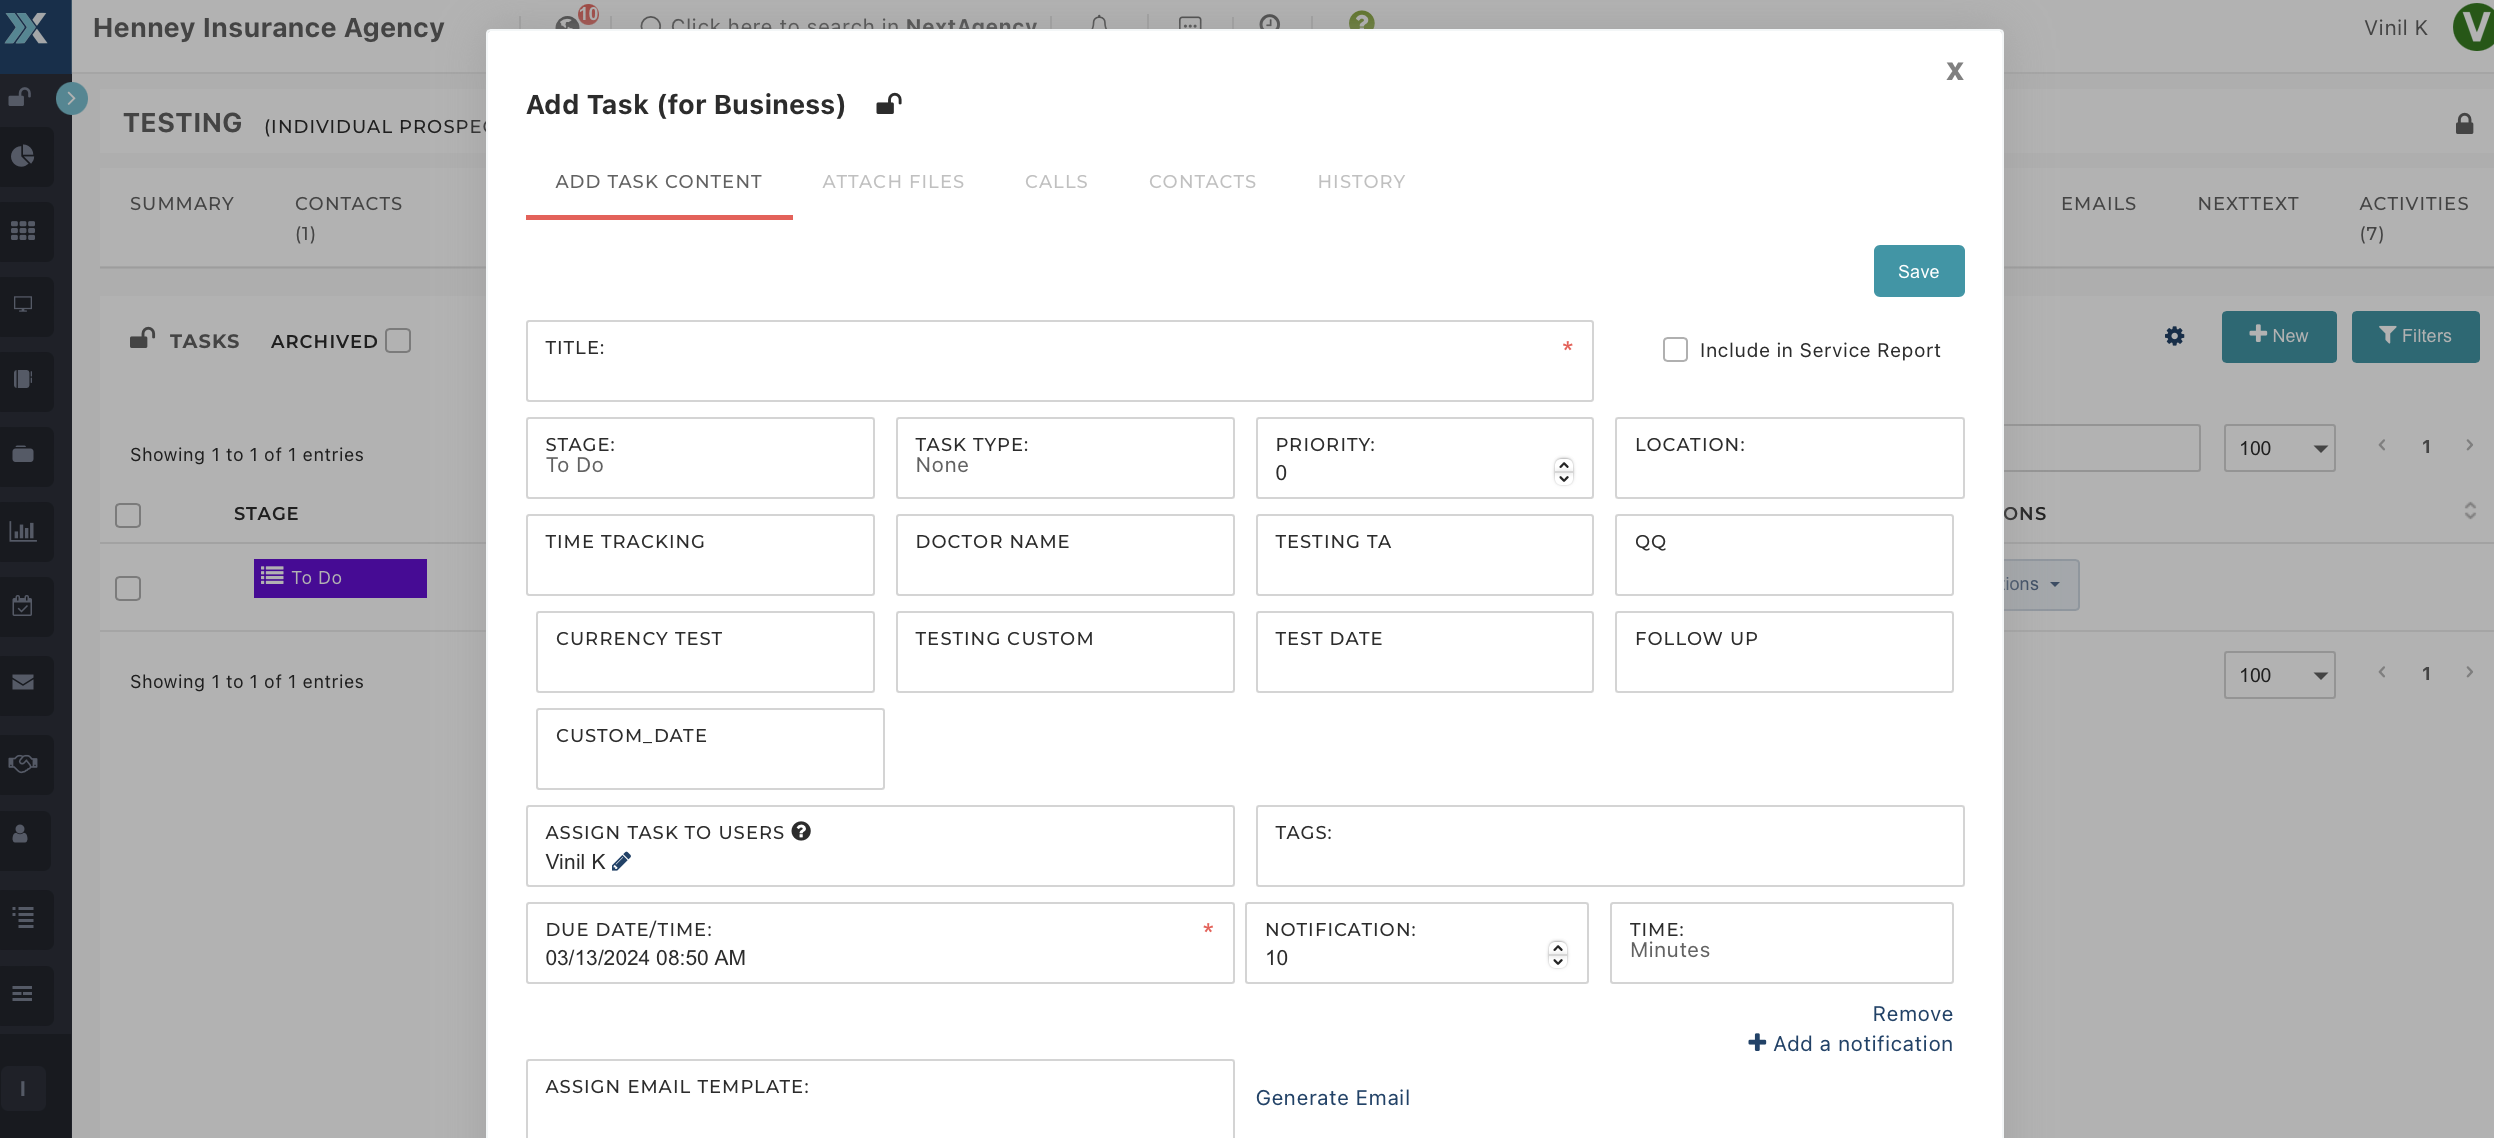
    To add a new Task, simply click on 'New' and fill out the details.


    You can also archive tasks and later view them by selecting the Archived checkbox in the upper-left corner of the page.


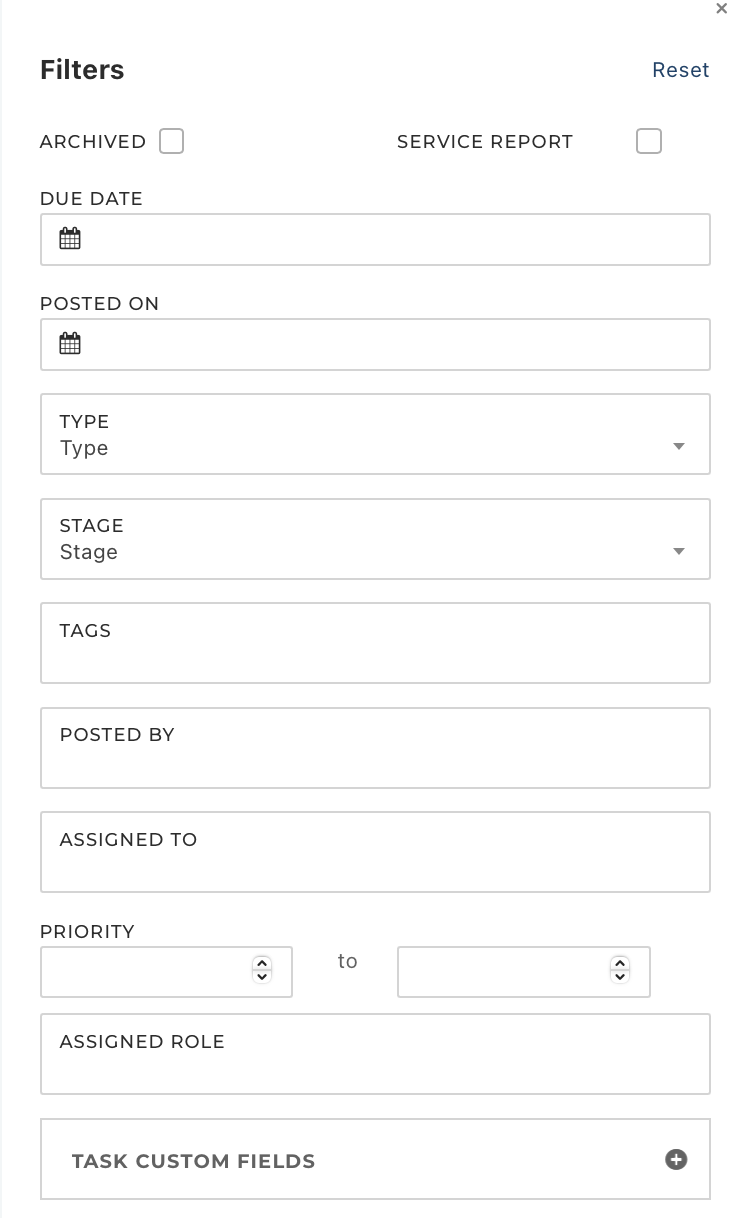
    Finally, you can filter the tasks by type, stage, tags, due date, etc.


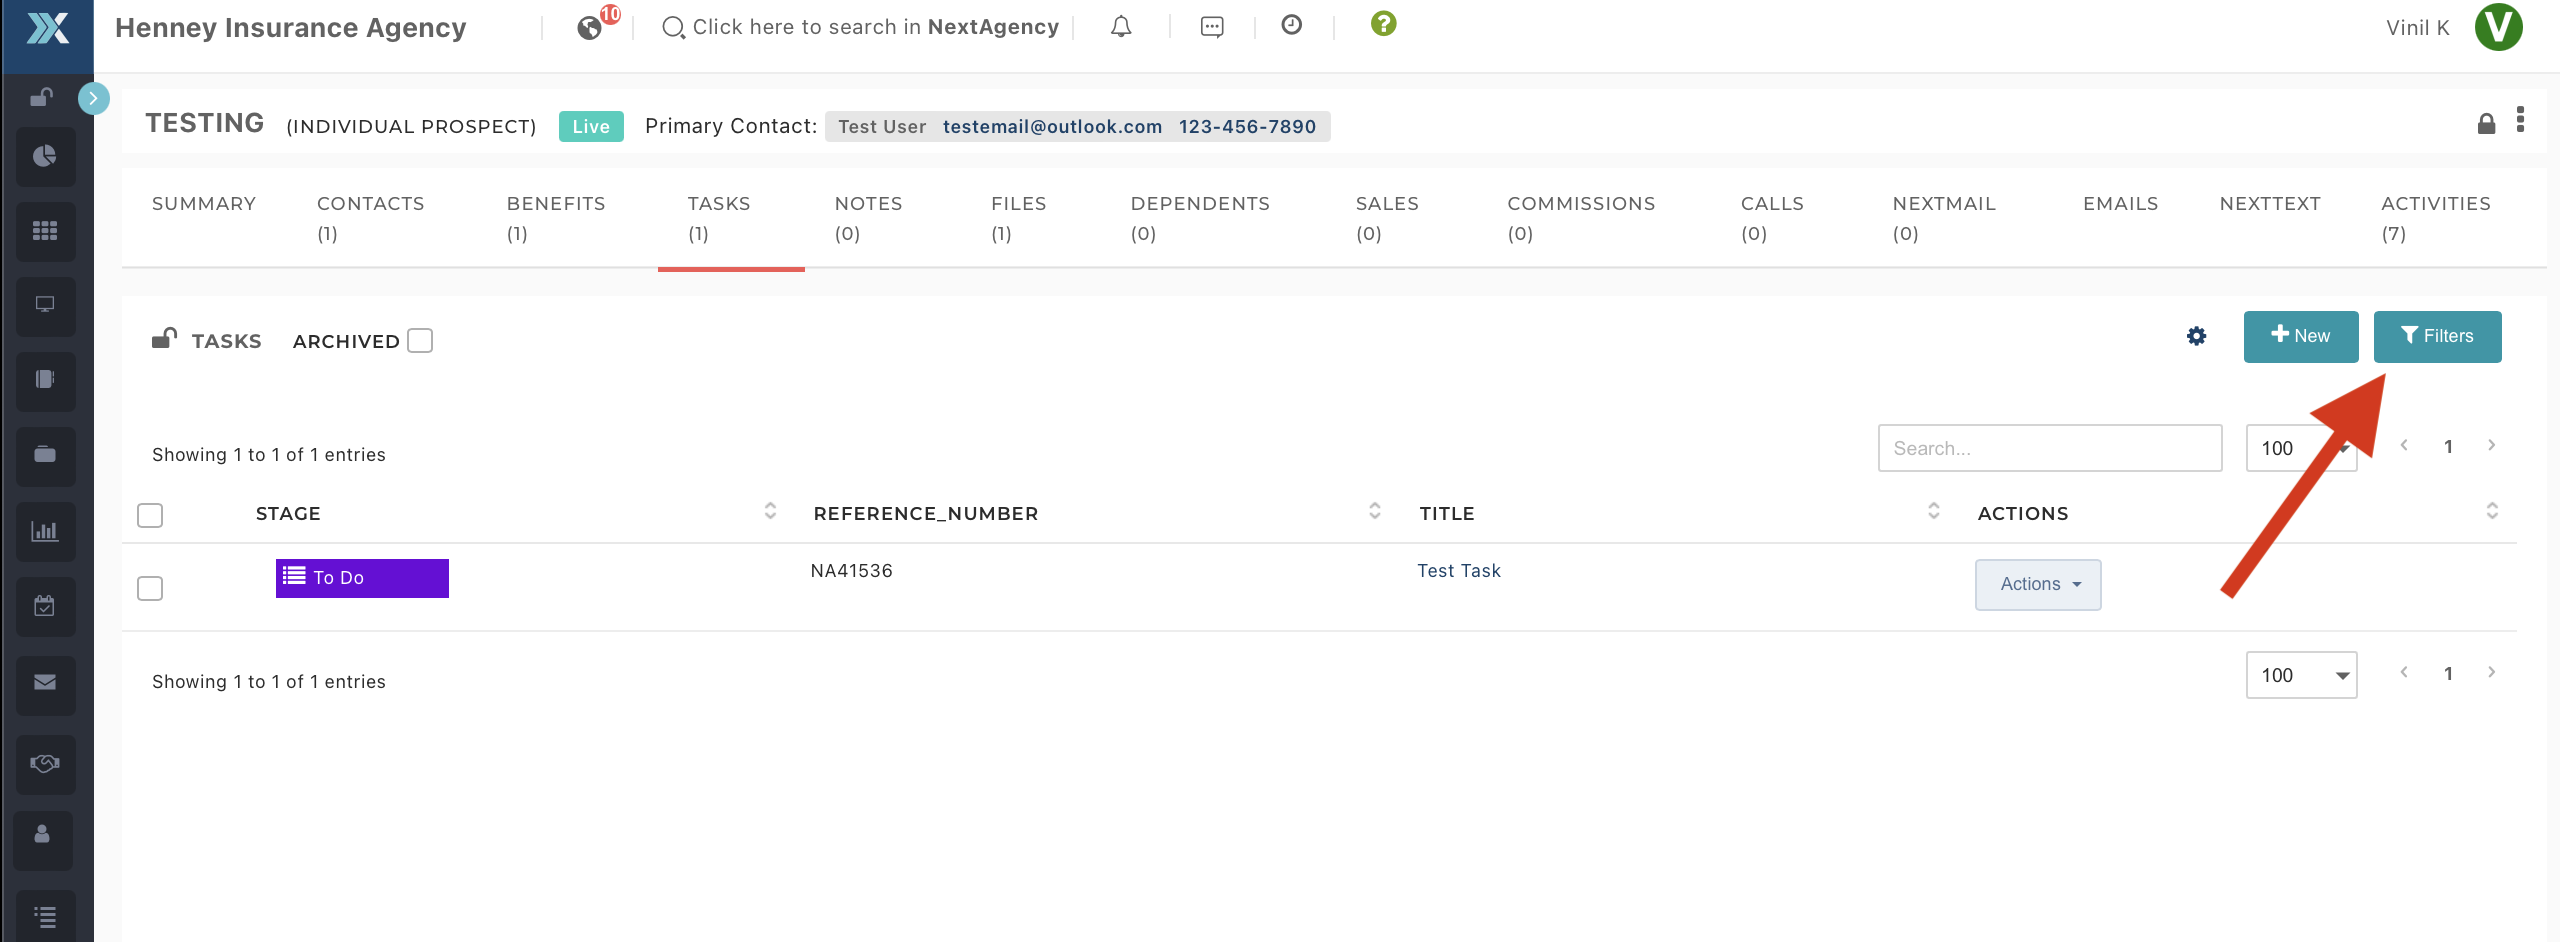
    Here are the available filters that will help you narrow down your results.


    Notes

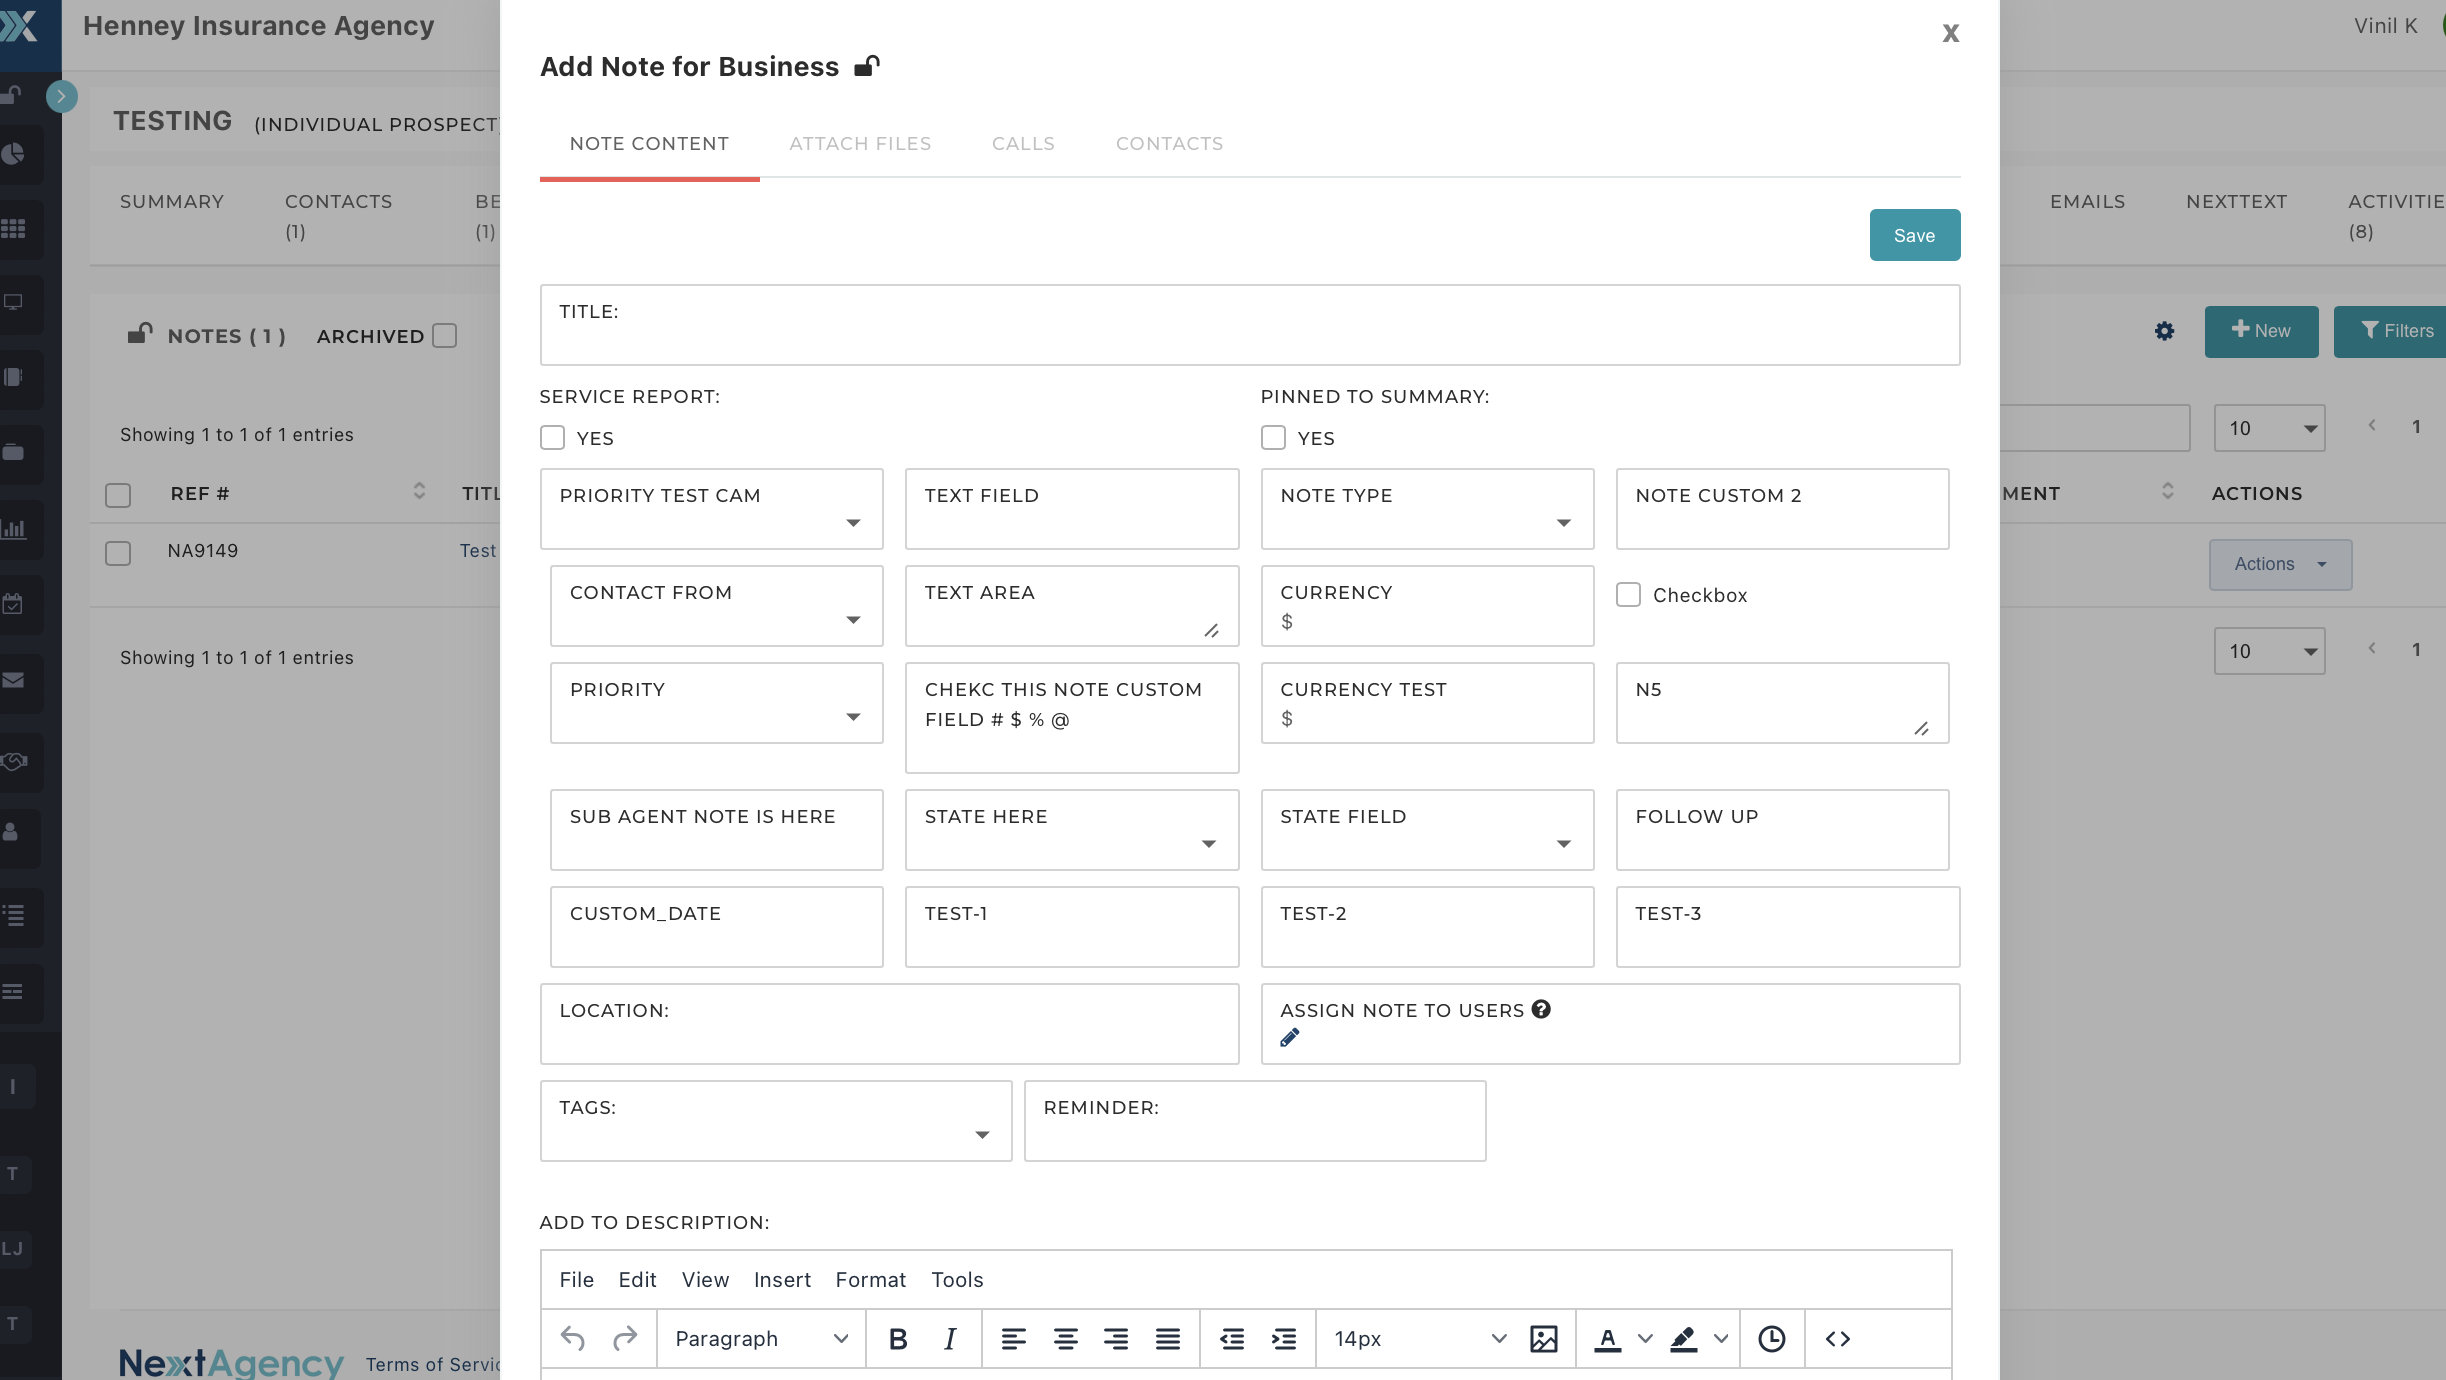
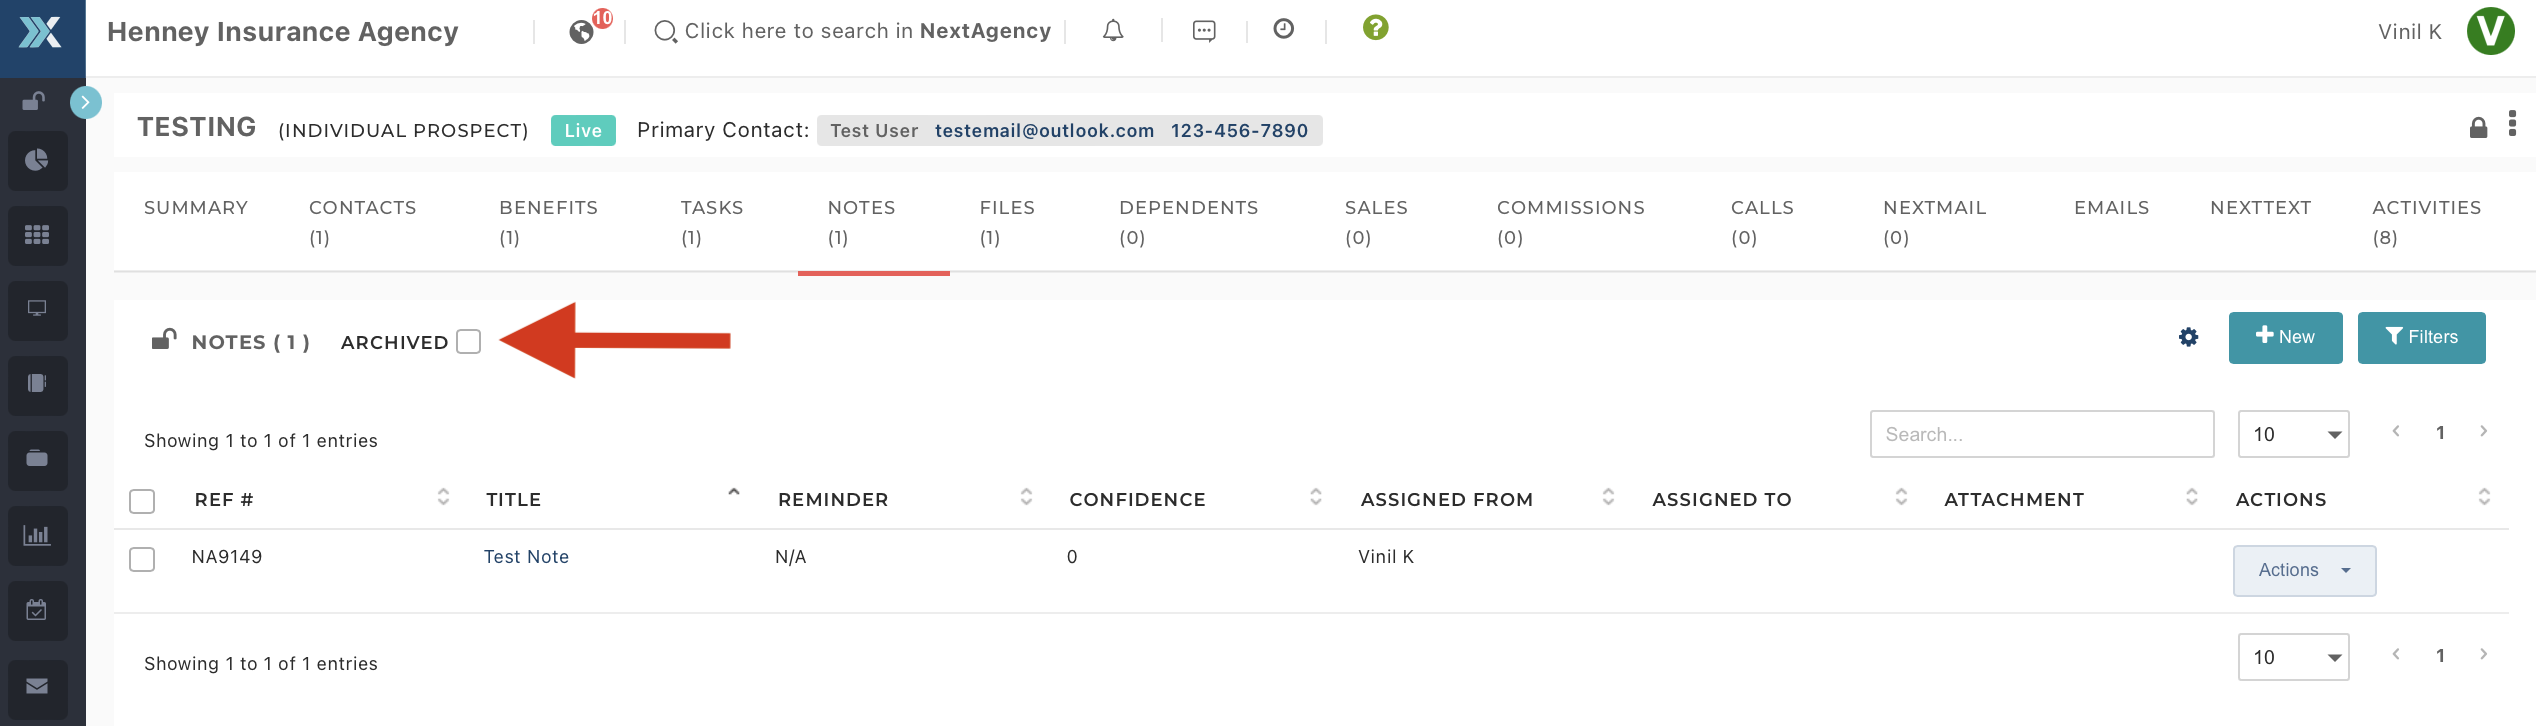
    This page contains notes relevant to the case record. You can add new notes and edit the existing notes.

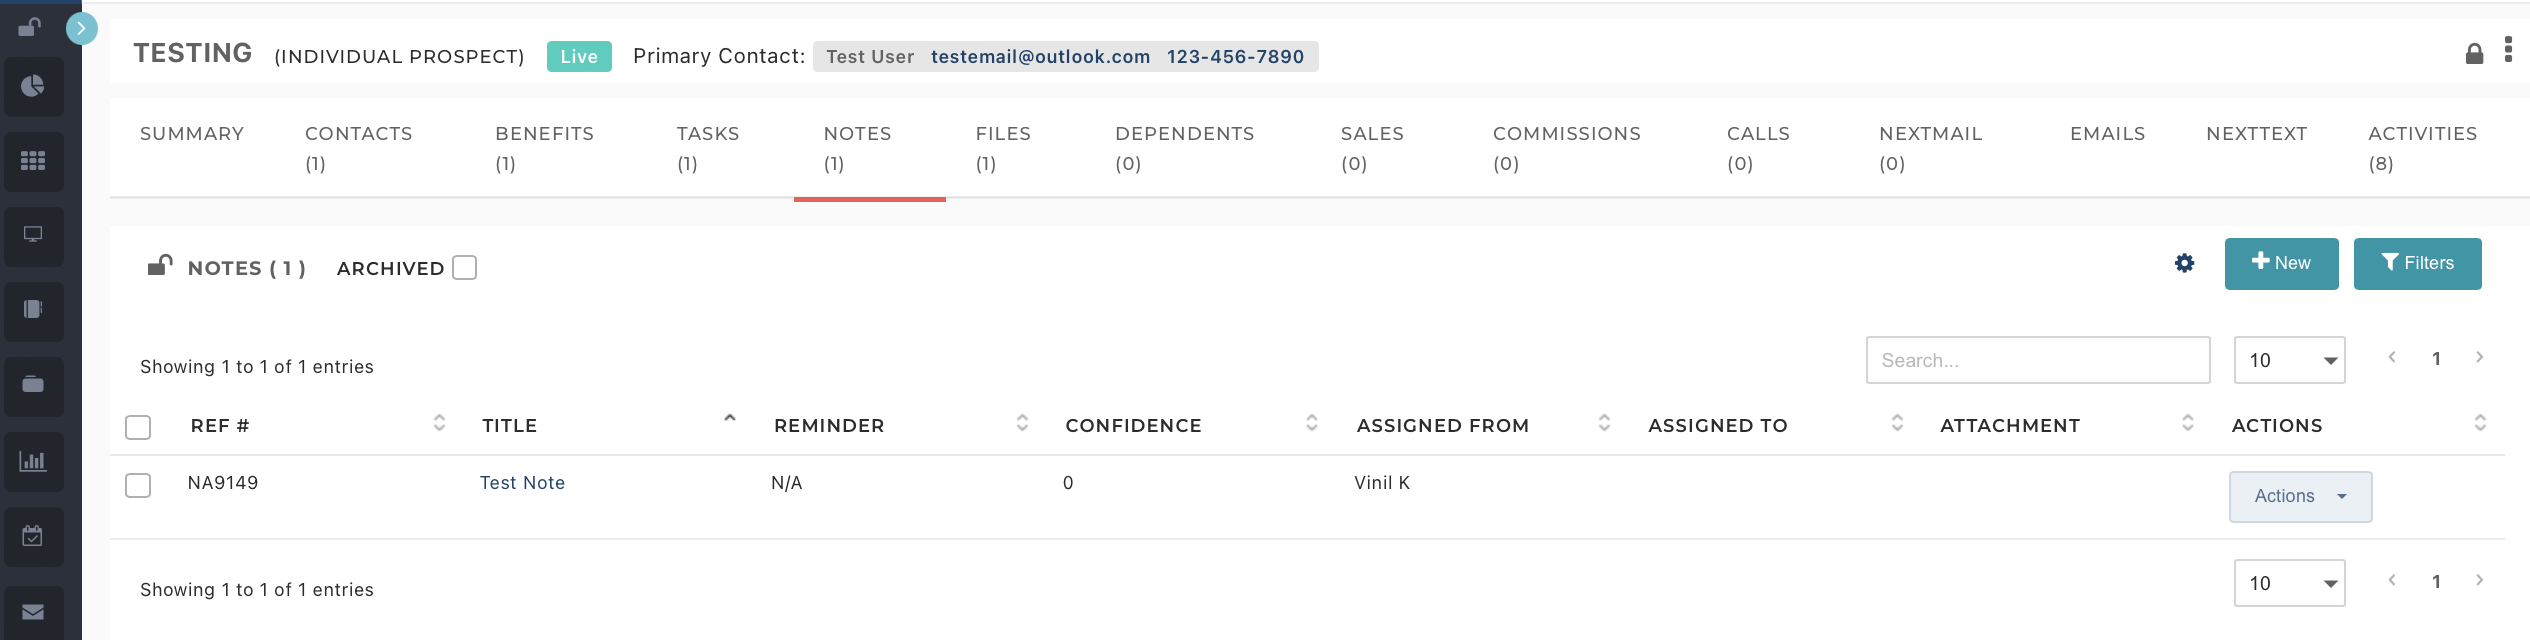
    To add a new Note, click on 'New' and fill out the details of your note.


    You can also archive the notes and later view them by selecting the Archived checkbox in the upper-left corner of the page.


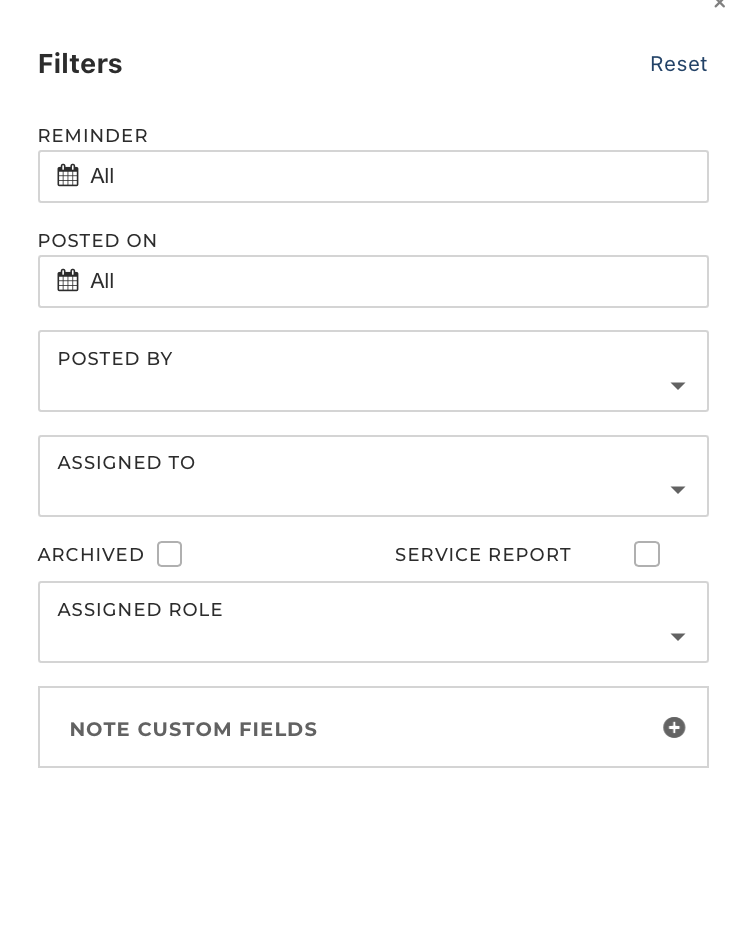
    You also have the option to apply filters to the notes. To apply, click on 'Filters'. Below are the filters available for your use.
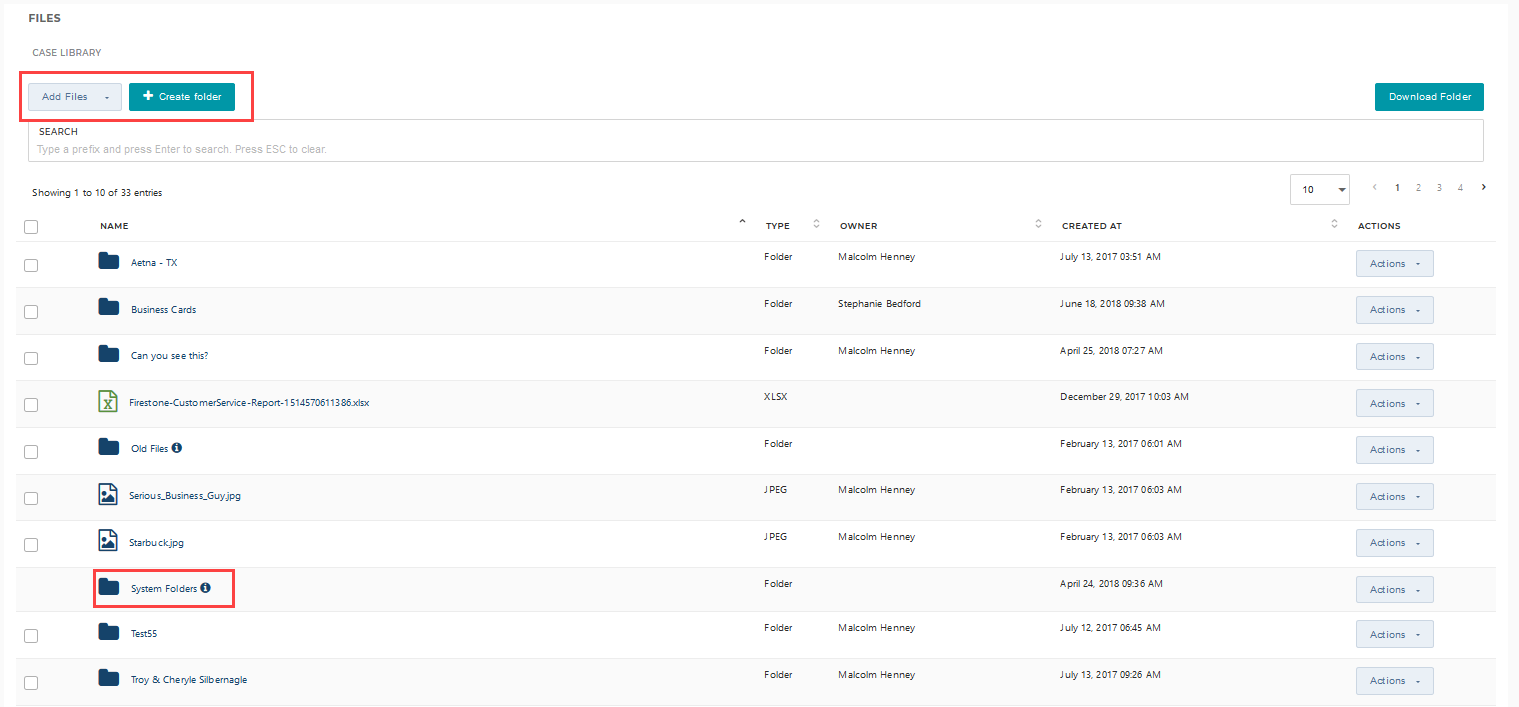


    Files

    This page contains several system folders for all files and documents relevant to the case record. It is also possible to create custom folders and add files. You can share, edit, and delete custom folders, but not system folders.

    NextBroker_ClientProspectCard_23.png

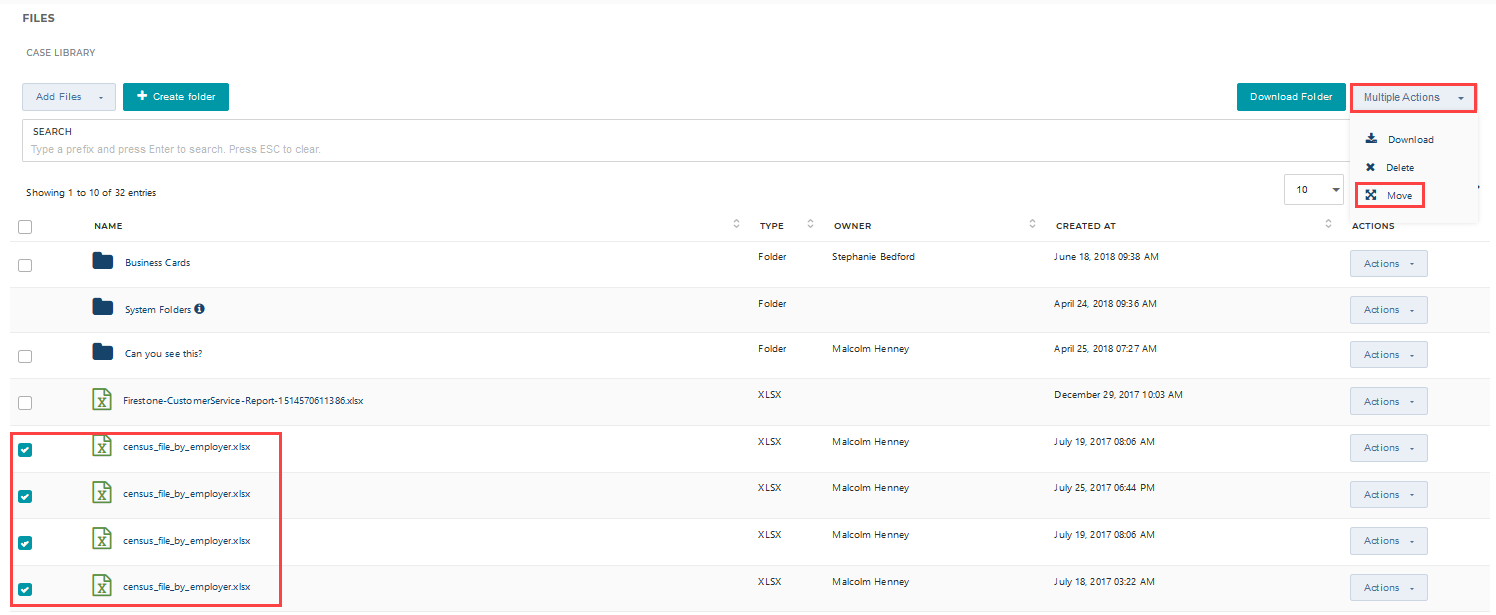
    You can also move files between folders. You can either drag a file record to the folder or select one or several files, click the Multiple Actions button that appears after the selection, and then choose Move. 

    NextBroker_ClientProspectCard_24.png

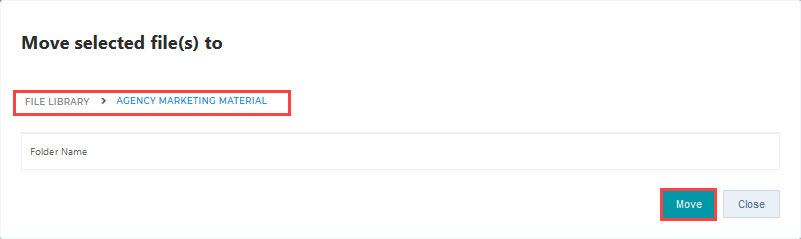
    In the window that appears, select the folder where you are going to move the file(s) and click Move.

    NextBroker_ClientProspectCard_25.png


    Finally, you can place the folders inside other folders by simply clicking and dragging one folder into another folder.

    Census

    This page contains demographic information about the client’s employees, such as, age or marital status. This data is needed to estimate the health care costs and is used for quoting purposes only, without being linked to the client's actual HR system. You can view the records by selecting the census type from the drop-down list.


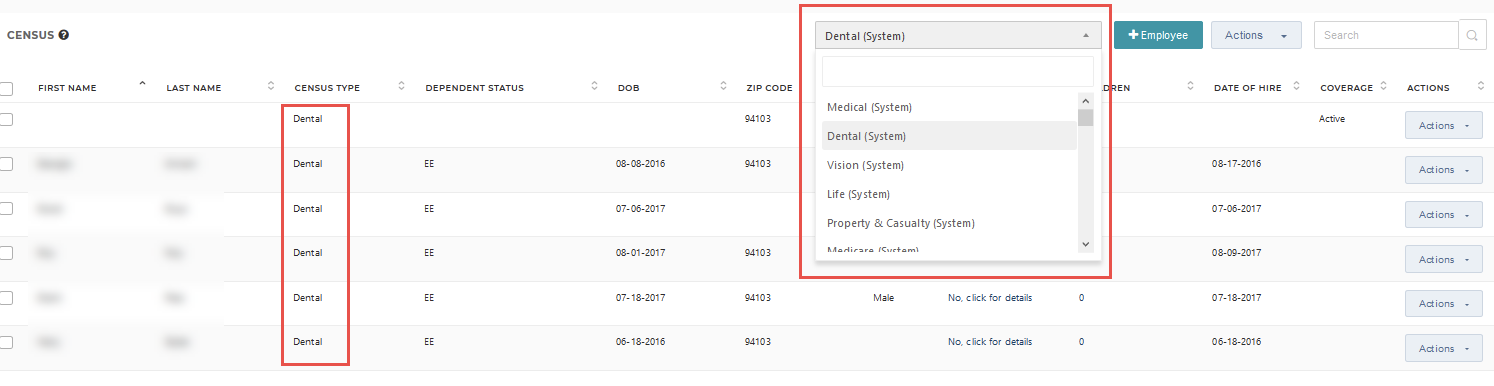
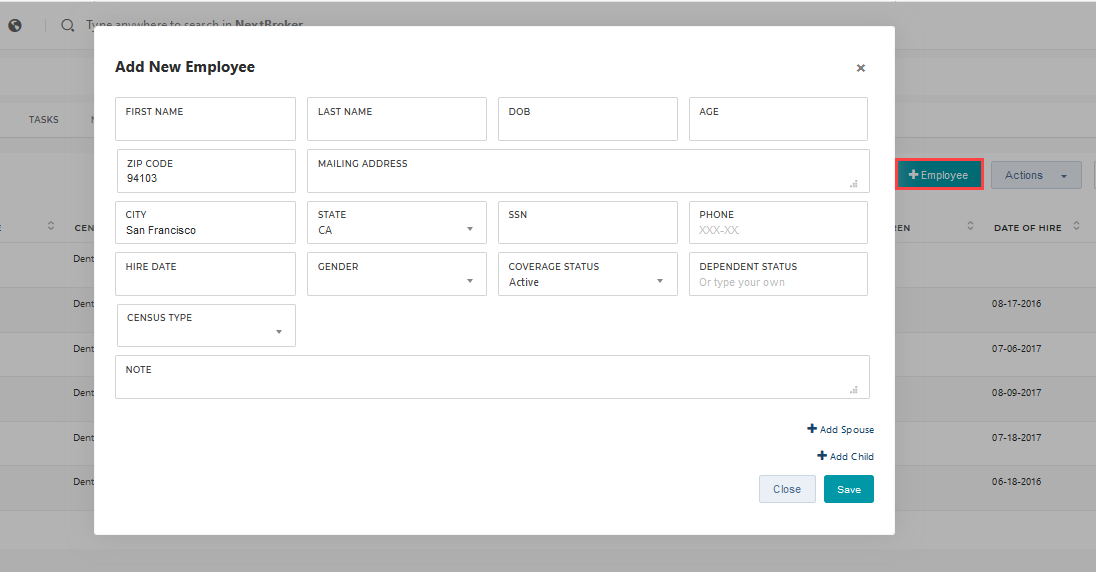
    You can also add new employees to the census by clicking the Employee button next to the drop-down list.

    NextBroker_ClientProspectCard_27.png

    The following actions are available for the census:

    • Set Coverage: Set the coverage status for the census.

            NextBroker_ClientProspectCard_28.png

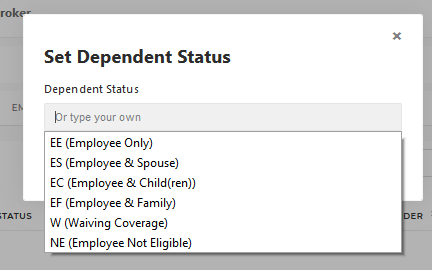
    • Set Dependent Status: If a person in the list is a dependent, i.e. a spouse of a child of an employee, you can specify the exact status.

            NextBroker_ClientProspectCard_29.png

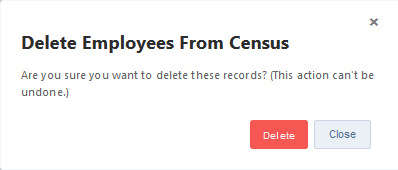
    • Delete Selected: Remove the selected employee record together with dependents.

            NextBroker_ClientProspectCard_30.png

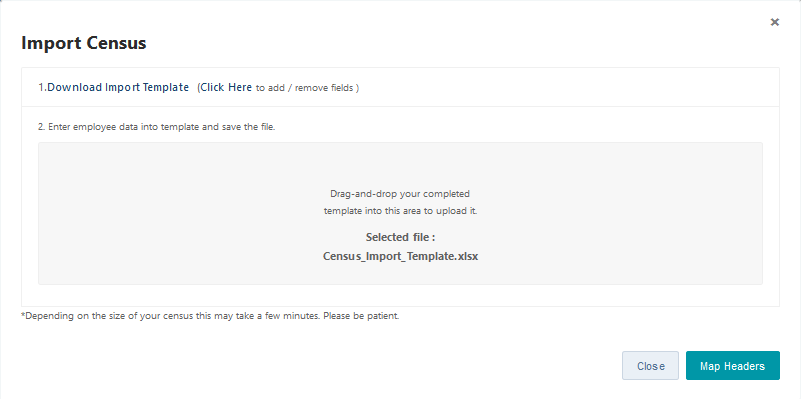
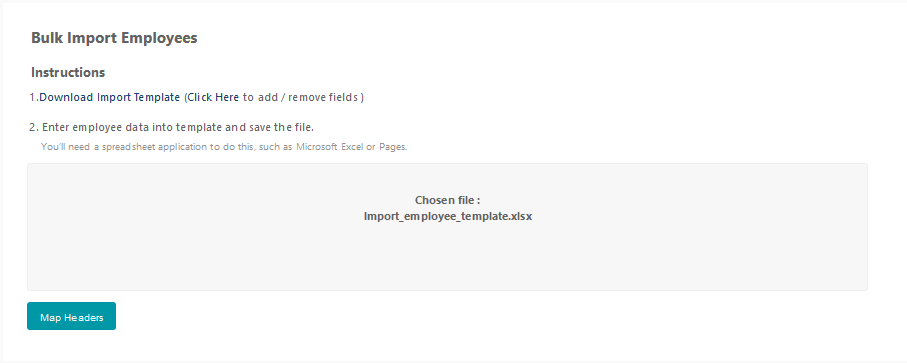
    • Import: If you need to add a large amount of employee records, it would be more convenient to run a bulk import from an Excel file. You need to download the import template, fill it in, and then upload it to NextAgency.

            NextBroker_ClientProspectCard_31.png

    • Export: Generate an Excel file with employee data from the census.
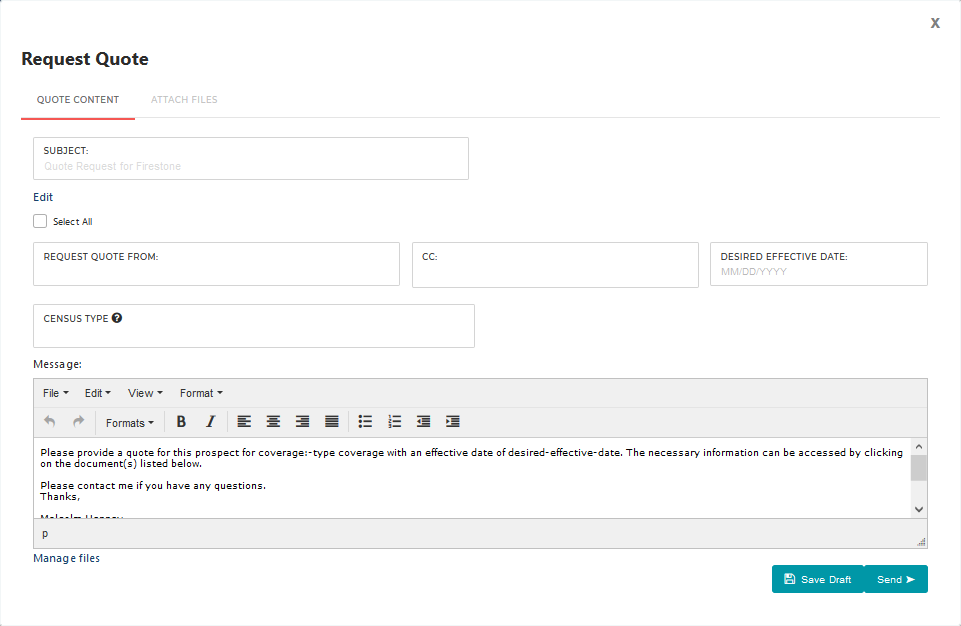
    • Quote: Send a quote request for the case to a carrier or general agency.

    NextBroker_ClientProspectCard_32.png

    Employees

    This page contains a list of the client’s employee records. Here you can do the following:

    • Add new Employees. Add existing Case Contacts and Individual case records as Employees.

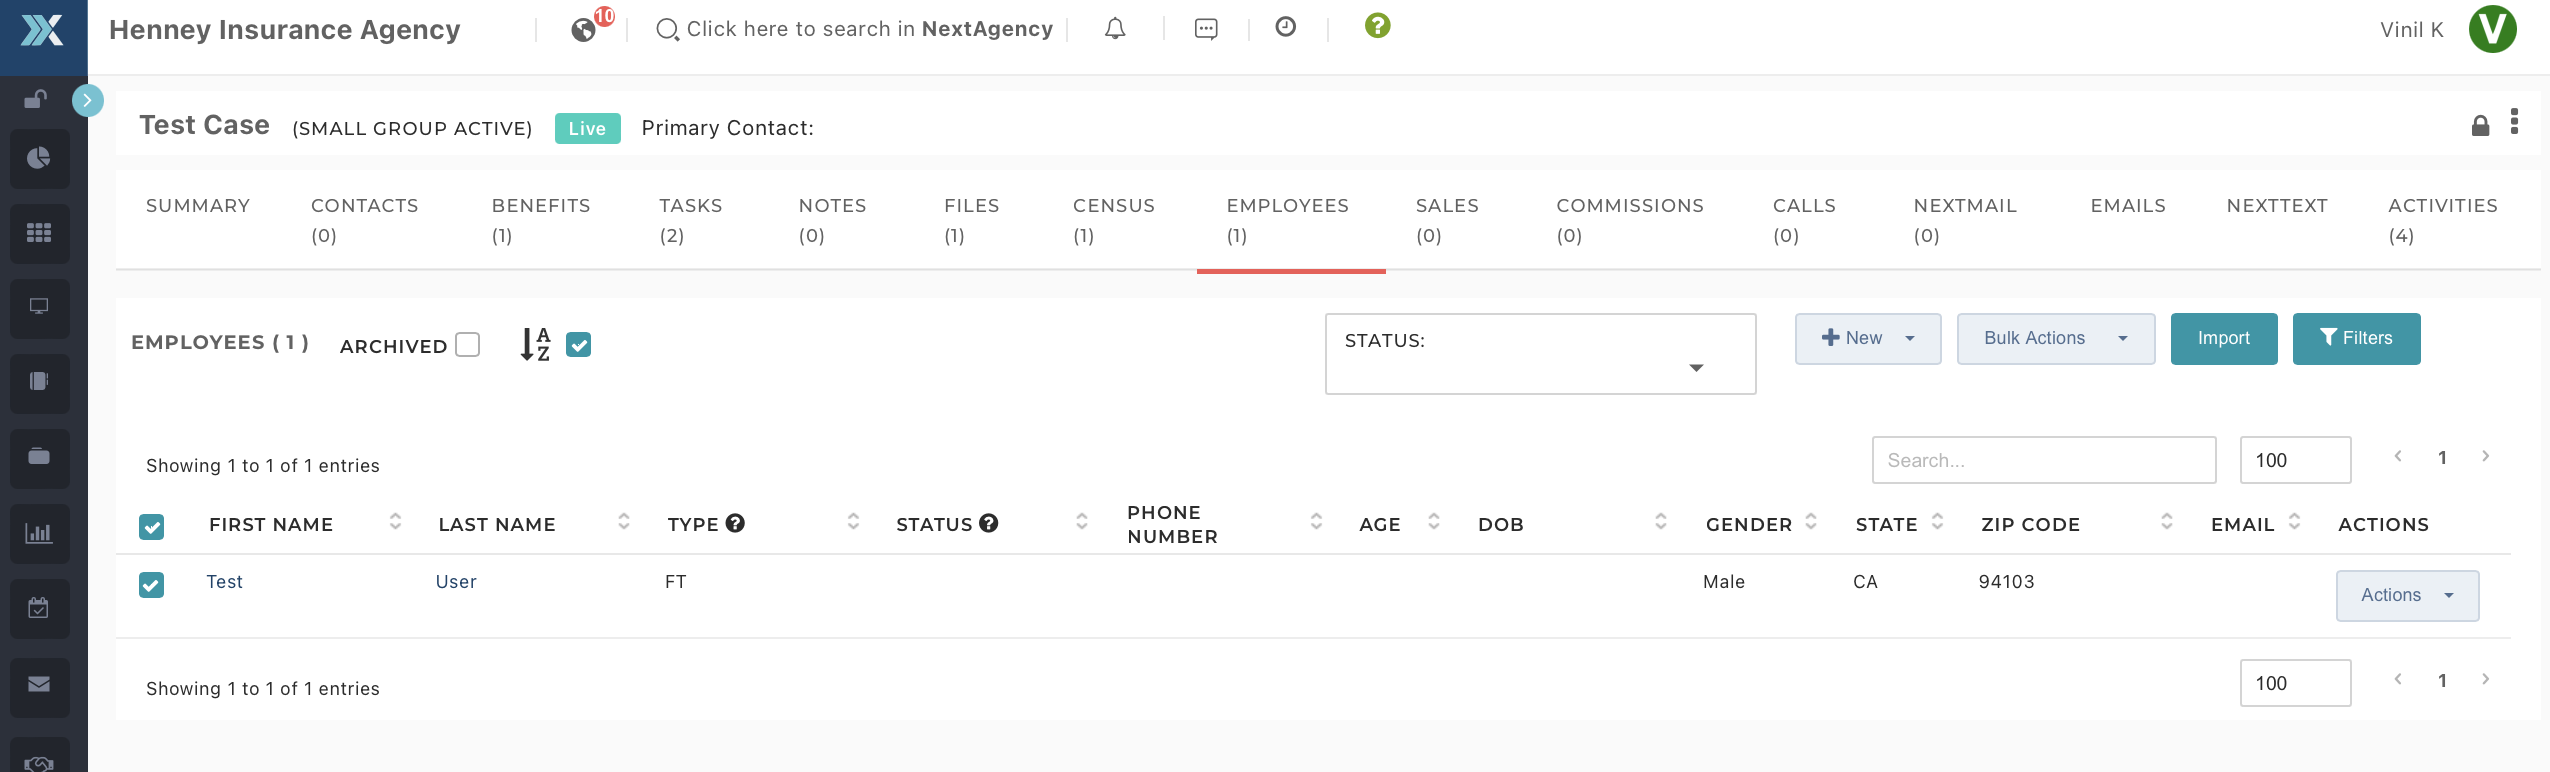
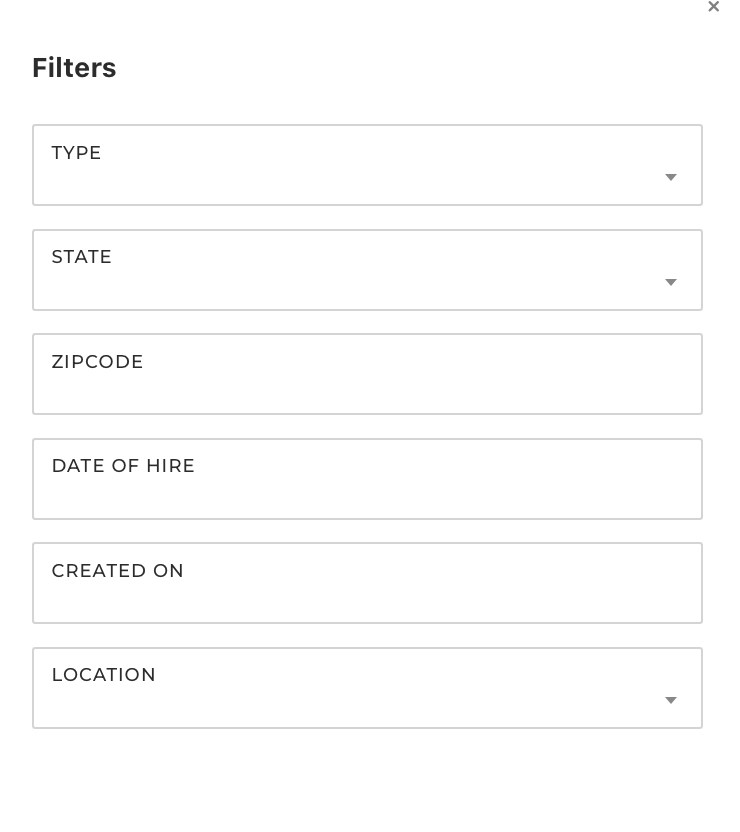
    • Filter the employees by Type, State, Zip code, Created on, Date of Hire, and Location.

    • Copy all or several employees to the census

    NextBroker_ClientProspectCard_35.png

    • Run a bulk import of the employees

    NextBroker_ClientProspectCard_36.png


    Sales

    On the Sales page, you can view and edit quotes, proposals, and enrollment kits that are relevant to the case.


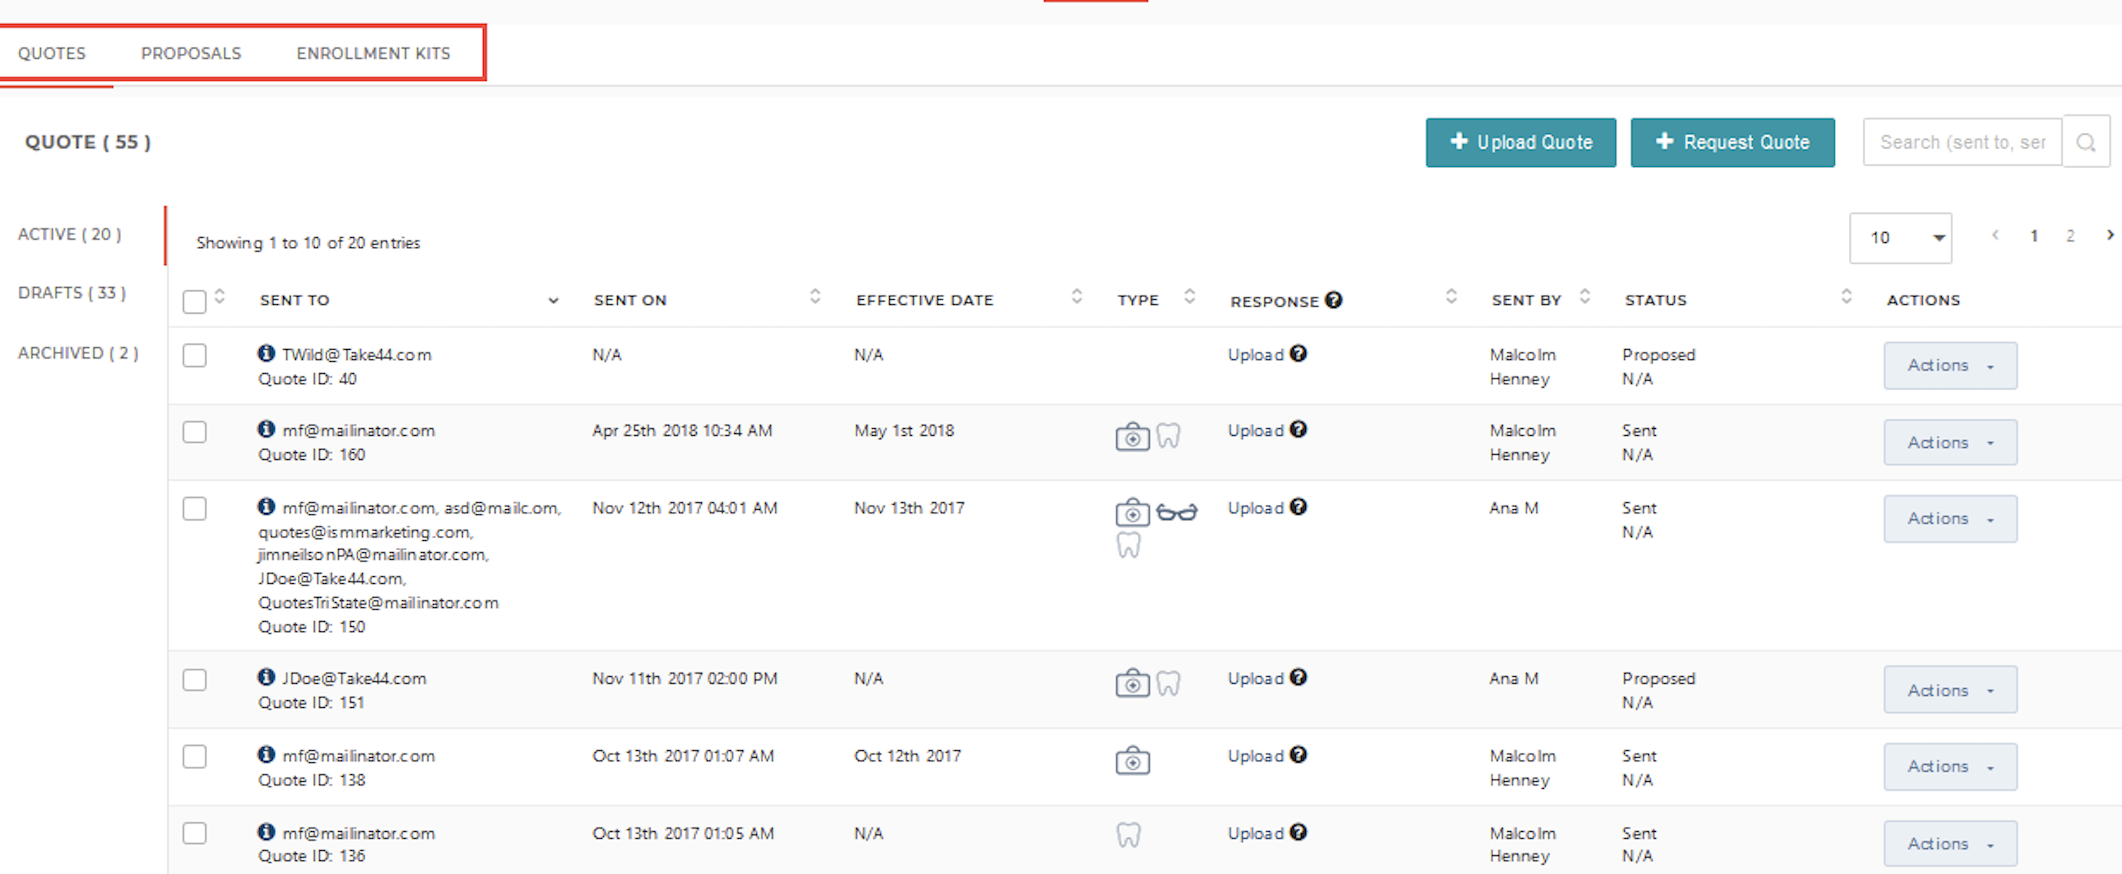
    You can also do the following:

    • Upload and request quotes

    • Add and Send proposals.

    • Create enrollment kits

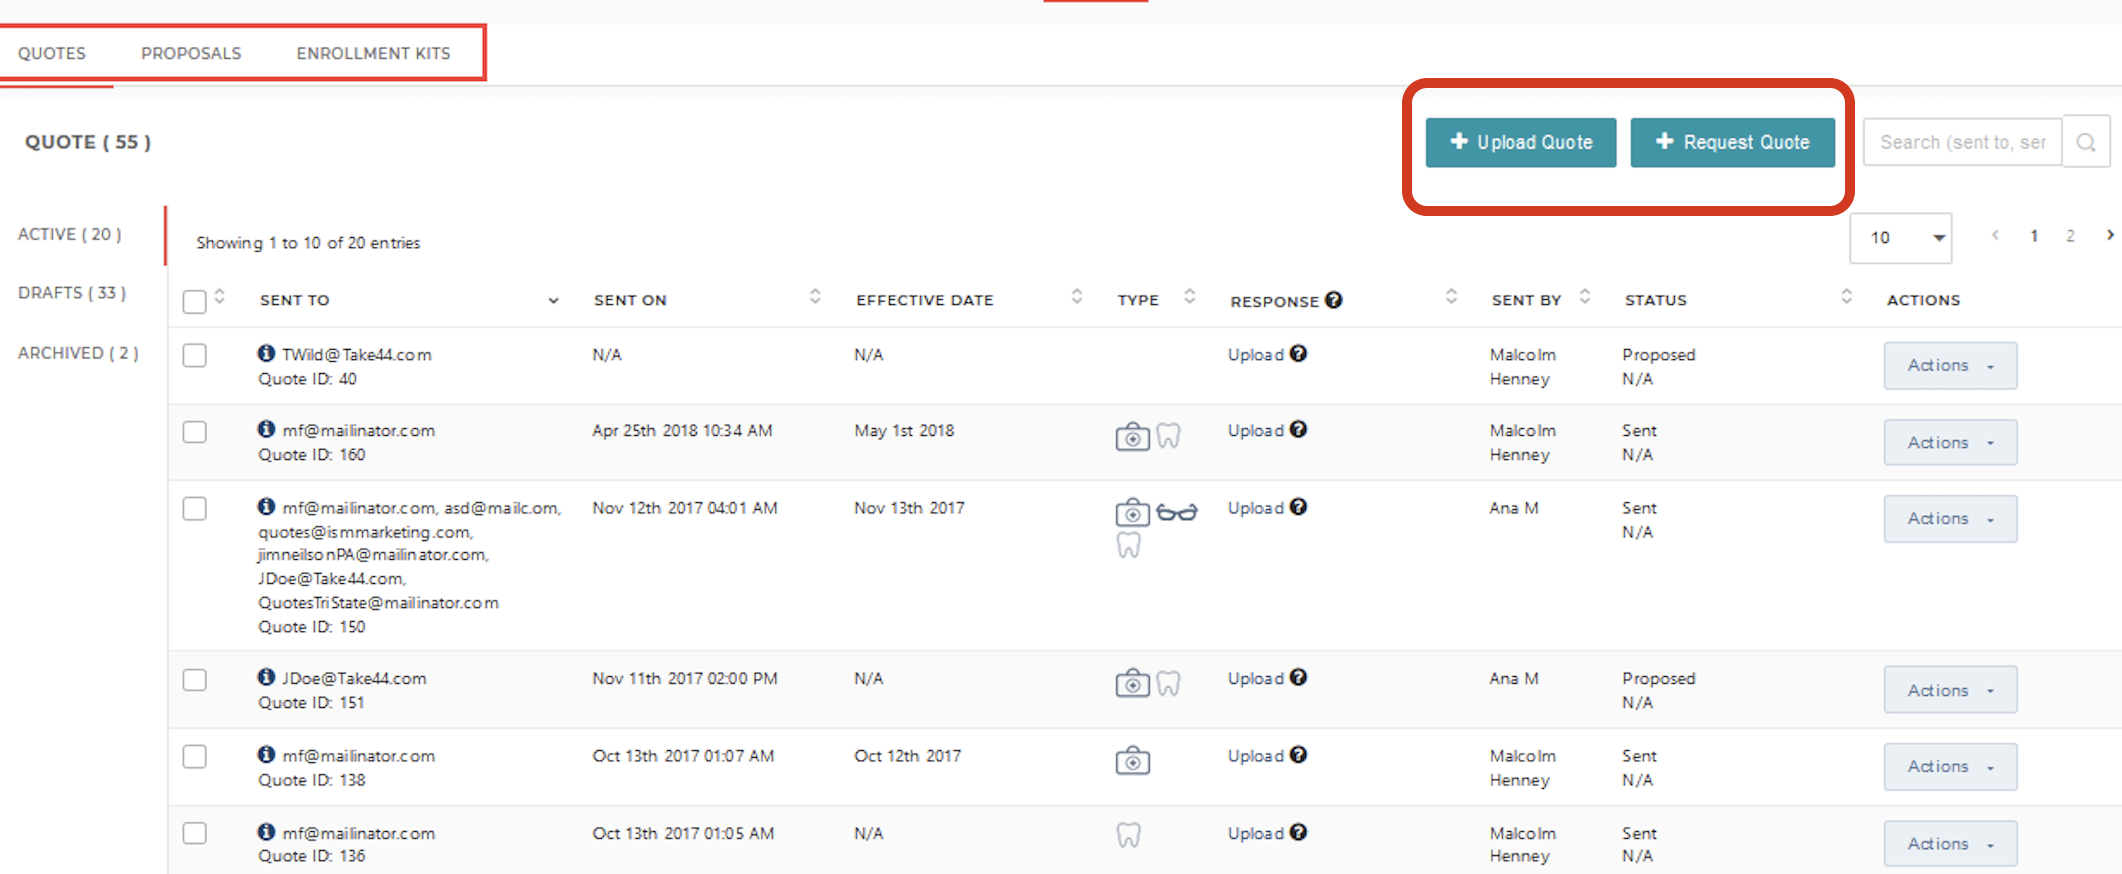
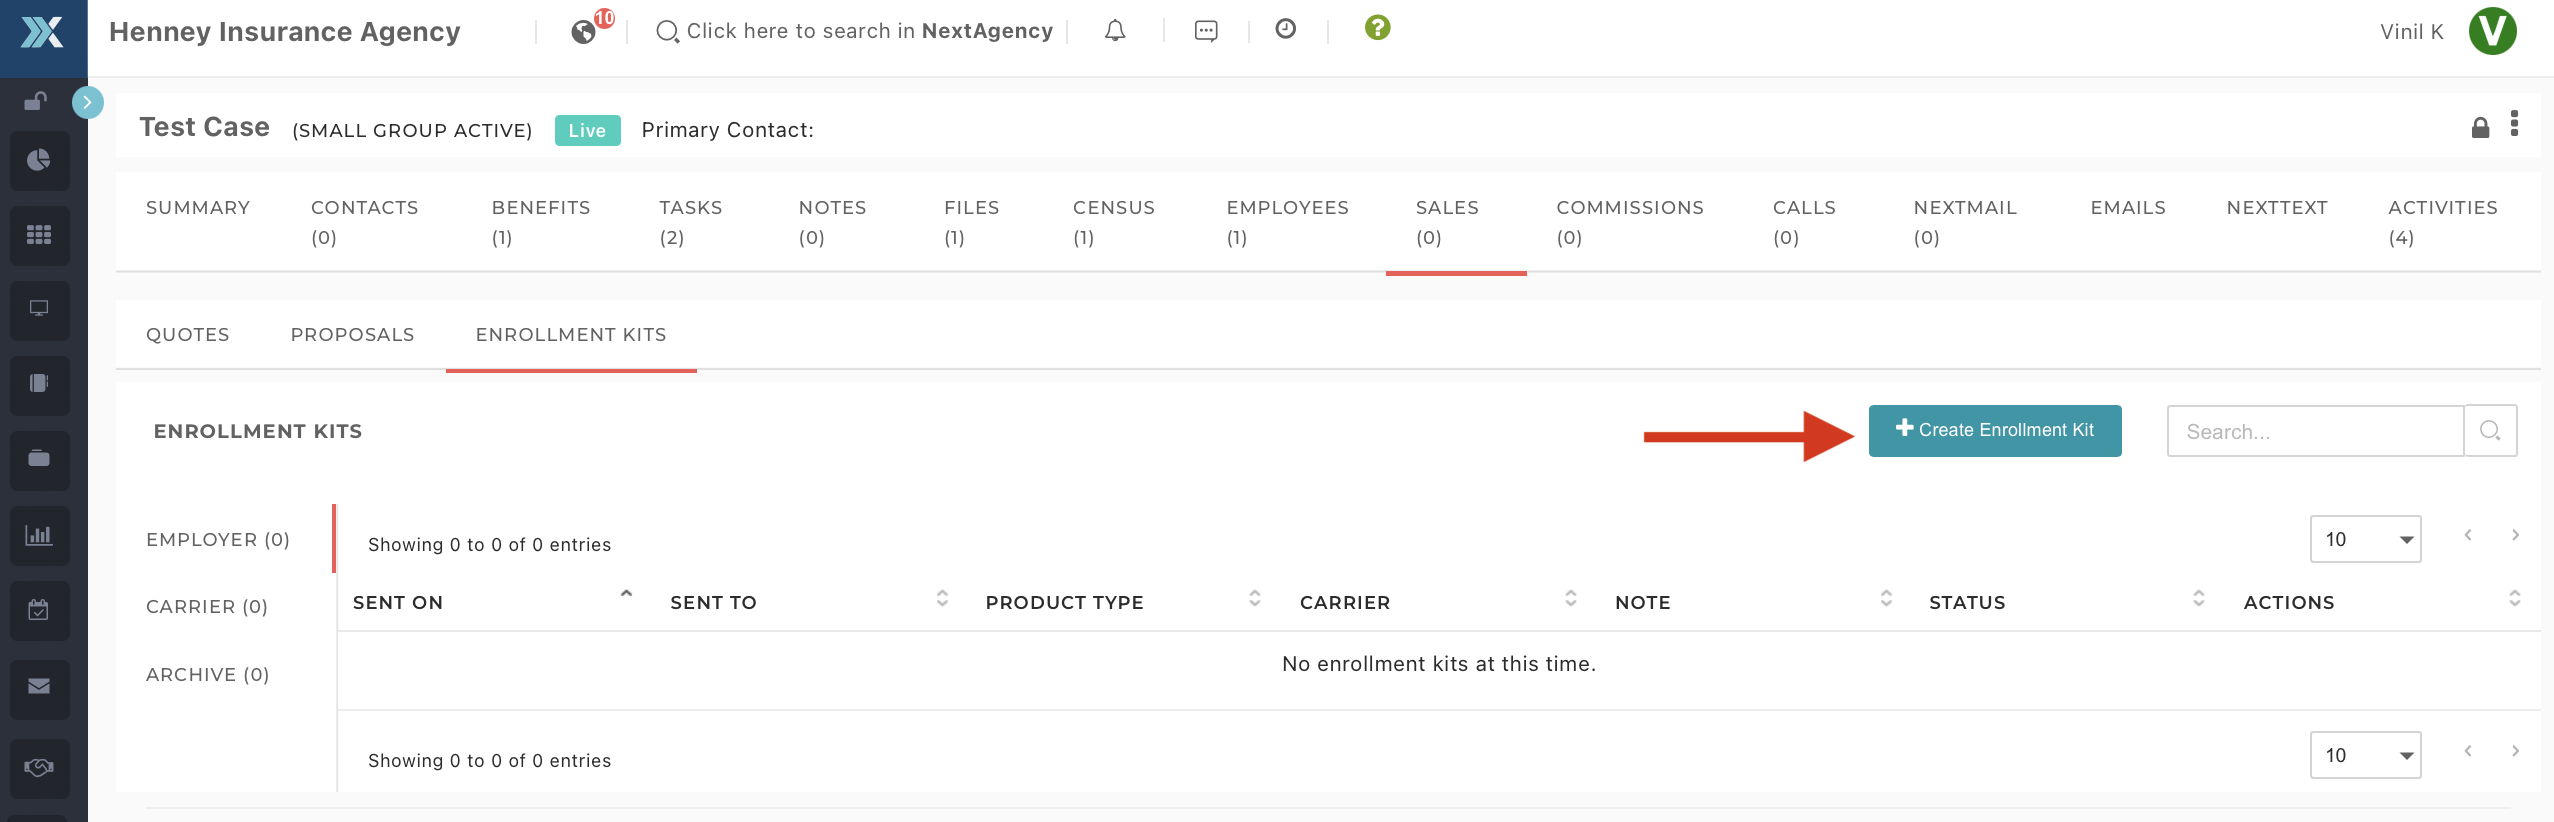
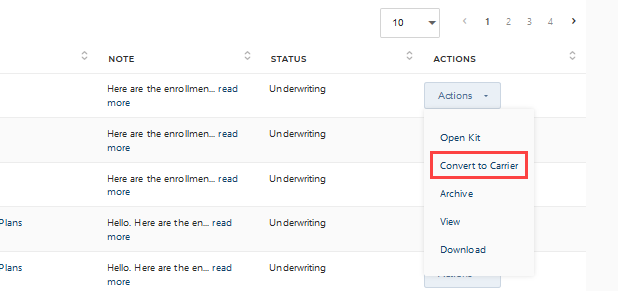
    • Convert employer enrollment kits to carriers

    NextBroker_ClientProspectCard_41.png


    Commissions

    This page contains all the information regarding commissions, overrides, splits, and bonuses that are relevant to the case record.

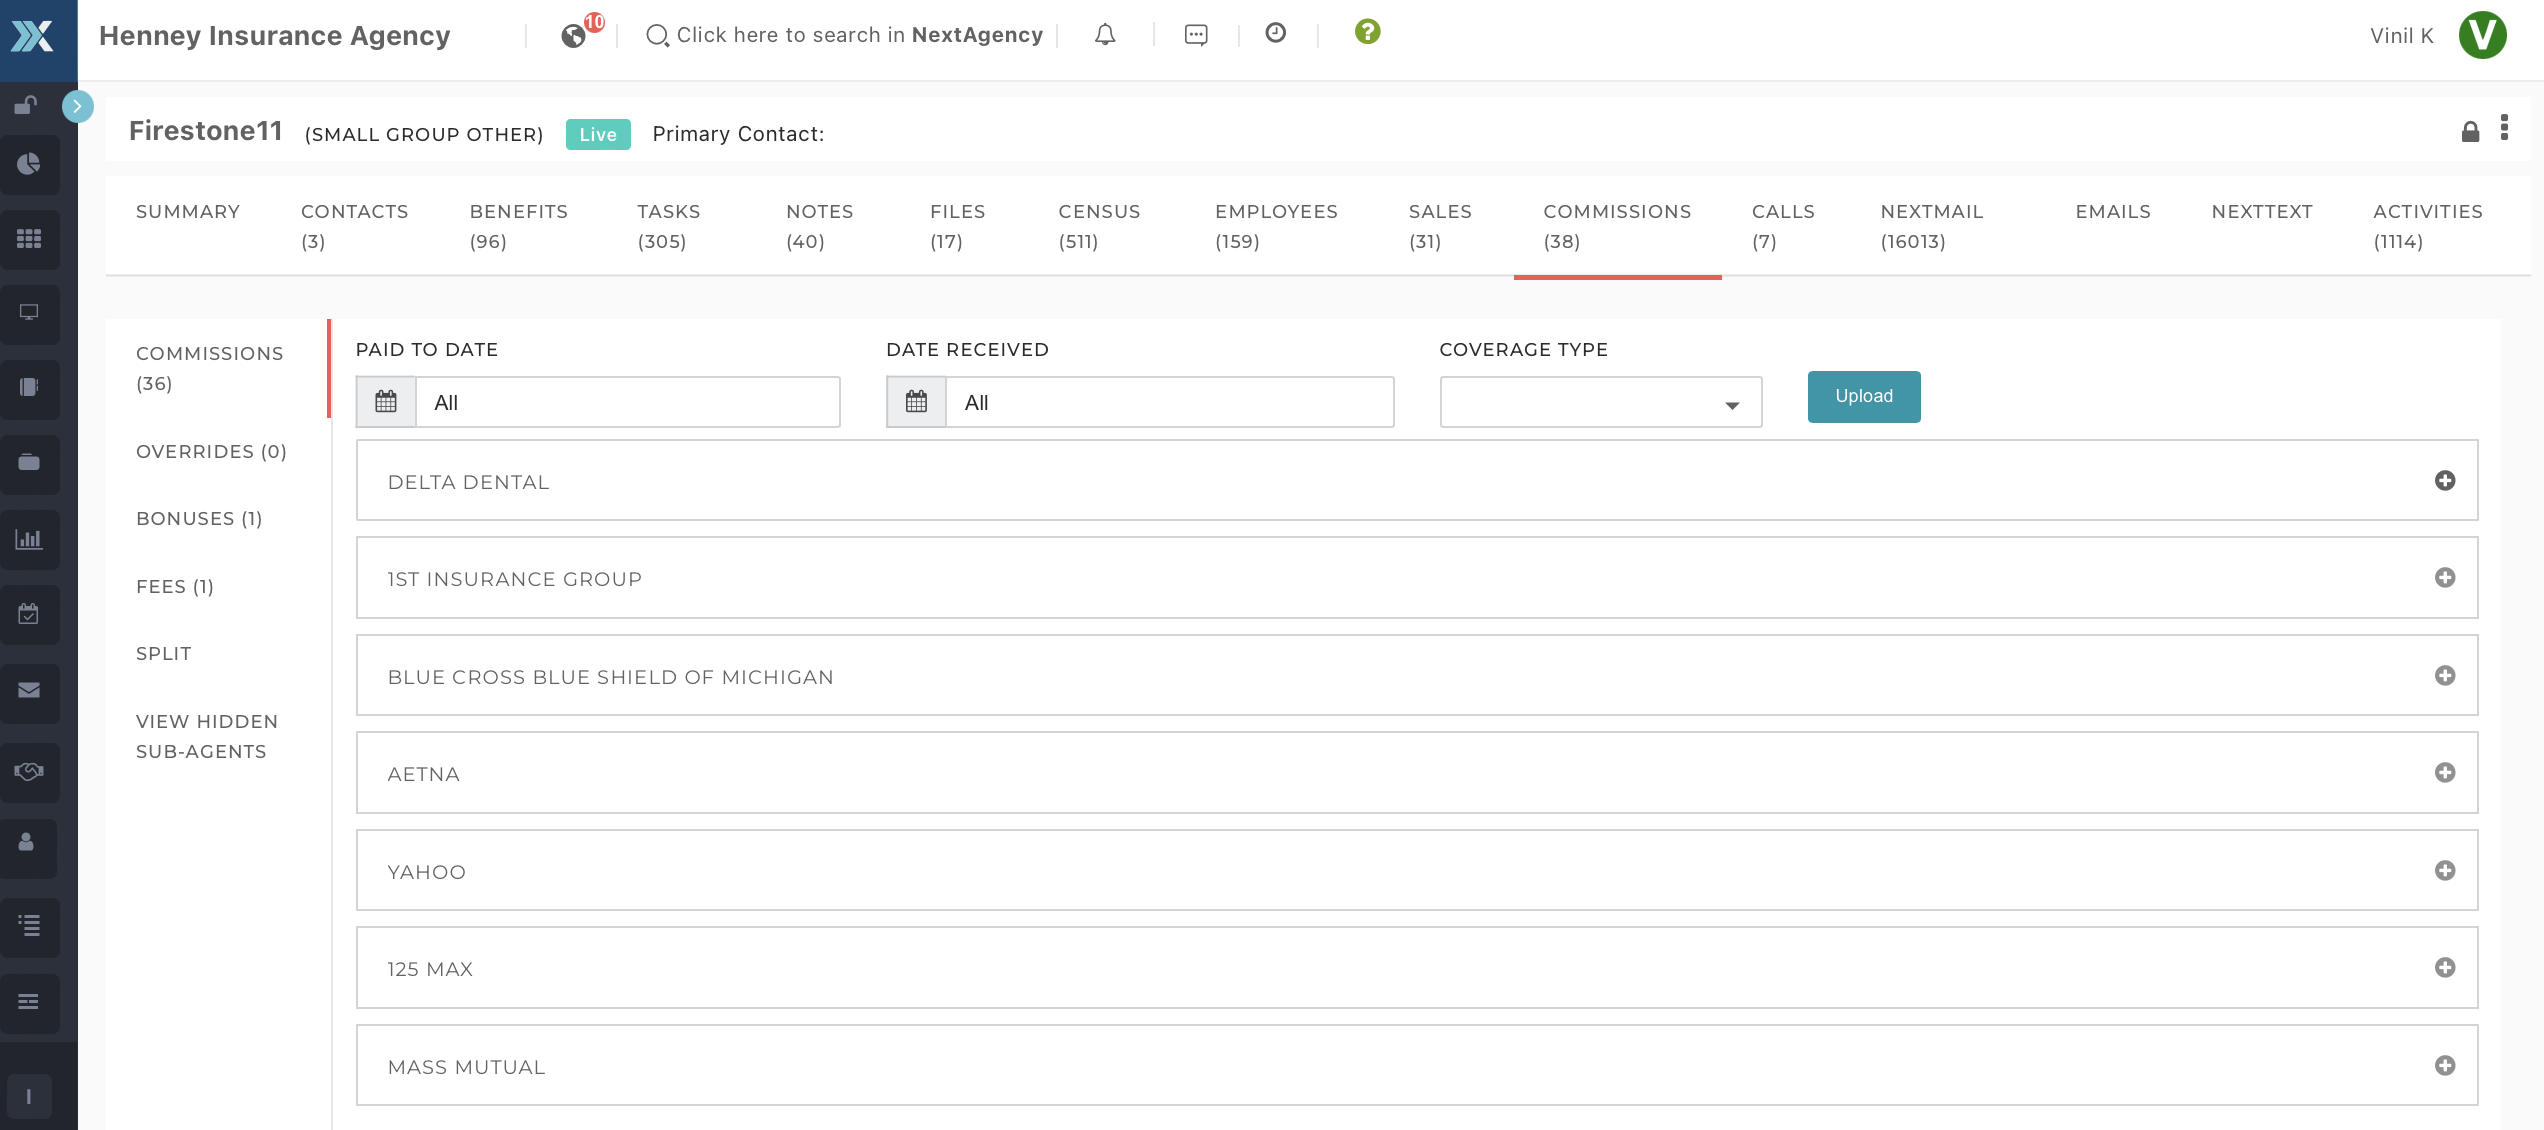
    You can split the commissions between a carrier and a subagent on the Split subpage.

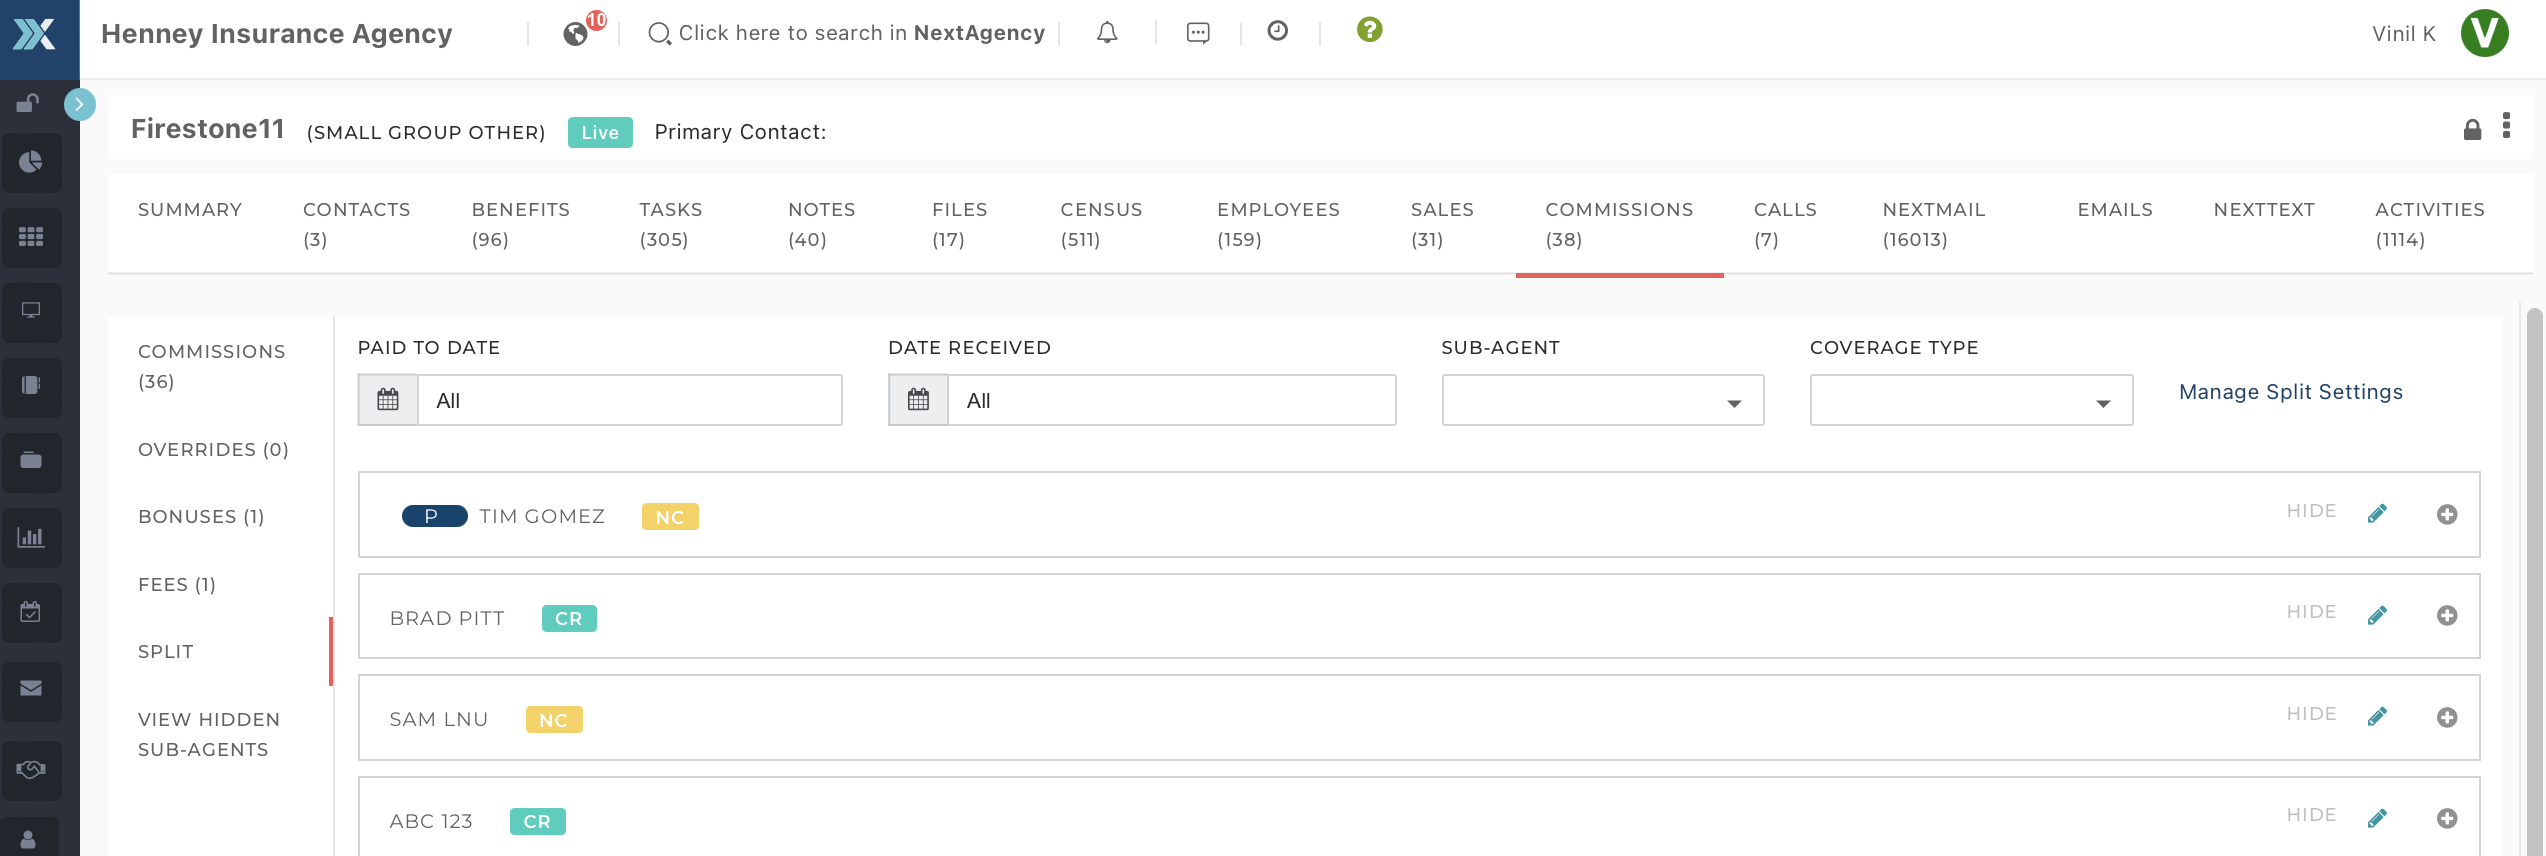
    You can also view the hidden sub-agents on the corresponding subpage.


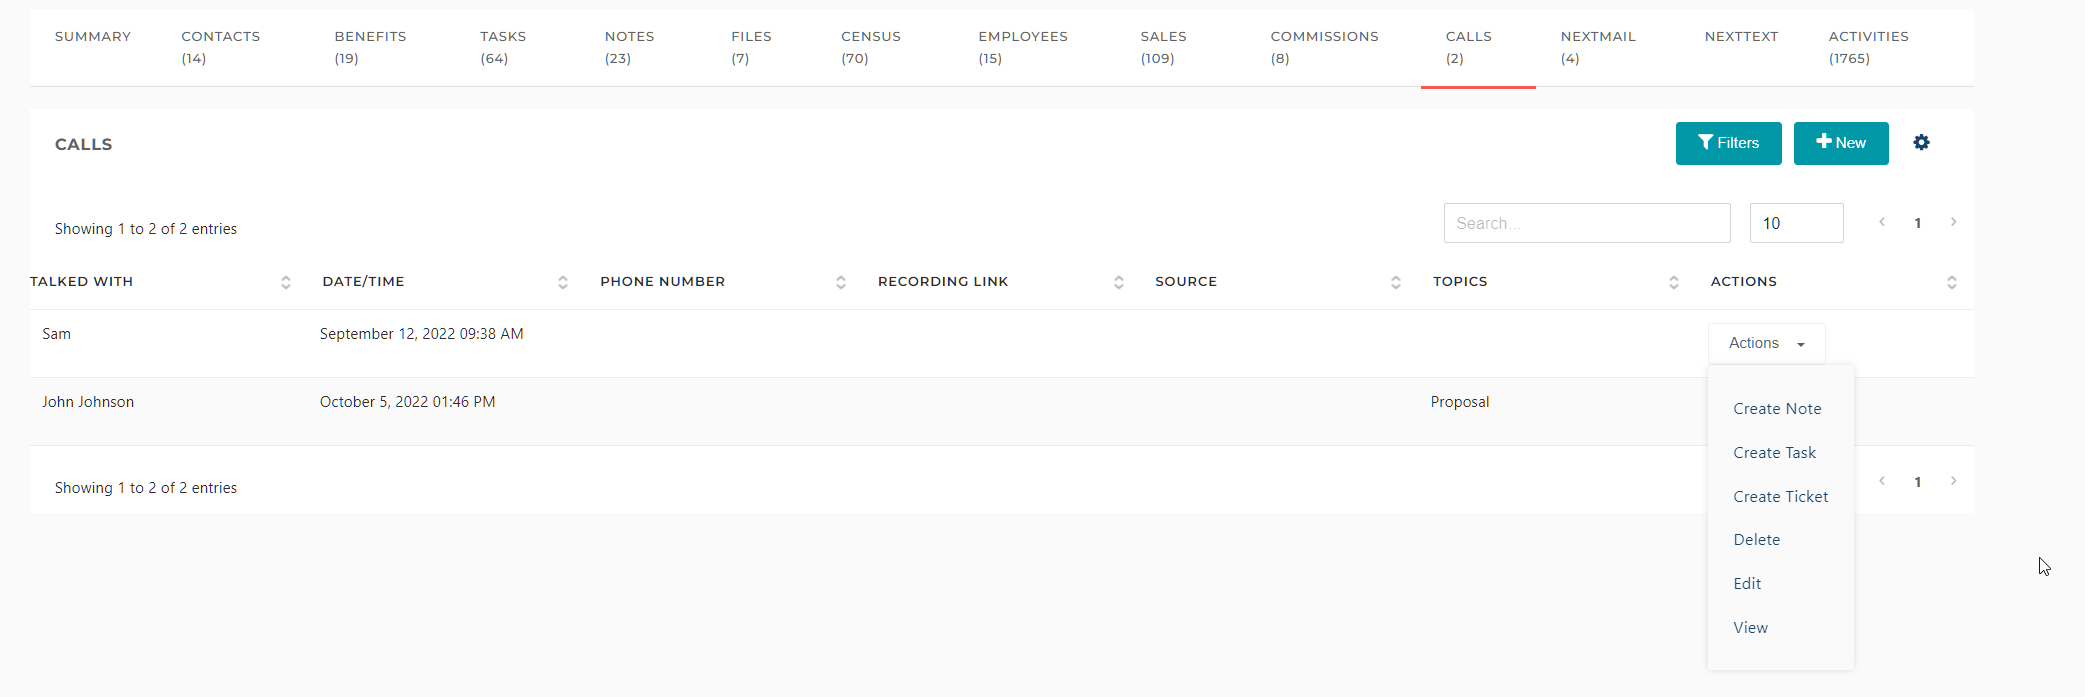
    Calls -  Add and edit Calls to include uploading the recording or linking the recording for each of your cases. You can also create Tasks and Notes associated with each call. 
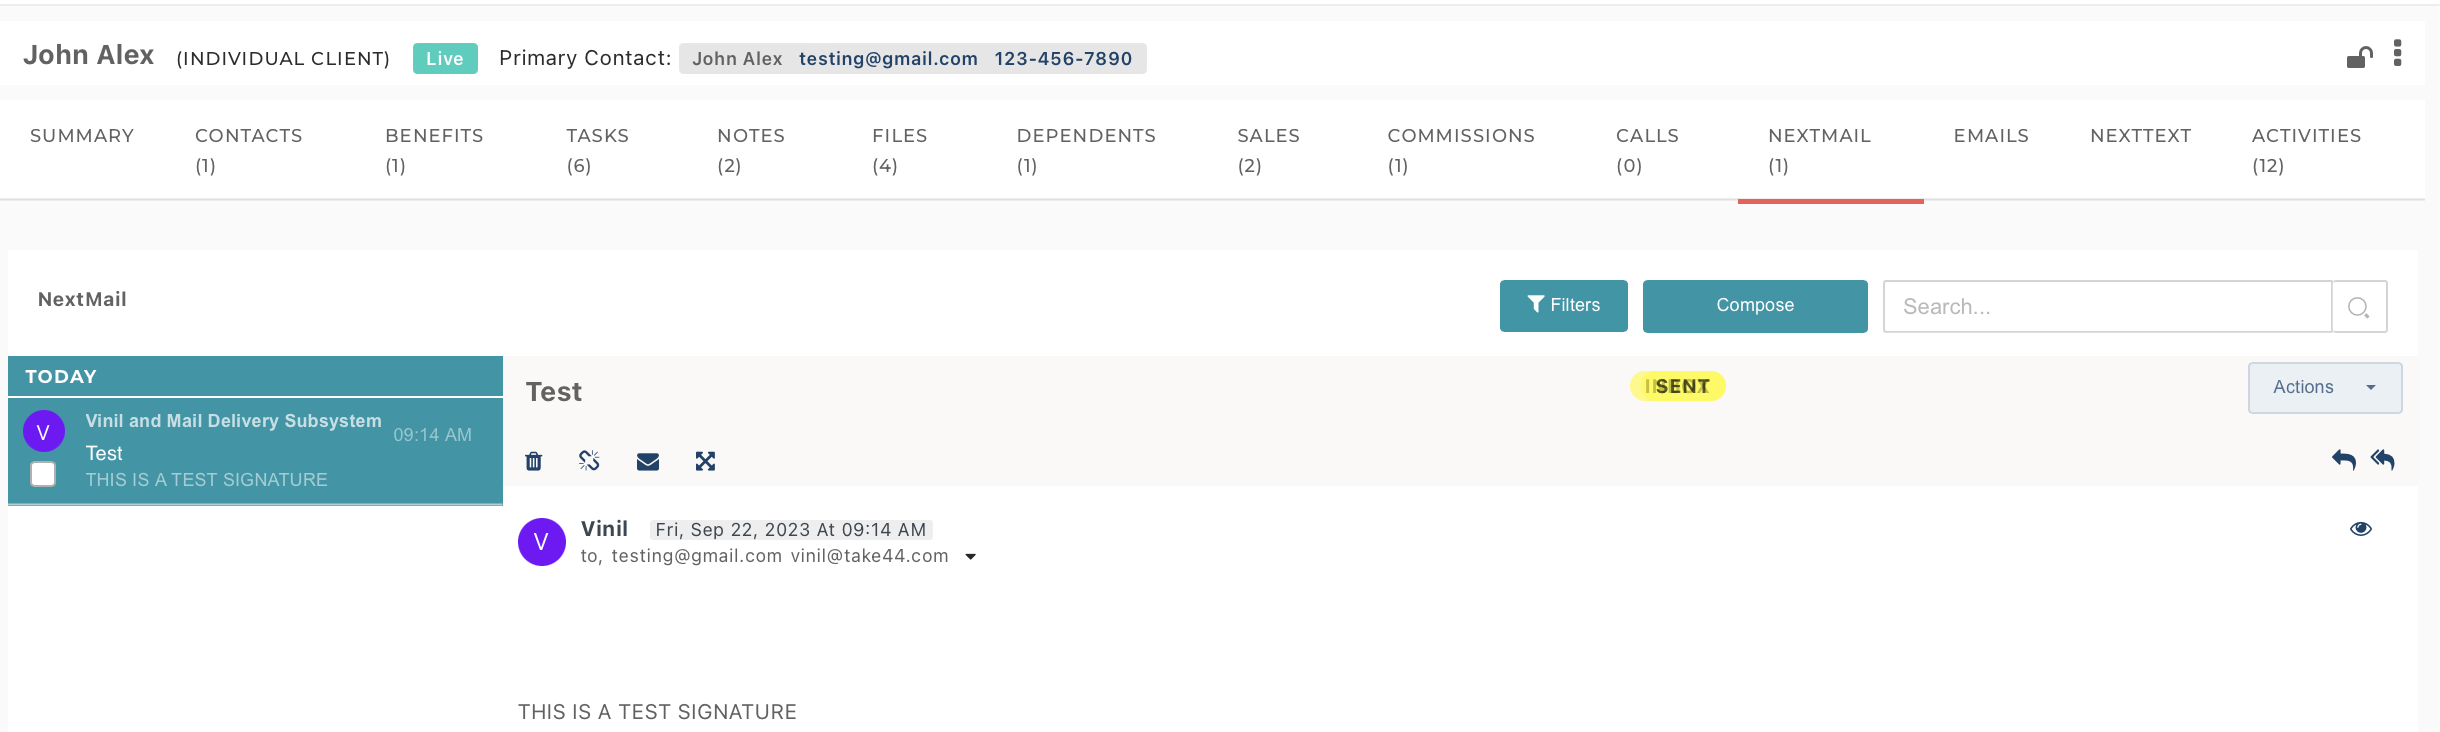

    callssample.png

    NextMail

    If you've chosen to sync your email account with NextAgency, the NextMail tab will display communications related to the case, including emails sent to or from contacts defined within the case.


    Emails - Emails assigned to cases from within the Outlook add-on are displayed in the Email tab of case records. By default, this tab is hidden. To display the tab, go to Settings > Agency Settings > Preferences. Click on the Personal sub-tab and then toggle on the 'Include Emails Tab' option. Click the 'Save' button.


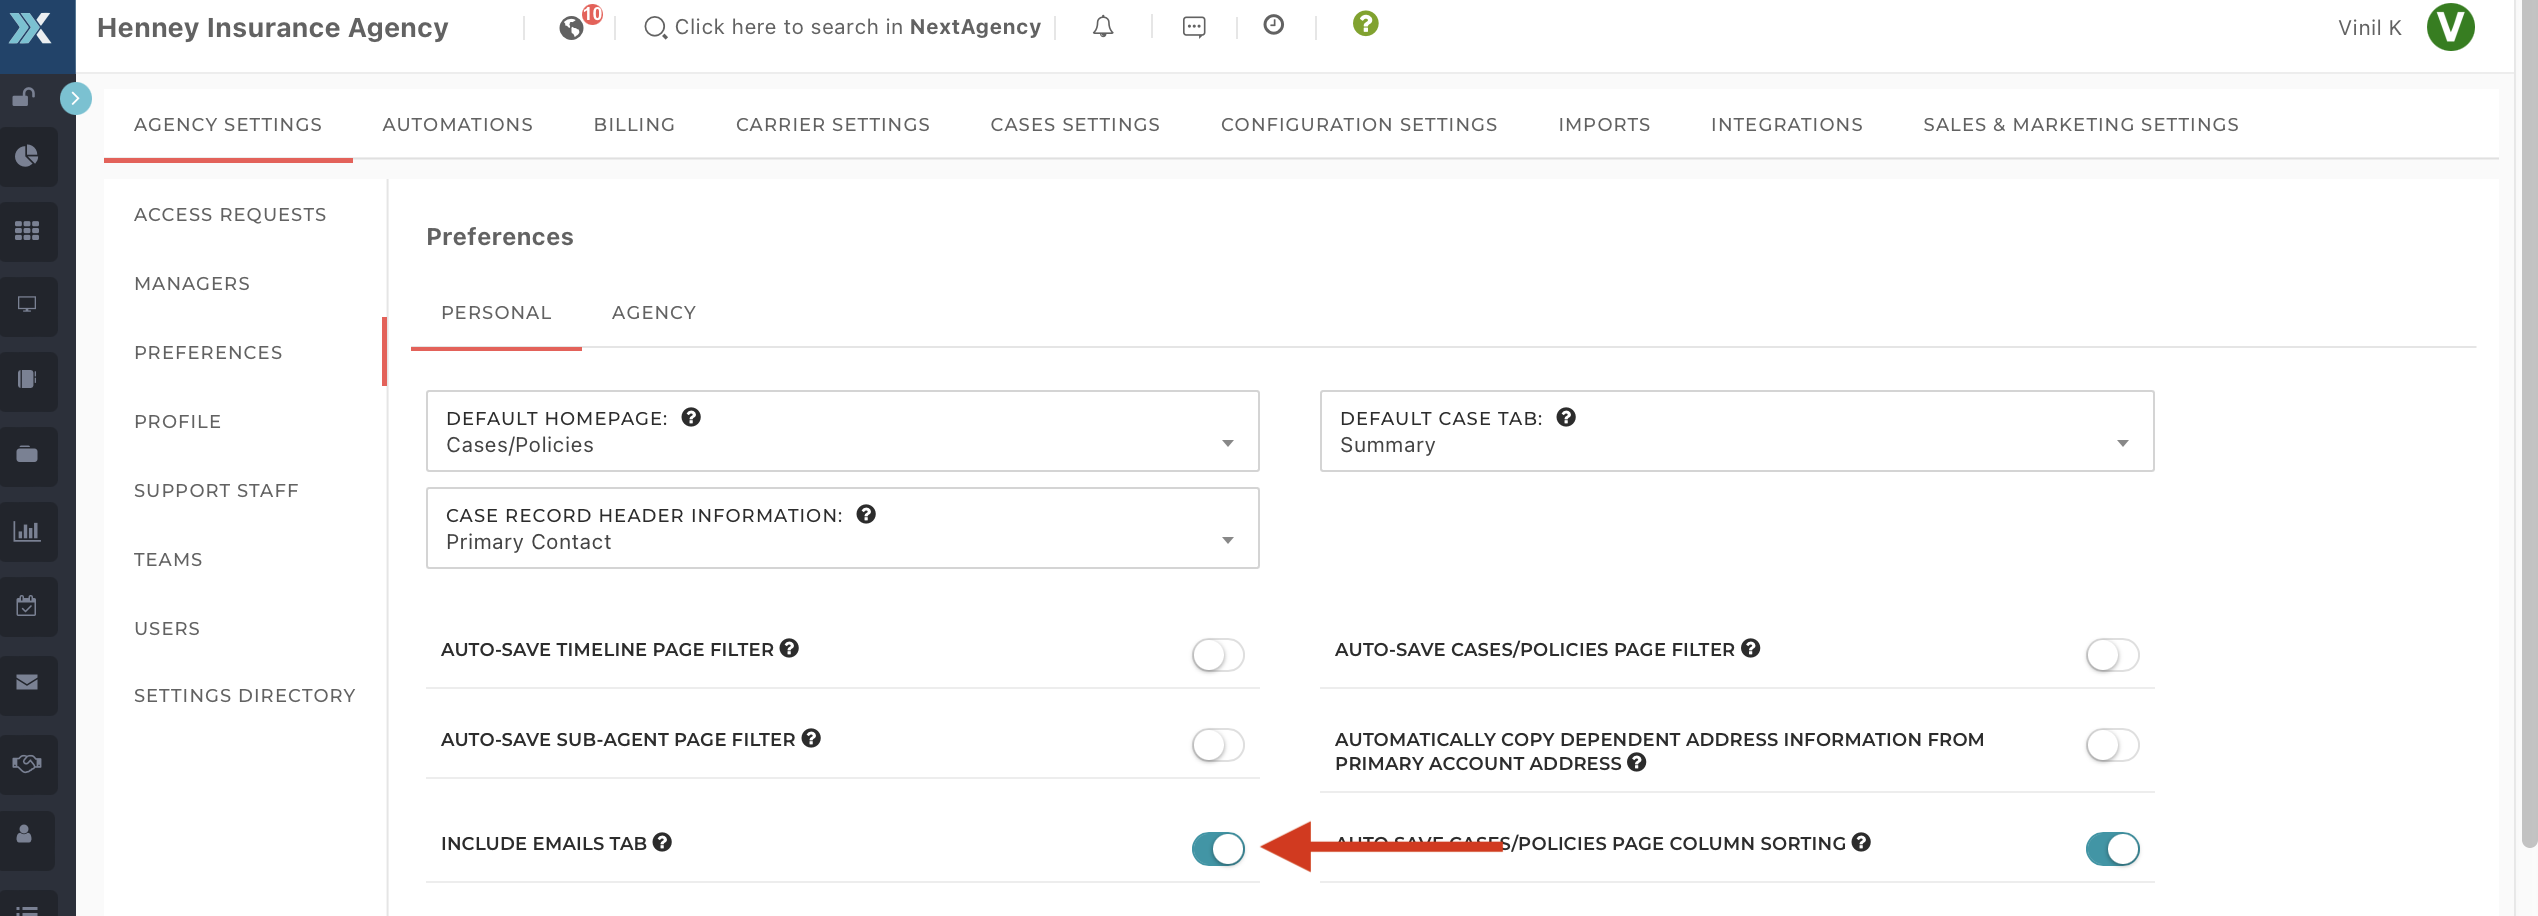
    All the attached Outlook emails can be viewed from the 'Emails' tab.


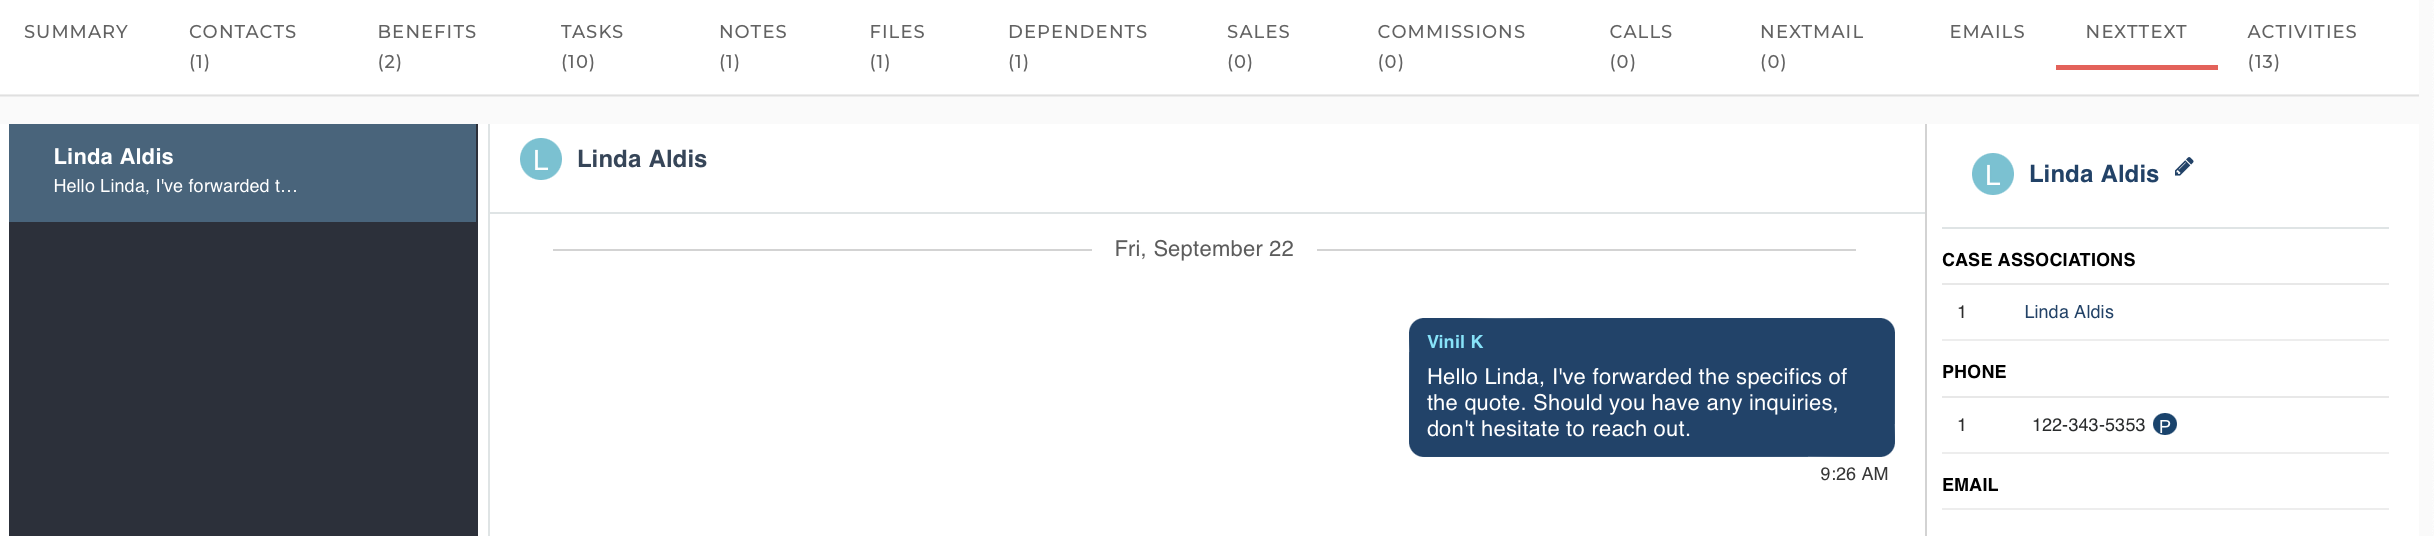
    NextText-  If you've chosen to use NextText, all communication via SMS with the client will be displayed here, including the contact details, date and time stamps, and of course messages. You are also able to send messages to your contact via SMS here as well. 


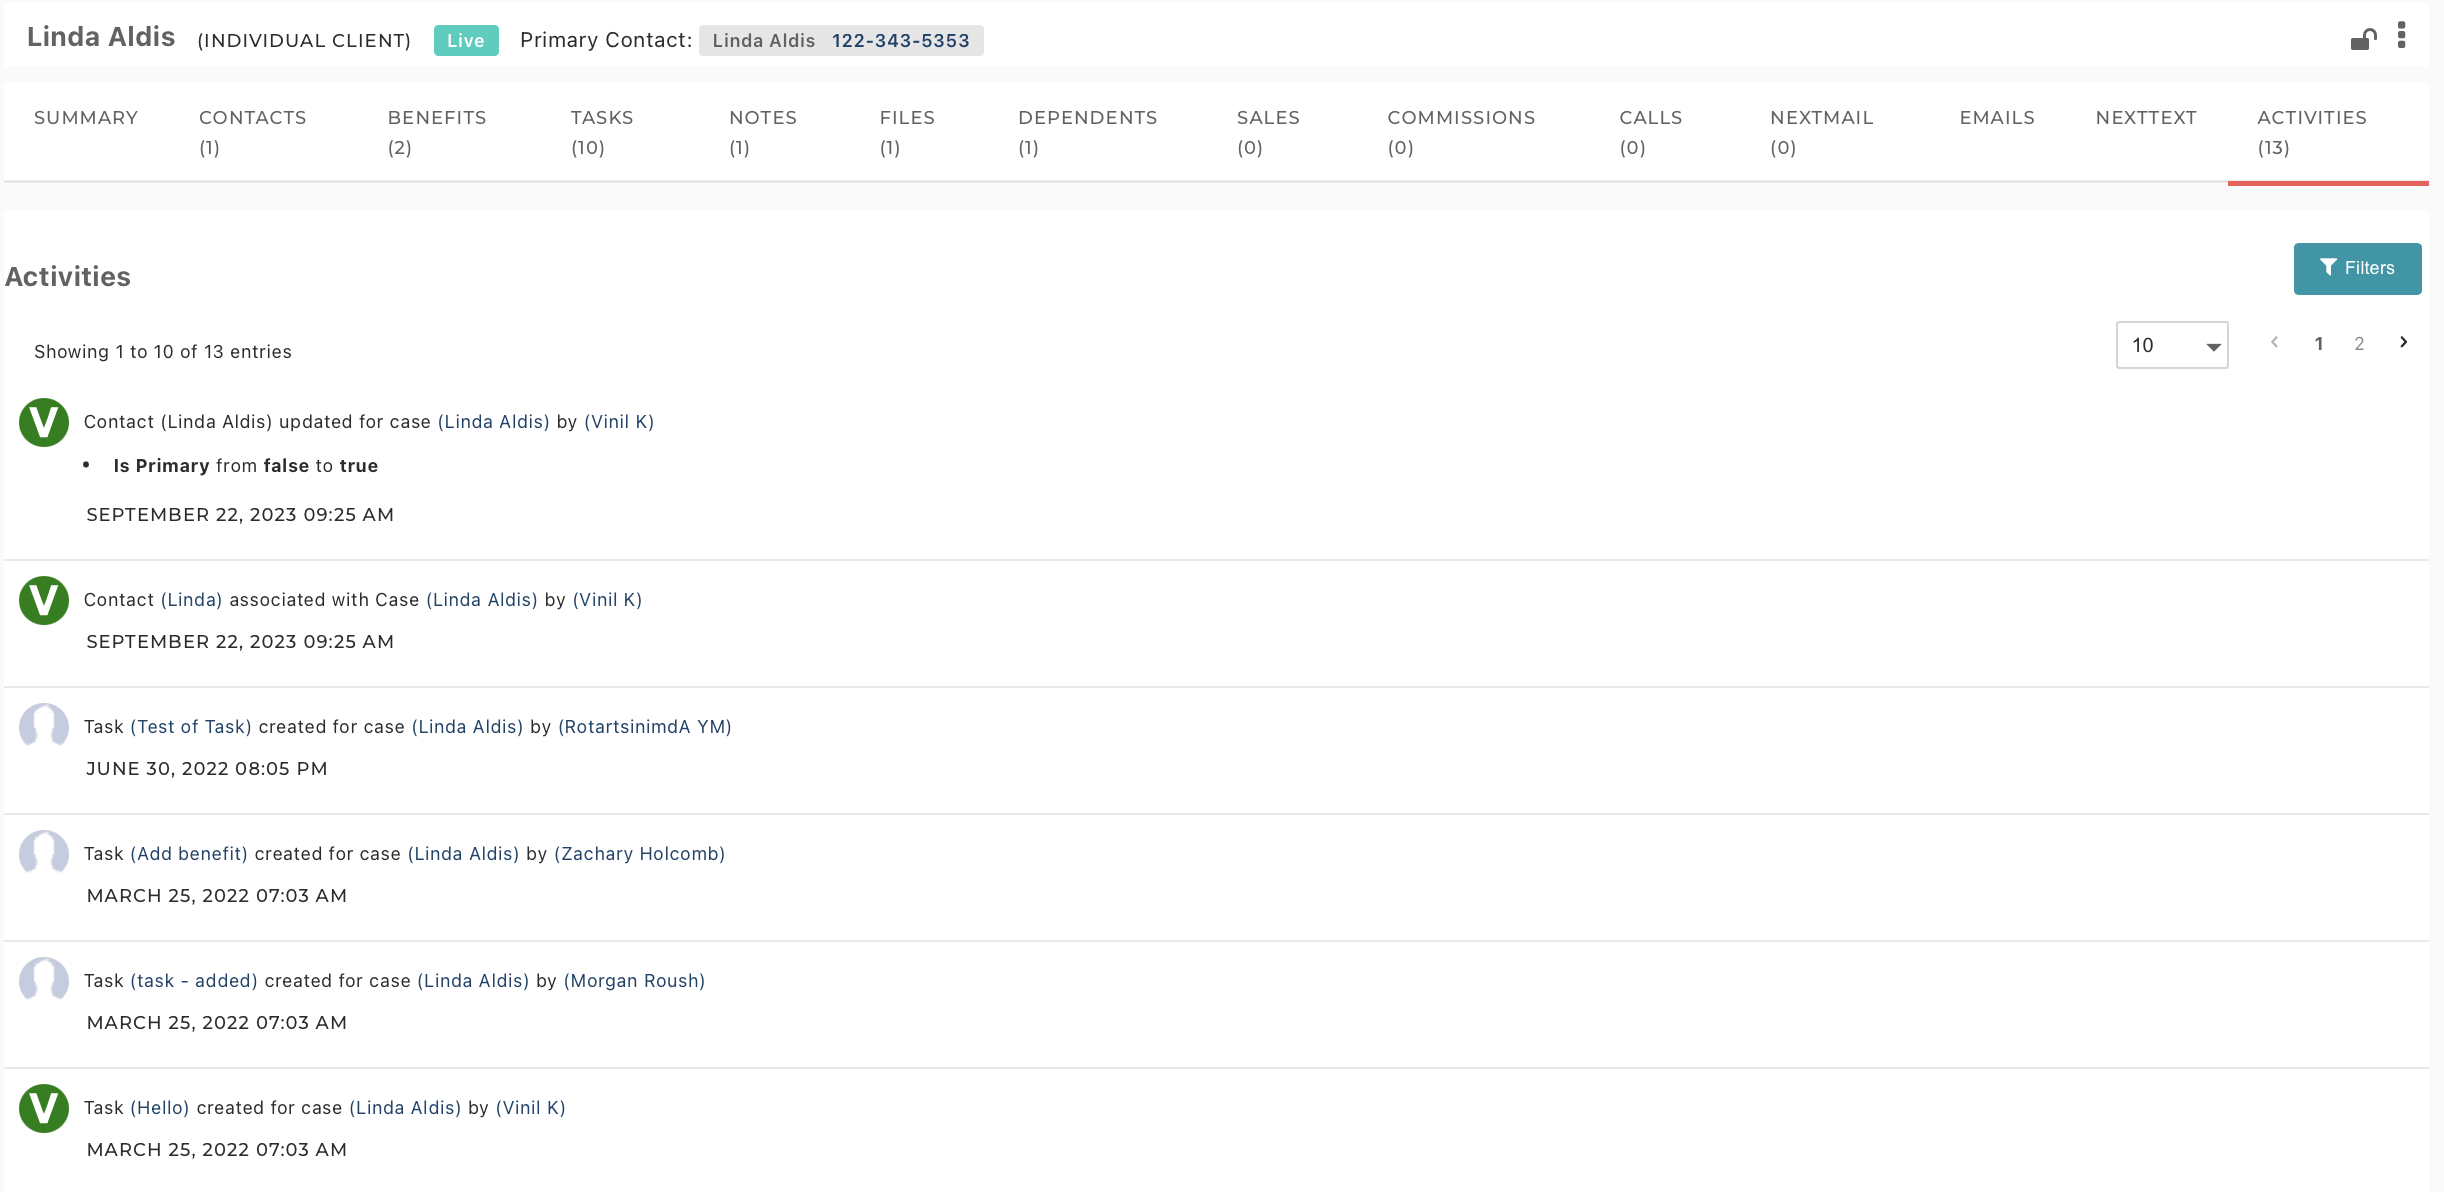
    Activities - Logs of all activities related to the case will be stored on this tab.


    If you have any questions, please reach out to our support team.


  • In NextAgency, case records can be managed individually (manually), or in bulk, by importing an Excel spreadsheet.  First, we'll review the manual method.


    Creating a New Case

    To add a new case record to NextAgency, do the following:

    1. In the upper-right corner of the dashboard, click New.

            NextBroker_Cases_01.png

    1. In the Sales Status section, select the sales status of the record that you are adding.  Sales Status values are customizable from the Sales Settings page.

             NextBroker_Cases_02.png

    1. In the Market Segment section, select the type of the case - individual, small group, or large group.

             NextBroker_Cases_03.png

    1. Available fields within a case depend on your selection under Market Segment.  For all market segments, the following fields require values: 
      • Sales Status
      • Broker of Record
      • Name

            mceclip0.png

    1. In the Lead Management section, specify the confidence score and estimated revenue.

            NextBroker_Cases_05.png

    1. In the Address section, specify the physical and mailing addresses of the prospect or client.

          NextBroker_Cases_06.png

    1. When ready, click Save & Continue.

    Your case record is ready and will open with the Summary tab. Fill in the relevant info on all other tabs. For more information, see NextAgency: Cases & Policies.


    Edit an Existing Case

    To edit a case record, navigate to Cases/Policies, find the Case you'd like to modify, click Action > Details in that row.


    mceclip3.png


    The case record will be opened.  On the Summary tab, in the Details section, you'll find an Edit button in the top right corner. Click to modify the case details.


    Screenshot_2021-05-11_150519.png

    For more information about how you can edit a case record, see NextAgency: Cases & Policies.


    Delete an Existing Case

    To delete a case record, you'll first need to Archive it.  Perform the following:

    1. Click Actions > Archive next to the record that you are going to delete.

            NextBroker_Cases_12.png

    1. In the confirmation dialog that appears, click OK.

            NextBroker_Cases_13.png

    1. In the upper-right corner above the cases table, expand the Quick Filters pane.
    2. In the General section, select the Archived checkbox. As a result, the cases table will be instantly filtered to view only the archived cases.

    NextBroker_Cases_14.png

    1. Now locate the record that you are going to delete and click Action > Delete. The Delete action is available only for the archived cases.

            NextBroker_Cases_15.png

    1. In the confirmation dialog that appears, click Confirm. Please note that the deletion cannot be undone.

            NextBroker_Cases_16.png


    Bulk Case Imports (Add New or Update Existing)

    When you need to add or update multiple cases, it may be easier to use an Excel spreadsheet. To import the case records from an Excel spreadsheet, do the following:

    1. In the upper-right corner of the Cases/Policies page, click Import.         Screenshot_2021-05-11_141556.png
    2. Select New if you'd like to create new cases, or Existing to update one or more fields within existing Case records.
    3. Select Using Spreadsheet.
    4. Select the Input Type, which will define the market segment you'd like to import.  Note: Individual and Group market segments have different fields and, thus must be imported separately.  Import templates are provided for each market segment if needed.
    5. Download the import template and fill it in with your data. 
    6. Drag your spreadsheet to the specified area or click to select the file from your computer.
    7. Click Map Headers.


      mceclip1.png

    8. This is where you will map the data from your Excel spreadsheet to fields within NextAgency.  For any fields (columns) in the spreadsheet that you'd like to be included, you'll need to select the proper field under System Headers.  A preview of the data from your spreadsheet is shown.  If your sheet includes data that is not needed for the import, you can select Ignore for those headers.mceclip2.png

    9. After successful validation, click Import File.


  • Each case within NextAgency has a set of stages/pipelines that you can change as you proceed with this case. The stages differ depending on the sales status of the case. They are marked with colors directly on the dashboard, in the cases table. You can filter the table by sales status, and then click the current stage of any record to view other available stages.

    NextBroker_Stages_04.png

    NextBroker_Stages_03.png

    You can also create your own, custom stages. To do it, follow these steps:

    1. In the upper-right corner of any NextAgency page, click your profile icon and choose Settings.
    2. On the Settings page that opens, go to the Sales Settings tab.
    3. Go to the Stages subtab.

            NextBroker_CarrierCredentials_08.png

    1. In the upper-right corner of the page that opens, click Add Stage.
    2. In the Add Stage dialog that pops up, enter the following data:

             NextBroker_Stages_01.png

    • Stage Name: Enter a short and descriptive title of the stage.
    • Sales Status: Select the sales status for which you are adding the stage, either prospect or client.
    • Win Percentage: If needed, enter the percentage that indicates the probability of reaching this stage.
    • Color/Font Color: Select the color to visualize the stage.
    1. When ready, click Save.

    The stage record will appear in the table. Use the search box to easily locate it. It is also possible to either edit or delete the record under Actions.

    NextBroker_Stages_02.png

    The stage is also added to the case records on the dashboard:

    7.png


    You can use the filters on the Cases/Policies page to show only the clients that have a specific Stage assigned.


  • The Benefits page of the client/prospect card gives an overview of insurance benefit plans that your agency can provide. They are broken down into system benefits, such as Health, Dental, Life, etc., and custom benefits that are created by NextAgency users. Each tab contains information about respective insurance carriers and relevant plans. It is possible to filter this information by showing either current or past benefits.


    For each Benefit, you can do the following:

    • Attach relevant documents.

          NextBroker_Benefits_02.png

    • Open the provider directory and carrier portal.

            NextBroker_Benefits_03.png

    • Update the effective date and renewal date.

    NextBroker_Benefits_04.png

    • Duplicate, edit, and remove the plans.

         NextBroker_Benefits_05.png

    • Assign benefits to employees.

            NextBroker_Benefits_06.png

    To add a new benefit, click Add Benefit, select the business type for which you are adding the benefit (Individual, Small Group, or Large Group for all benefits except for the Property & Casualty product type, where the business types are Personal, Small Group, and Commercial), and choose the relevant product type on the Profile tab. 

    NextBroker_Benefits_07.png 


    The arrangement of the Add New Benefit form fields will change depending on your choice of the business type and product type. Now we will explore the common fields that are available for all product types.

    Common Fields: Profile Tab

    • Share With Client: Select this checkbox to make the benefit visible to the client so they can assign it to their employees.
    • Carrier/Vendor: Choose the insurance provider that is relevant to the new benefit or add a new one by clicking the link directly in the field.

             NextBroker_Benefits_11.png

    • Product Type: Choose one of the available benefit types. They are divided into system product types, which are present in the system by default, and custom product types, which you have created yourself.
    • Plan Name: Choose the name of the benefit plan or add a new plan by clicking the link directly in the field.

            NextBroker_Benefits_12.png

    • State: Select the code of the state that is relevant for the benefit.
    • Single Deductible: Enter the maximum amount of employee’s own money that they will have to pay for their individual medical expenses before the company starts covering them.
    • Family Deductible: Enter the maximum amount of employee’s own money that they will have to pay for their individual and family medical expenses before the company starts covering them.
    • Single Out Of Pocket Limit: Enter the maximum amount of employee’s own money that they will have to pay for their individual medical expenses during the year before the company starts covering them.
    • Family Out Of Pocket Max: Enter the maximum amount of employee’s own money that they will have to pay for their individual and family medical expenses during the year before the company starts covering them.
    • Policy Number: Enter the number of the relevant insurance policy.
    • Group Number: Enter the relevant group ID number.
    • Total Monthly Premium: Enter the total monthly fee amount that should be paid to an insurance company.
    • Total Annual Premium: Enter the total annual fee amount that should be paid to an insurance company.
    • Effective Date: Date on which the benefit becomes active.
    • Renewal Date: Date on which the benefit has to be renewed.
    • Minimum Hours Per Week: Specify the minimum number of hours that the insured person should work per week to be eligible for this insurance plan.
    • Eligibility Period: Specify the length of time during which the insured person is eligible for this insurance plan.
    • Carrier Portal Link: Enter a carrier portal URL.
    • General Agency: Select the general agent that is managing this insurance plan or add a new general agent by clicking the Add General Agent link directly in the field.

          NextBroker_Benefits_08.png

    • Status: Specify whether this benefit is current or past.
    • Policy Stage: Specify the current stage of assigning this benefit.
    • Internal/External Note: Add notes, if applicable. Internal notes can be viewed only inside the agency whereas external notes are shared with the employer and employees.
    • Add Files: Attach files to the benefit, if applicable.

    Common Fields: Contribution Tab

    NextBroker_Benefits_09.png

    The Contribution tab is available only for the Small Group and Large Group/Commercial business types. This tab is for entering either the percentage or the amount of insurance payment to be covered by the employer for the employee’s family members. The amount of contribution is typically set by employer regardless of the product type or plan type. The total amount is calculated automatically.

    Common Fields: Rates Tab

    The Rates tab is for entering the insurance rate for the employee and their family members.

    NextBroker_Benefits_10.png

    Now let's explore the system product-specific fields on the Profile tab.

    Product-Specific Fields: Medical

    • Plan Type: Choose the type of the insurance plan.
    • Metal Level: Choose between the Bronze, Silver, Gold, or Platinum levels for the insurance plan.
    • Exchange (not available for the Large Group business type): Specify whether the insurance plan is an exchange, i.e. federally subsidized.
    • Minimum Hours Per Week: Specify the minimum number of hours that the insured person should work per week to be eligible for this insurance plan.
    • Payment Mode: Choose how the payments will be made under this insurance plan.
    • Provider Directory Link: Enter a URL by which the insurance provider can be found in the directory.

    Product-Specific Fields: Dental

    • Plan Type: Choose the type of the insurance plan.
    • Waiting Period(s): Select the length of time after purchasing the dental benefits plan that the client must wait before they can get their full coverage.
    • Provider Directory Link: Enter a URL by which the insurance provider can be found in the directory.
    • Minimum Hours Per Week: Specify the minimum number of hours that the insured person should work per week to be eligible for this insurance plan.
    • Date of Birth (available only for the Individual business type): Specify the birth date of the insured person.
    • Payment Mode: Choose how the payments will be made under this insurance plan.
    • Provider Directory Link: Enter a URL by which the insurance provider can be found in the directory.
    • Maximum Benefit: Specify the limit of the dental benefit.
    • Orthodontia: Specify whether the orthodontic services are included with this benefit.
    • Orthodontia Waiting Period(s) (visible only if Yes was selected under Orthodontia): Select the length of time after purchasing the dental benefits plan with orthodontic services that the client must wait before they can get their full coverage.
    • Orthodontia Maximum Benefit (visible only if Yes was selected under Orthodontia): Specify the limit of the dental benefit for orthodontic services.
    • Vision Included: Specify whether the vision benefits are included.
    • Vision Maximum Benefit (visible only if Yes was selected under Vision Included): Specify the limit of the vision benefits.

    Product-Specific Fields: Vision

    • Plan Type: Choose the type of the insurance plan.
    • Provider Directory Link: Enter a URL by which the insurance provider can be found in the directory.
    • Minimum Hours Per Week: Specify the minimum number of hours that the insured person should work per week to be eligible for this insurance plan.
    • Payment Mode: Choose how often the payments will be made under this insurance plan.
    • Benefit Frequency: Enter how often the benefit should be provided, i.e. the frequency of eye exams or lense/frame replacement.
    • Eye Exam Copay: Enter the co-payment amount for routine eye exams.
    • Provider Directory Link: Enter a URL by which the insurance provider can be found in the directory.

    Product-Specific Fields: Property & Casualty

    • Plan Type: Choose the type of the insurance plan.
    • Minimum Hours Per Week: Specify the minimum number of hours that the insured person should work per week to be eligible for this insurance plan.
    • Financing: Specify if financing is available for this plan.
    • Down Payment Percentage (%) (visible only if Yes is selected under Financing): Specify the minimum percentage of down payment for this plan.
    • Financed Percentage (%) (visible only if Yes is selected under Financing): Specify the minimum percentage that is financed for this plan.
    • Taxes and Fees ($) (visible only if Yes is selected under Financing): Specify the amount of taxes and fees that are eligible for this plan.
    • Finance Company (visible only if Yes is selected under Financing): Select the company that is financing this plan.
    • Billing Type: Specify whether the billing type for this plan is direct bill or agency bill.

    Product-Specific Fields: Medicare

    • Plan Type: Choose the type of the insurance plan.
    • Date of Birth (available only for the Individual business type): Specify the birth date of the insured individual.
    • Medicare Claim Number/HICN: Enter the claim number or beneficiary's identification number that is relevant to the Medicare plan.
    • Start Date - Part A: Specify the date when the Part A of the Medicare plan comes into force.
    • Start Date - Part B: Specify the date when the Part B of the Medicare plan comes into force.
    • Two-Party Discount: Specify if the two-party discount is available for this Medicare plan, e.g. for spouses that are 65 and older.
    • Dual Eligible: Specify if this plan is eligible both for Medicare and Medicaid benefits.
    • Medicaid Number (visible only if Yes is selected under Dual Eligible): Specify if this plan is eligible both for Medicare and Medicaid benefits.
    • Provider Directory Link: Enter a URL by which the insurance provider can be found in the directory.

    Product-Specific Fields: LTC

    • Plan Type: Choose the type of the insurance plan.
    • Minimum Hours Per Week: Specify the minimum number of hours that the insured person should work per week to be eligible for this insurance plan.
    • Issue Age: Enter the age of the insured person with which the LTC insurance plan comes into force.
    • Benefit Amount: Enter the amount of the benefit that is eligible for the LTC plan.
    • Benefit Amount Type: Specify whether the LTC benefit should be paid on a montly or on a daily basis.
    • Benefit Period: Specify the period during which the LTC benefit is active.
    • Elimination Period: Specify the period during which the LTC benefit should be eliminated.
    • Elimination Period Type: Specify whether the LTC benefit should be eliminated during x calendar days or during x service days.
    • Inflation Protection: Specify whether this plan is subject to protection from inflation.
    • Enter Percentage (visible only if Yes is selected under Inflation Protection): Enter the interest percentage for inflation protection.
    • Interest Type (visible only if Yes is selected under Inflation Protection): Specify whether the inflation protection interest is compound or annual.
    • Money Pool: Enter the total amount of money that your insurance agency provides to pay for LTC.
    • Waiver of Premium: Specify whether the LTC plan includes a "waiver of premium" feature.
    • Life Insurance: Specify whether the LTC plan is combined with life insurance.
    • Partnership Plan: Specify whether the LTC plan is combined with Medicaid.
    • Return of Premium: Specify whether the LTC plan allows the return of premium.
    • Until Age (visible only if Yes is selected under Return of Premium): Specify the age until which the premium should be returned.

    Product-Specific Fields: Disability

    • Plan Type: Choose the type of the insurance plan.
    • Benefit Amount: Enter the amount of the benefit that is eligible for the disability plan.
    • Benefit Period: Specify the period during which the disability benefit is active.
    • Elimination Period: Specify the period during which the disability benefit should be eliminated.
    • Cost of Living: Specify the cost of living of the insured person to adjust the payments under this benefit.

    When ready, click Save. The benefit will be added to the corresponding tab.

  • In this article, we will show you how to assign benefits to employees within group cases. Let's suppose that you are creating a new benefit for a group case and want to instantly assign it to some of the employees. Follow these steps:

    1. Go to the Benefits tab of the case card.
    2. In the upper-right corner, click Add Benefit.
    3. In the Add New Benefit form that opens, fill in all the necessary fields. For more information, see NextAgency: Benefits.

      addnewbenefitsample.png

    4. Click Save.
    5. The benefit will appear on the Benefits tab. To assign it to employees, click Actions > Assign to Employee.

            NextBroker_AssigningBenefits_02.png

    1. In the Assign Benefits to Employees window that pops up, you can click on Assign and select employees. You can select multiple employees at once.

            assigntoemployee.png


    1. Click Save.
    2. To check the assignment of a benefit, go to the Employees tab.
    3. Find a relevant employee and click their name in the list.

             NextBroker_AssigningBenefits_04.png

    1. Go to the Benefits tab to check if the benefit has been added.


    1. You can assign more benefits at this tab by clicking Assign Benefits in the upper-right corner.


       13. You can also bulk assign benefits to Employees from the Employees tab. Select the employees >          Bulk Actions and select Assign Benefits.


    14. To change the effective date of the benefit for your employees, simply click on the relevant checkmark, update the effective date, and hit Save.


    If you need any assistance, please contact our support team.

Resources

Help Desk

The NextAgency Blog

Company

About

Contact Us

Capterra G2

Privacy            Copyright 2025 Take 44, Inc.            Terms & Conditions